Getting Started With Cypress: An End-to-End Testing Framework
Table of Contents
Cypress is a next-generation front end testing tool built for the modern web. It is the next generation Selenium and enables us to write tests faster, easier, and reliable. Some of the compelling features that I find interesting with Cypress are
- Time Travel: Cypress takes snapshots while running the tests and enables hovering over each to see the application state during each step.
- Real-time reloads: Cypress automatically reloads any time a test is changed.
- Automatic waiting: No more adding waits and sleeps to the tests. It was one thing I hated about writing Selenium tests, and Cypress automatically does that work. It works awesome!
- Familiar tools: Writing tests is a breeze with Cypress and is built on top of exiting tools and frameworks.
Cypress comes with a lot more features and is worth checking out. In this post, we will look at how to get started with Cypress and a few approaches to set up data required for testing the application.
Installation and Setup
The Cypress docs are well explained and have a step by step walkthrough to set up Cypress tests. I have Cypress installed under the web application folder.
- Set up Cypress
- Enable Typescript support for Cypress. Add tsconfig.json under the cypress folder.
- Install and Set up Cypress Testing Library. Types are available at DefinitelyTyped
npm install --save-dev cypress @testing-library/cypress @types/testing-library__cypress
Cypress comes with default test examples. If the example tests are not showing up for you, try running 'cypress open' (or run), which should generate them. You can ignore the tests from running in the cypress.json file.
{
  "ignoreTestFiles": "**/examples/*.js",
  "baseUrl": "http://localhost:3000"
}
With Cypress installed in your project, use one of the approaches mentioned to open Cypress. I prefer to add a npm script to package.json and use that to launch Cypress. The Cypress test runner automatically finds all the tests and displays them. The runner also detects the available browsers on the client machine and shows an option to choose from them.
Writing First Test
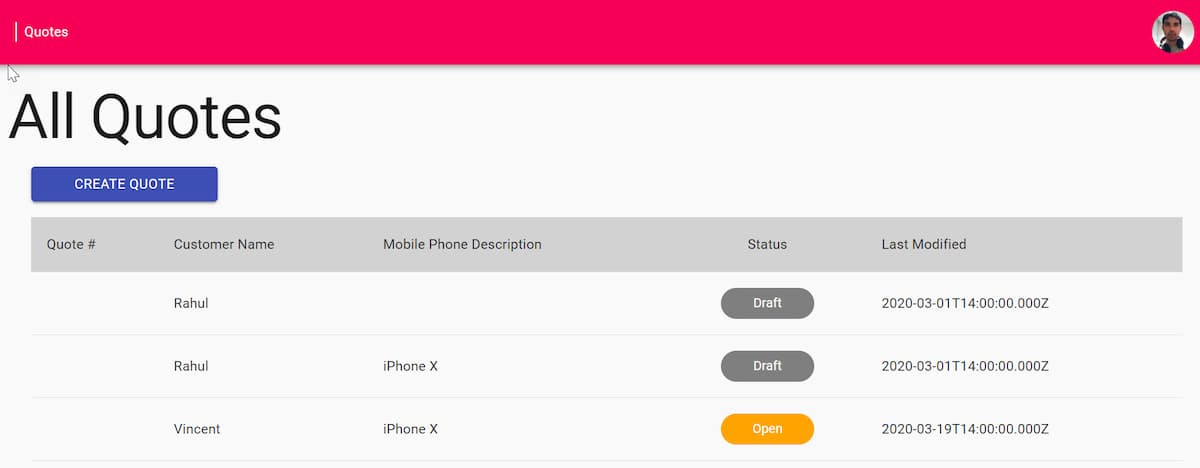
Typically my first tests are to check the whole set up is working fine. So testing the app is launching, and rendering the expected elements is a good start. In this case, we are displaying a list of quotes and a 'Create Quote' button. A good test might be to test for the existence of the button and the title text.

Add a new file (quotes.spec.ts) under the cypress/integration folder. I prefer grouping tests into folders under the integration folder for better management. The findByText from the Cypress Testing Library checks for the existence of elements with the specified text, in our case, the header label and the button text.
describe("Quotes", () => {
  it("Loads home page", () => {
    cy.visit("/");
    cy.findByText("All Quotes");
    cy.findByText("Create Quote");
  });
});
The Cypress runner automatically detects the new file and displays it in the UI. Click that to execute the tests against the selected browser.
Congrats, you have the first test running, and Cypress set up. Check in the code!
Mock Data Approaches
Most of the apps have a backend API that serves data. Setting up the data is essential to write more tests and is often a painful task. Let us explore a few different options to set up data for testing.
The cy.server starts a server to route requests and allows us to change their default behavior. The cy.route, helps intercept network calls and return mock data.
Inline Data
Setting up inline data is the easiest when starting to write tests. The test uses the JSON object as mock data. Below the network call to '/api/qoutes' in intercepted to return an empty array of quotes. When there are no quotes, we expect the application to show a message indicating that.
it("No quotes shows empty message", () => {
  cy.server();
  cy.route("GET", "/api/quotes", []);

  cy.visit("/");

  cy.get("[data-cy=noquotes]");
  cy.findByText("There are no matching Quotes.");
});
NOTE: I am using the 'data-*' attribute to select elements, and it helps isolate the elements from CSS and JS changes. Check out the recomended practices for selecting elements
Fixture
To reuse the same test data across different tests (possibly in different files), save it as an external file under the cypress/fixtures folder. Add a new file 'quotes/quotes.json' with some quotes data in it. The cy.fixture command helps loads the data from the file. Using aliasing, the data is used to mock the route call (by specifying '@quotes' to indicate the fixture aliased data). The data can also be used as a JSON object as shown and then used to test the different UI elements are rendered as expected.
it("Renders quotes as expected", () => {
  cy.server();
  cy.fixture("quotes/quotes.json")
    .as("quotes")
    .then((quotes) => {
      cy.route("GET", "/api/quotes", "@quotes");

      cy.visit("/");

      const renderedQuotes = cy.get("tbody > tr");
      renderedQuotes.should("have.length", quotes.length);
      renderedQuotes.each((renderedQuote, index) => {
        cy.wrap(renderedQuote).within(() => {
          const quote = quotes[index];
          cy.get("[data-cy=quoteNumber]")
            .invoke("text")
            .should("eq", quote.quoteNumber || "");
          cy.get("[data-cy=customerName]")
            .invoke("text")
            .should("eq", quote.customerName || "");
          cy.get("[data-cy=mobilePhoneDescription]")
            .invoke("text")
            .should("eq", quote.mobilePhoneDescription || "");
          cy.get("[data-cy=statusCode]")
            .invoke("text")
            .should("eq", quote.statusCode || "");
          cy.get("[data-cy=lastModifiedAt]")
            .invoke("text")
            .should("eq", quote.lastModifiedAt);
        });
      });
    });
});
JSON Server Fake API
Using a Fake API is helpful when developing front-end applications and remove the dependency to build out the whole backend servers. Once agreed on an API Spec, we can build out the two parallel without any dependency. JSON Server is a great way to set up a full fake REST API for front-end development. JSON server can be set up literally in ‘30 seconds’ and with no coding as the website claims.
Using a Fake API not only speeds the front-end development, it also helps write tests. With JSON Server, we can guarantee that the data will always be reset to the initial state every time we start the fake API server. We can also simulate different sceanrios and have the API return appropriate data in each case. It makes development and writing tests against those scenarios easy. E.g., We can have different scenarios like API call returns empty quotes or API call return a few records or API call return lots of records and needs multiple pages or even one where it errors out. If the Fake API is setup to return appropriate data for each of the scenarios, it can be used during development and testing.
it("Error getting quotes shows error message", () => {
  cy.setScenarios("error-quotes");
  cy.visit("/");
  cy.get(".Toastify");
  cy.findByText("Unable to get data.");
});
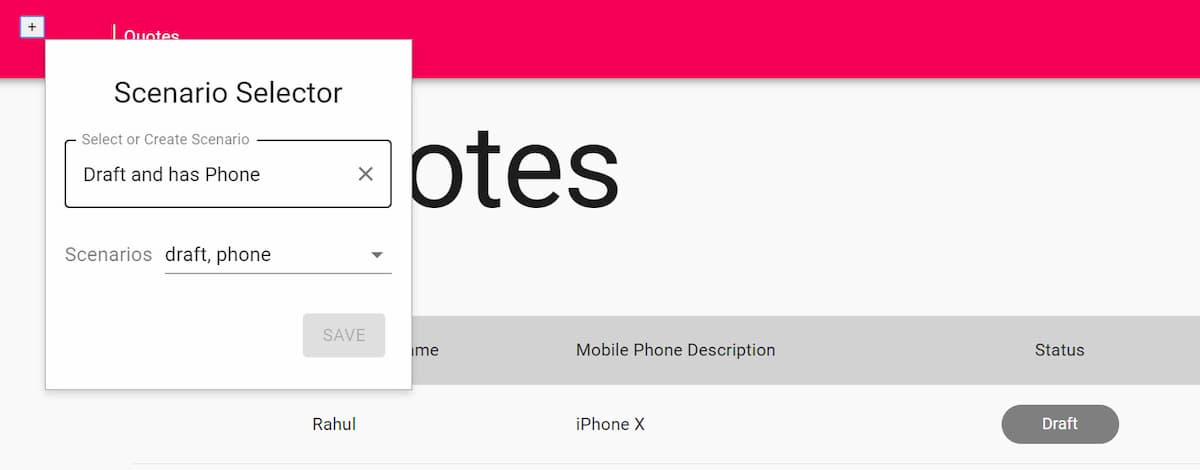
cy.setSceanrios is a Cypress custom command I have added. For all network requests made, it sets a specific HTTP header value, which is used by JSON Server to determine what data to return. Check out the Simulating Different Scenarios Using Fake JSON Server API post for more details on how to set up JSON Server to return data based on the scenarios specified. In the above test, it simulates a server error scenario and expects a toast message shown with the appropriate details.
I find setting up a fake API server as a compelling way to go forward - a twofer - it helps with the development and testing. If you are setting up Cypress on an existing project, it might be easier to set up inline mock data or using Fixtures. Capture responses from the real API and use that in the fixture or inline mock data.
Hope this helps you to get started with Cypress automation testing.

Rahul Nath Newsletter
Join the newsletter to receive the latest updates in your inbox.
