Recording My First Screencast
Table of Contents
Screencast helps to connect with people in a different way and adds a personal touch (sound and visual). It makes learning new things faster, by seeing it in action. Most of the fine details (which can be missed while writing a blog post) get captured in screencasting and this helps in better understanding. I have been long wanting to create screencasts and start a YouTube channel. Finally, this happened in 2016 and here is how the recording experience went.
A screencast is a digital recording of computer screen output, also known as a video screen capture, often containing audio narration.
Presentation
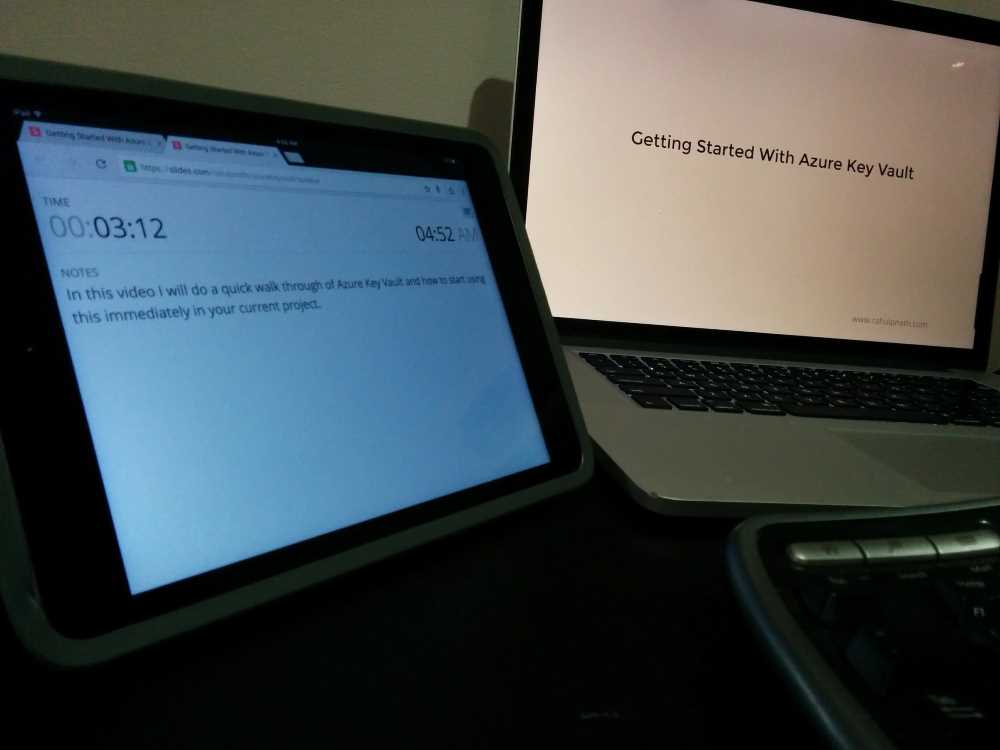
I chose to do my first screencast as a slide share presentation, as it was something that I was comfortable with. Since there are not many videos on Azure Key Vault and I have been blogging extensively about it, I didn't have to think twice about the topic. I scripted the whole presentation, to every word that I would say. Scripting for a video is different from writing a blog post as it has to be conversational with a video. Also, there are a lot more details that need to be covered and talked about as it is all visible on the recording.
Since I did not have an external monitor I wanted a presentation application that allows presenter notes and syncs them across multiple devices. This would allow me to record the screen and read off the presenter notes side by side. Slides had exactly what I wanted. It allows to add presenter notes for each slide and allows remote controlling the presentation from multiple devices. So I can launch it as a full-screen presentation on my laptop for recording screen and have an iPad or mobile launch the same presentation as a presenter where the notes show up. This helped me follow the script while recording the video. It would have been much easier with multiple monitors, but I just did not want to get one just for this and I have been trying to get used with a single screen. Alternatively, I could have taken a printout of the script.
Microphone
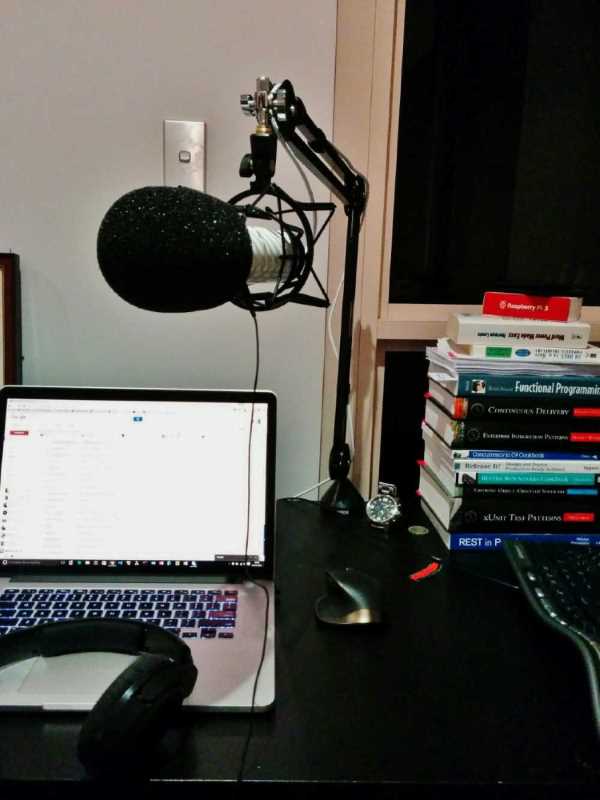
An external microphone is absolutely necessary to record your sound well. The microphone that comes built into the laptop is not suited for recording good quality audio. It picks a lot more of the background noises, room noise, typing etc and creates a lot of disturbance in the recording. There are a lot of options available when it comes to getting an external microphone. Most of the microphones are either Condenser Mics or Dynamic Mics. Microphones also have different connectivity options like XLR, USB etc. For a home recording setup USB is easier to get started with so I decided to get one with a USB connectivity.
I got the Rode Podcaster with a boom arm and shock mount. The Rode Podcaster is a dynamic USB mic and is a popular choice amongst many people out there. It's a bit higher on the price side (depends on your budget though) but delivers great value. It cuts off most of the room noise and takes in only your voice which is exactly what I wanted. You need to get really close into the mic, so a boom arm helps.

Software
Choosing the software was much easier than getting the microphone. Adobe Premiere or Camtasia are the most popular screen recording software's in the windows world. I have a lot of friends already using Camtasia and was happy with it. So I decided to stick with Camtasia and bought a license (Thanks to Readify's Software Allowance, I did not have to spend a lot from my pocket).
For recording audio, I use Audacity, which is an open source software and available free of cost. I am yet to learn some audio processing techniques and for now just use noise removal, amplify and compression. Also since the Rode microphone does not pick a lot of external noise the audio did not require much processing. At first, I tried recording with a Samson GO mic but felt that it picked it a lot more room noise and it needed a lot more audio processing.
Recording
With the hardware and software sorted now comes the hardest part of it all - Recording!!. I knew there would be difficulties along the way, but never thought it would be this hard. After reading around I understood that a popular technique that people use for recording is to record the audio and video separately for webcasts/screen recordings. I decide to take the same approach but just that did it in the wrong order (which I found after the first recording). For my first video I did the video first and the audio later. This meant that I recorded my screen performing all the slide movements and the code sample demo and then tried to fit the audio onto it. This was the biggest mistake in my complete recording, but I realized it only towards the end of the recording. Recording video was easy but fitting in the sound to it was hard. I had to do multiple (innumerous) takes and have to stop so often every now and then. And since I am yet to learn how to talk naturally when in front of a microphone, my voice was all over the place. Some bits had more bass, some a bit low others high, some fast others slow. I struggled with it for a long time and finally somehow got to get it all together. But though it was nowhere close to the quality that I set out for or would love to have in videos that I watch, I decided to ship it. For the second recording, I recorded the audio first and then fitted in the video onto it. This was so much easier and I have a more consistent voice in that, though there is a noticeable change in the middle.
I am planning to do more recordings in the upcoming months so that I get more comfortable with it. If it hurts, do it more often. Kindly leave your feedback on the videos.

Rahul Nath Newsletter
Join the newsletter to receive the latest updates in your inbox.