
.http Files Explained: Boost Your ASP NET Core API Development Workflow
.http files provide an easy way to invoke API endpoints without leaving your IDE. Learn how to create and update .http files, send HTTP requests, and manage different configuration support for your API development.
Table of Contents
.http files provide an easy way to invoke API endpoints without leaving your IDE.
Both Rider and Visual Studio IDE has built-in support for this.
In this post, let’s
- learn about .http files
- create and update .http files
- send HTTP requests in .http files
- support different environment config
- Manage sensitive information in config
I will use an API built over AWS DynamoDB, and AWS Lambda to host the API.
However, using .http files is not limited by where and how you decide to host your APIs as we will see in this video.
Thanks to AWS for sponsoring this post.
What are .http Files?
.http files in ASP.NET Core templates are plain text files used to define and test HTTP requests.
These files allow us to write, document, and execute API calls directly from the code editor, streamlining the process of building and testing API Endpoints.
.http Files contain the HTTP method, URL, headers, and request body, serving as both a testing tool and living API documentation.
Create and Update .http Files
.http files are included by default when creating a new ASP NET Core Web API application using the template.
Alternatively, you can create a new file with the .http extension anywhere within your source code.
Visual Studio also recognizes .rest as an alternative file extension for the .http file format.
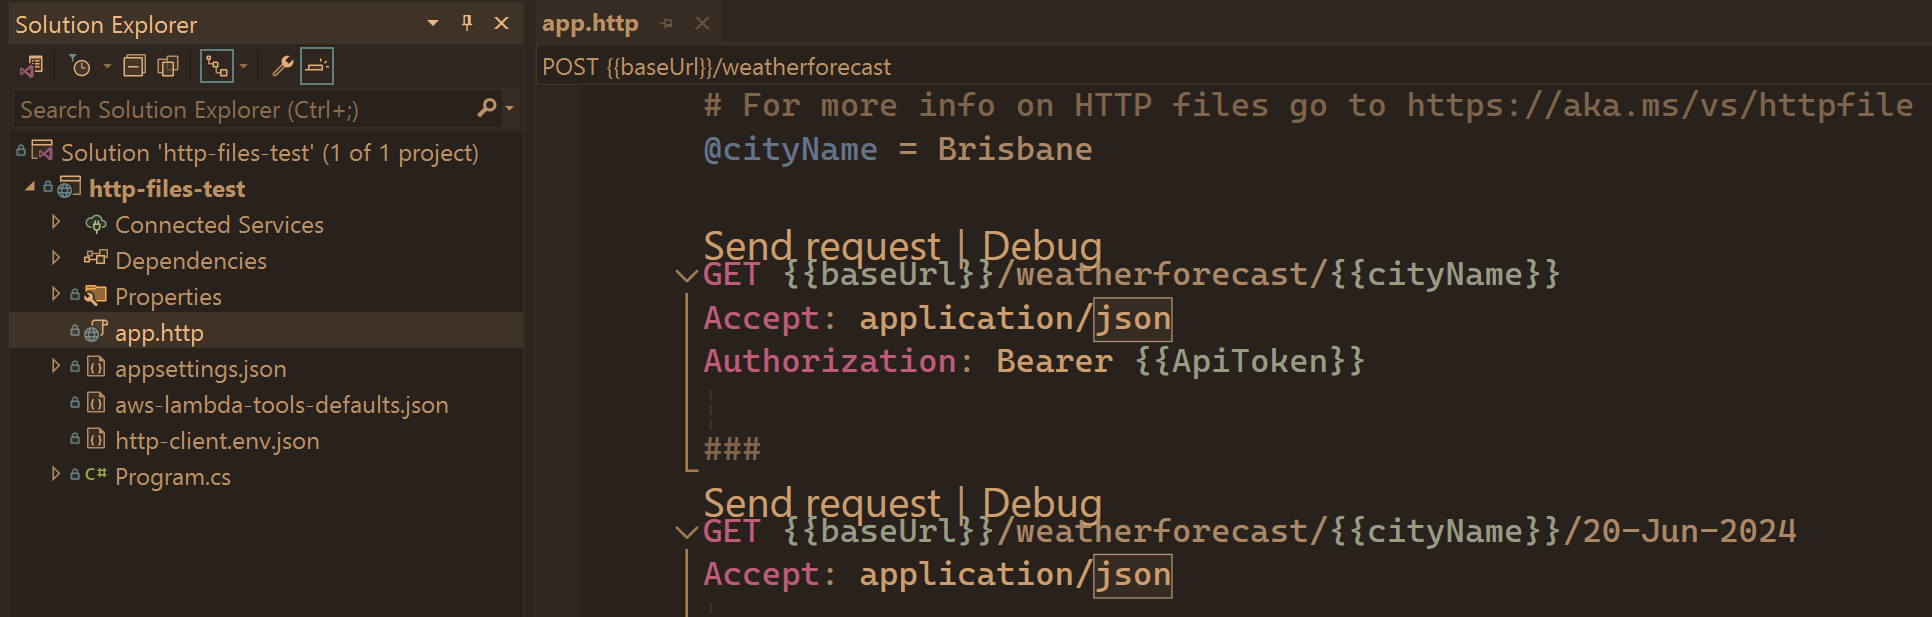
You can name .http files with any name that suits your project needs. In the above screenshot, the file is named app.http.
Requests in .http Files
.http files consist of one or more HTTP requests.
Each request starts with a method and URL, followed by optional headers on separate lines.
Multiple requests are separated by '###'.
Below is a sample .http file with two GET requests to an API endpoint with some headers.
GET https://localhost:7128/weatherforecast/Brisbane
Accept: application/json
Custom: MyTestHeader

###
GET https://localhost:7128/weatherforecast/Brisbane/19-Jun-2024
Accept: application/json
Header attributes must be defined immediately after the request line without any blank lines. Each header attribute is specified on its line.
For POST request, the body is specified after a blank line, as shown below.
###
POST https://localhost:7128/weatherforecast/
Accept: application/json
Content-Type: application/json

{
    "cityName": "Brisbane",
    "date": "19-Jun-2024",
    "temperatureC": 8,
    "summary": "windy"
}
Variables in .http Files
.http files support defining variables using the @ symbol.
Variables can be referenced in requests by wrapping the variable name in double curly braces - {{variableName}}.
@baseUrl =  https://localhost:7128

GET {{baseUrl}}/weatherforecast/Brisbane
Accept: application/json
Custom: MyTestHeader
The code above defines a variable baseUrl along with its value, which is then used to build the URL for the HTTP requests.
Send HTTP requests using .http Files
One of the main advantages of using .http files in your development process is that you can invoke HTTP requests from within your IDE.
From within the IDE, you can use the 'Send request' option to send an HTTP request to the defined URL.
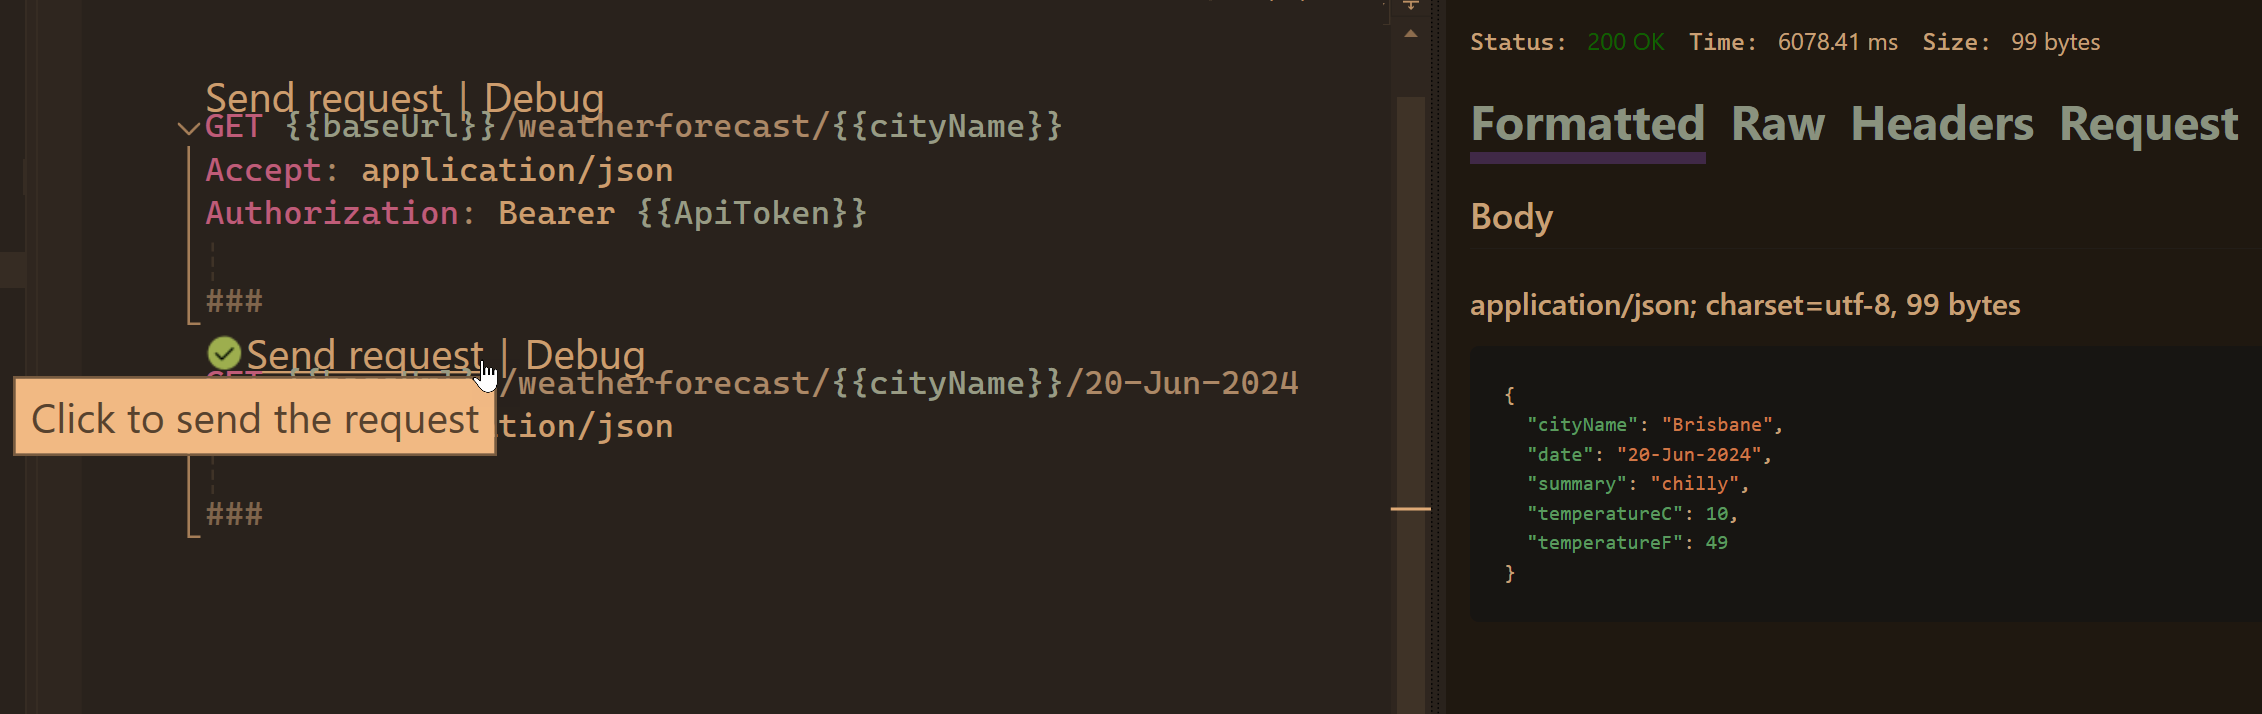
The response appears in a separate pane to the right of the editor window.
Support different environments in .http Files
When working with API Endpoints, it's very common to deploy them in different environments, such as development, testing, etc.
.http files provide a way to separate the configuration for each environment in a different file.
Create a file named http-client.env.json and move all the relevant configurations that change per environment to that file.
{
  "dev": {
    "baseUrl": "https://localhost:7128"
  },
  "test": {
    "baseUrl": "https://bla73eawvh6fnqho6g5s6haoha0lihgl.lambda-url.ap-southeast-2.on.aws"
  }
}
Above, I have dev and test environments defined in my http-client.env.json file.
For each environment, I need to switch between the baseUrl property. If you need more variables per environment you can define them under the relevant environment object section in the JSON file above.
You can switch between environments from within the .http file opened in your IDE as shown below.
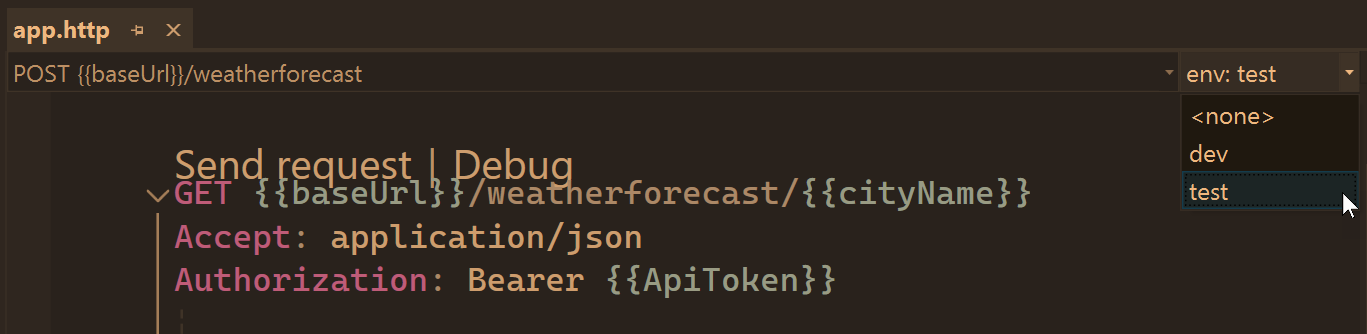
Based on the environment choice, it will switch the variable values loaded from the specified environment configuration.
This allows us to test against different environments for API Endpoints quickly.
Manage Sensitive Information in Configuration Files
Both the app.http file and http-client.env.json are usually checked in as part of the source code to your repository.
This means you shouldn't include any sensitive values, such as passwords, API keys, etc., in this file.
.http files support ASP NET Core User Secrets, Azure Key Vault and DPAPI encryption for these scenarios.
To get values defined in ASP NET Core User Secrets, you can define a variable that has a provider and secretName properties.
Set the provider value to AspnetUserSecrets and set secretName to the name of the desired user secret.
The below configuration in the http-client.env.json file defines an ApiToken variable whose value is bound from the User Secrets configuration with the same secretName (ApiToken)
{
  "dev": {
    "baseUrl": "https://localhost:7128"
  },
  "test": {
    "baseUrl": "https://bla73eawvh6fnqho6g5s6haoha0lihgl.lambda-url.ap-southeast-2.on.aws",
    "ApiToken": {
      "provider": "AspnetUserSecrets",
      "secretName":  "ApiToken"
    }
  }
}
When a request is sent, the value is automatically bound from User Secrets and used.
Since User Secrets live in the developer machine, these are not part of the source code that needs to be checked into the repository.
Sample API Endpoint Application
You can find the full source code for the sample API endpoint application and the .http file here.
The CRUD API uses DynamoDB as its storage and performs updates to an existing DynamoDB table in my AWS Account.
If you are new to DynamoDB check out my blog post below to get started.

For the API endpoint's test environment, I am hosting the API on AWS Lambda, as explained in this blog post and accompanying video.

var builder = WebApplication.CreateBuilder(args);

builder.Services.AddAWSLambdaHosting(LambdaEventSource.HttpApi);
builder.Services.AddSingleton<IDynamoDBContext>(new DynamoDBContext(new AmazonDynamoDBClient()));

var app = builder.Build();

app.UseHttpsRedirection();

app.MapGet(
    "/weatherforecast/{cityName}",
    (string cityName, IDynamoDBContext dynamoDBContext) =>
    {
        return dynamoDBContext.QueryAsync<WeatherForecast>(cityName).GetRemainingAsync();
    });

app.MapGet(
    "/weatherforecast/{cityName}/{date}",
    (string cityName, string date, IDynamoDBContext dynamoDBContext) =>
    {
        return dynamoDBContext.LoadAsync<WeatherForecast>(cityName, date);
    });

app.MapPost(
    "/weatherforecast/",
    ([FromBody] WeatherForecast weatherForecast, IDynamoDBContext dynamoDBContext) =>
    {
        return dynamoDBContext.SaveAsync(weatherForecast);
    });

app.MapDelete(
    "/weatherforecast/{cityName}/{date}",
    (string cityName, string date, IDynamoDBContext dynamoDBContext) =>
    {
        return dynamoDBContext.DeleteAsync<WeatherForecast>(cityName, date);
    });

app.Run();
Rahul Nath Newsletter
Join the newsletter to receive the latest updates in your inbox.

