
Azure Queue Storage For The .NET Developer: How To Easily Get Started
Learn how to use Azure Queue Storage to build decoupled applications. Understand the different ways to interact with a Queue Storage and use it from a .NET application. Also see how to use Managed Identities to connect to Queue without needing any connection string.
Table of Contents
Queues are a mechanism to decouple applications. It allows us to create a backlog of work to be asynchronously processed.
Azure Queue Storage provides a simple, cost-effective solution for handling large volumes of messages. It enables asynchronous communication between different applications. It allows to decouple applications, build resilience and also scale for bursts of traffic.
In this post, let's explore how to create Azure Queue Storage and use this from an ASP NET Core application. The steps are very much the same if you look to use this from any .NET application.
Creating a Queue
To start using the Queue, let's first create it in Azure. The easiest way is to create it using the Azure portal.
In a real-world application, you can use scripts to automate this or, even better, use Infrastructure as Code (IAC) to automate these from your build and deploy pipeline.
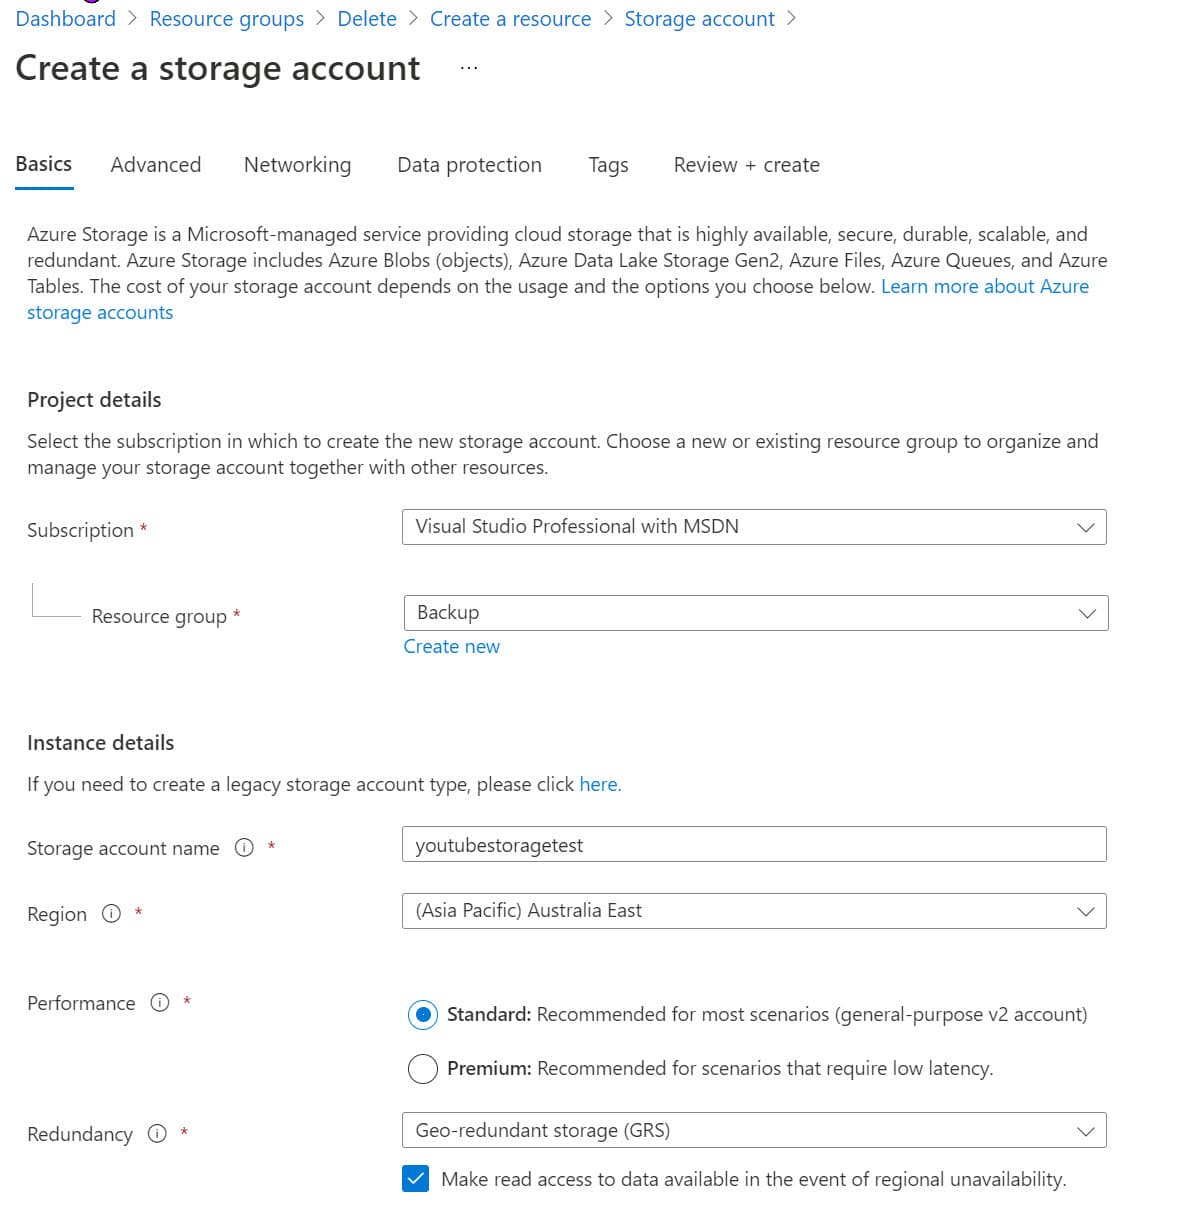
But for now, let's head over to the Azure Portal and search from 'Azure Storage Account'.
An Azure Queue Storage lives under a Storage account in Azure. To create a queue, we first need to create a storage account.
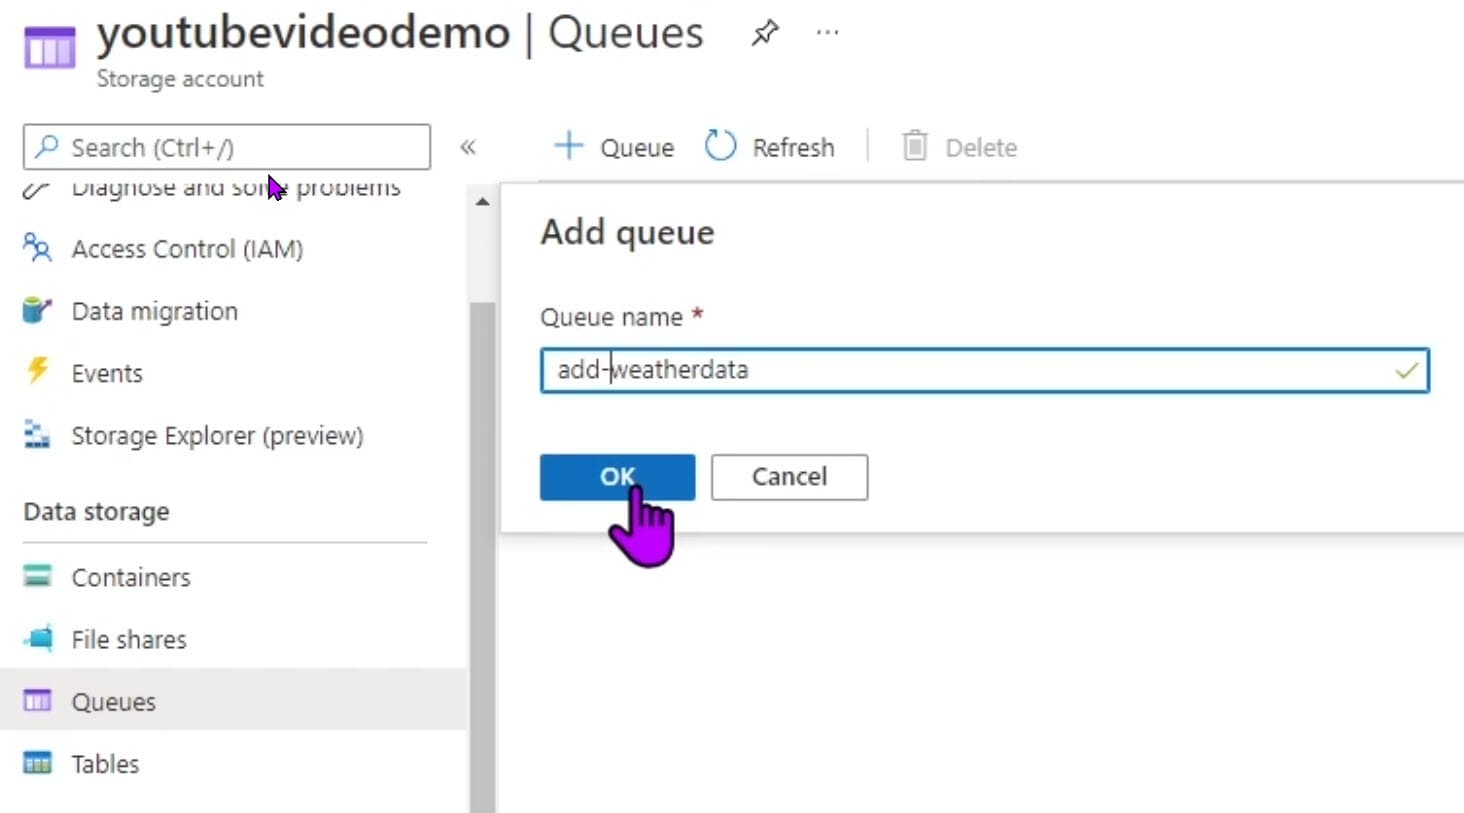
Once created, we can add Queues under the Storage account, as shown below.
Connecting to Azure Queue from .NET
With Queue Storage created, we can start using it from our application. Queue Storage is excellent when you want to decouple long-running workloads to happen in the background. It prevents users from having to wait till long precesses are completed.
The NuGet package Azure.Storage.Queues provides the libraries required to connect to Queue Storage. Once installed, use the QueueClient class to send and receive messages.
The QueueClient requires a Connection String to authorize and authenticate. It is available from the Azure Portal from the Access Keys section under the Storage Account (as shown below).
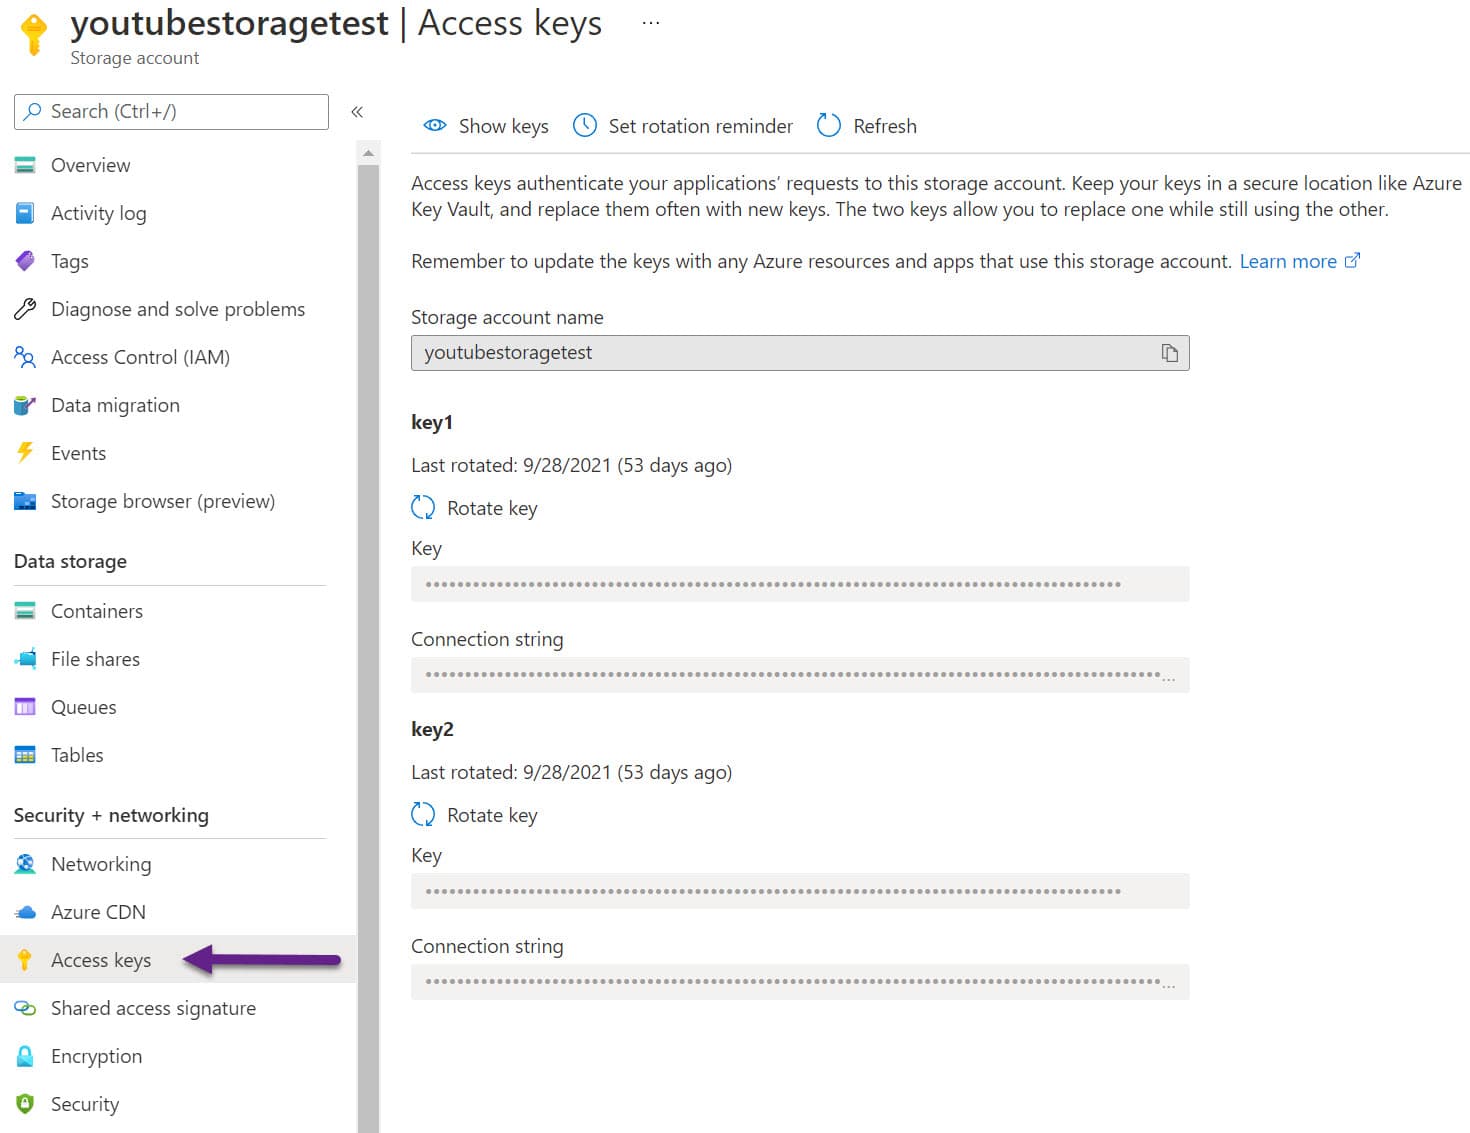
Azure Queue Storage Access Keys
Later in the post, I'll show you how to connect to the Queue without a connection string and using Managed Identity.
Sending Messages
Create a new ASP NET Core application using the default template. It has a WeatherForecast controller, which we can integrate with Queue Storage.
Let's assume we now need to POST new weather data to our application. But adding weather data involves some processing work, and we want this to happen in the background. So the user would simply be posting new weather data, and we will send this message to a queue to be processed separately.
For now, let's use the QueueClient and the Connection string to connect to the Queue Storage. Using the SendMessageAsync method, we can send messages to the Queue.
[HttpPost]
public async Task Post([FromBody]WeatherForecast weatherForecast, CancellationToken cancellationToken)
{
    var connectionString = "<Connection String>"
    var queueName = "add-weatherdata";
    var client = new QueueClient(connectionString, queueName);
    var message = JsonSerializer.Serialize(weatherForecast);
    await client.SendMessageAsync(message,  cancellationToken);
}
The POST method adds a message to the Queue and makes it available for processing to any application listening on that Queue.

Messages added to the Queue have an Id, Insertion time, Expiration time, and Dequeue count in addition to the actual message.
- Insertion time → The time of insertion of the message into the Queue
- Expiration time → By default, it is seven days, after which the message will automatically expire and get deleted from the Queue
- Dequeue count → Indicates the number of times the message was read from the Queue and placed back
The SendMessageAsync has overloaded methods, that allows to explicitly set the Expiration time and also a Visibility timeout.
The Visibility timeout specifies the delay after which a message will show up in the Queue after adding. So if you set a value of 60 seconds, the message will appear in the Queue (and be available for processing only after 60 seconds).
To create messages that never expire, set the timeToLive as a negative value.
Reading Messages
Messages dropped into the Queue can be picked up by another application to process. Below I have a simple Background Task that runs every 10 seconds and reads a message from the Queue.
protected override async Task ExecuteAsync(CancellationToken stoppingToken)
{
    while (!stoppingToken.IsCancellationRequested)
    {
        _logger.LogInformation("Reading from queue");
        var queueMessage = await _queueClient.ReceiveMessageAsync();
        if (queueMessage.Value != null)
        {
            var weatherData = JsonSerializer.Deserialize<WeatherForecast>(queueMessage.Value.MessageText);
            _logger.LogInformation("New Mesasge Read: {weatherData}", weatherData);
            // APplication process
            await _queueClient.DeleteMessageAsync(queueMessage.Value.MessageId, queueMessage.Value.PopReceipt);
        }
        await Task.Delay(TimeSpan.FromSeconds(10));
    }
}
The ReveiveMessagesAsync method reads one or more messages from the Queue. It removes the message from the Queue for 30 seconds (by default or the specified visibilityTimeout).
Once the message processing is complete, the message must be deleted from the Queue so that it is not picked up again for processing. If not deleted, it will be available back in the Queue after the visibilityTimeout.
Azure Storage Explorer
The Azure Storage Explorer tool allows managing storage accounts from desktops. It will enable the management of storage accounts across multiple subscriptions and accounts.
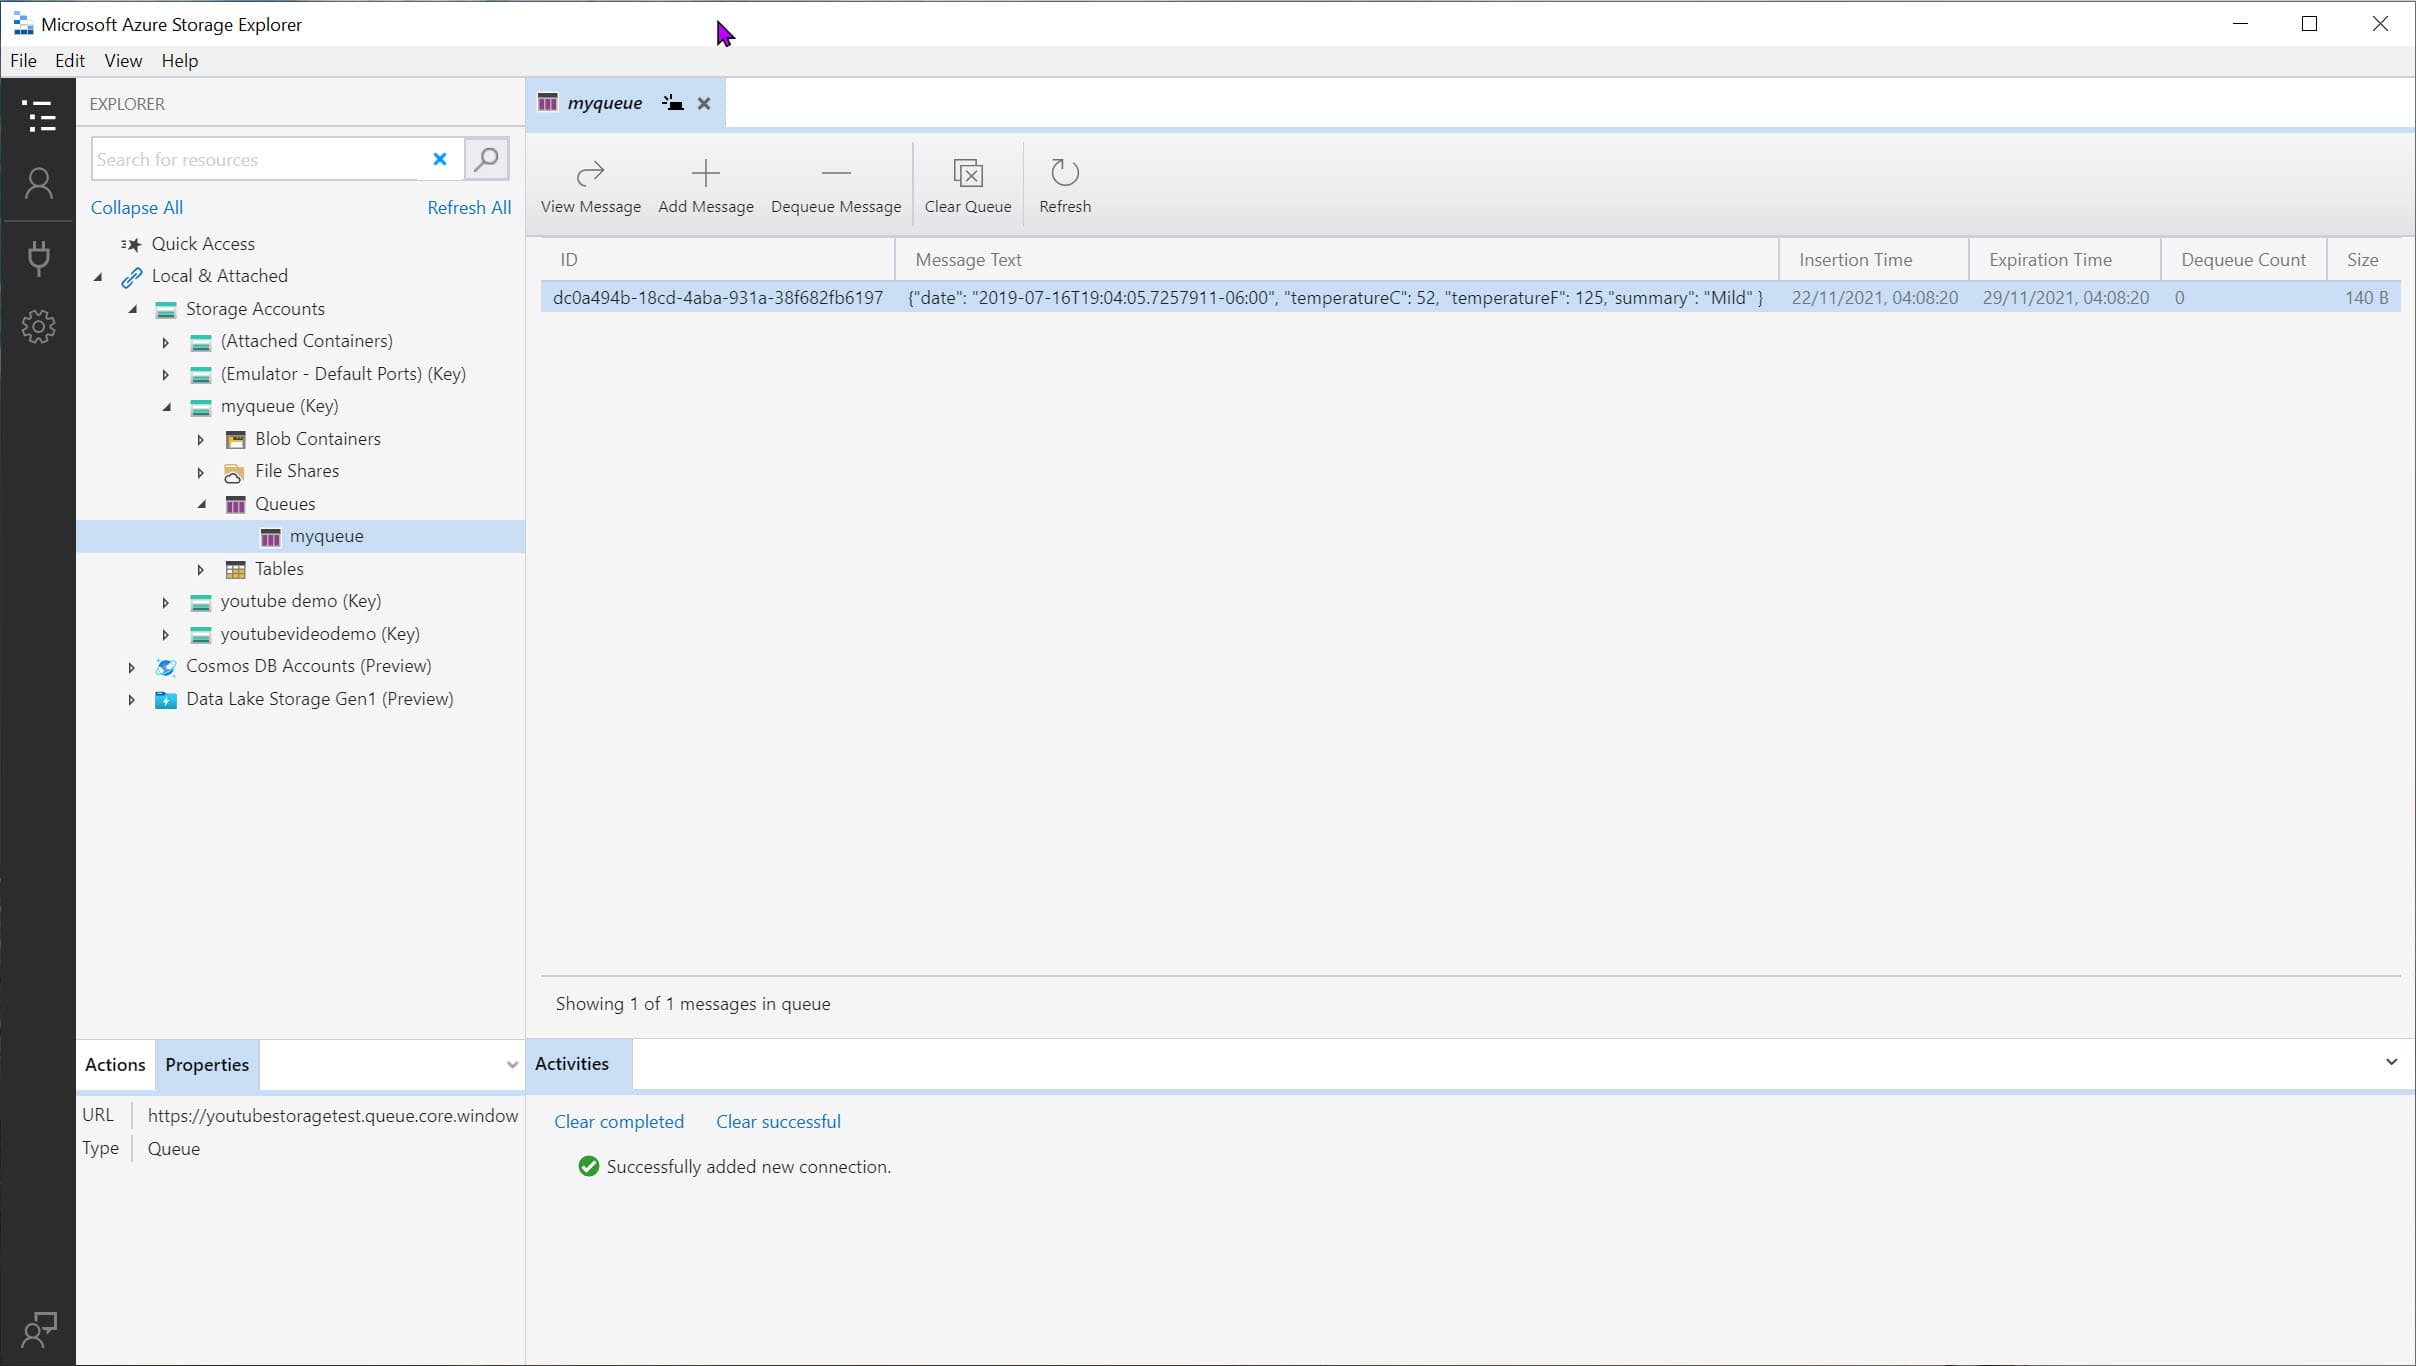
When reading messages from the Queue, the explorer tool uses the Peek functionality. With Peek, the message is not removed from the Queue and is still available for processing for other applications looking at the same Queue.
Dependency Injection of Queue Client
Anytime you need to interact with the Azure Queue from a .NET application, you need an instance of a QueueClient. Rather than explicitly creating an instance, it's easier to dependency inject.
The [Microsoft.Extensions.Azure](https://www.nuget.org/packages/Microsoft.Extensions.Azure/) Nuget package allows to easily integrate different Azure clients with .NET Dependency Injection (DI) and configuration systems.
In the ConfigureServices method of the Startup.cs class, we can register the QueueClient for the application.
services
    .AddAzureClients(builder =>
    {
        builder.AddClient<QueueClient, QueueClientOptions>((_, _, _) =>
        {
            var connectionString = "<Connection String>";
                  var queueName = "add-weatherdata";
            return new QueueClient(connectionString, queueName);
        });
    });
Once registered in the DI container, we can request an instance of QueueClient in the constructor. The .NET DI will inject it automatically at runtime.
public WeatherForecastController(
    ILogger<WeatherForecastController> logger, QueueClient queueClient)
{
    _logger = logger;
    _queueClient = queueClient;
}
Using Managed Identity To Connect To Azure Queue
The above code, when registering the QueueClient still uses the Connection String. Managing Credentials and ConnectionString's can become a bit tricky, so it's best to avoid needing to use them in the first place. Azure Managed Identity eliminates the need for Connection Strings to authenticate with resources.
Using the DefaultAzureCredential part of the Azure.Identity library we can connect to Azure Queues without needing a connection string.

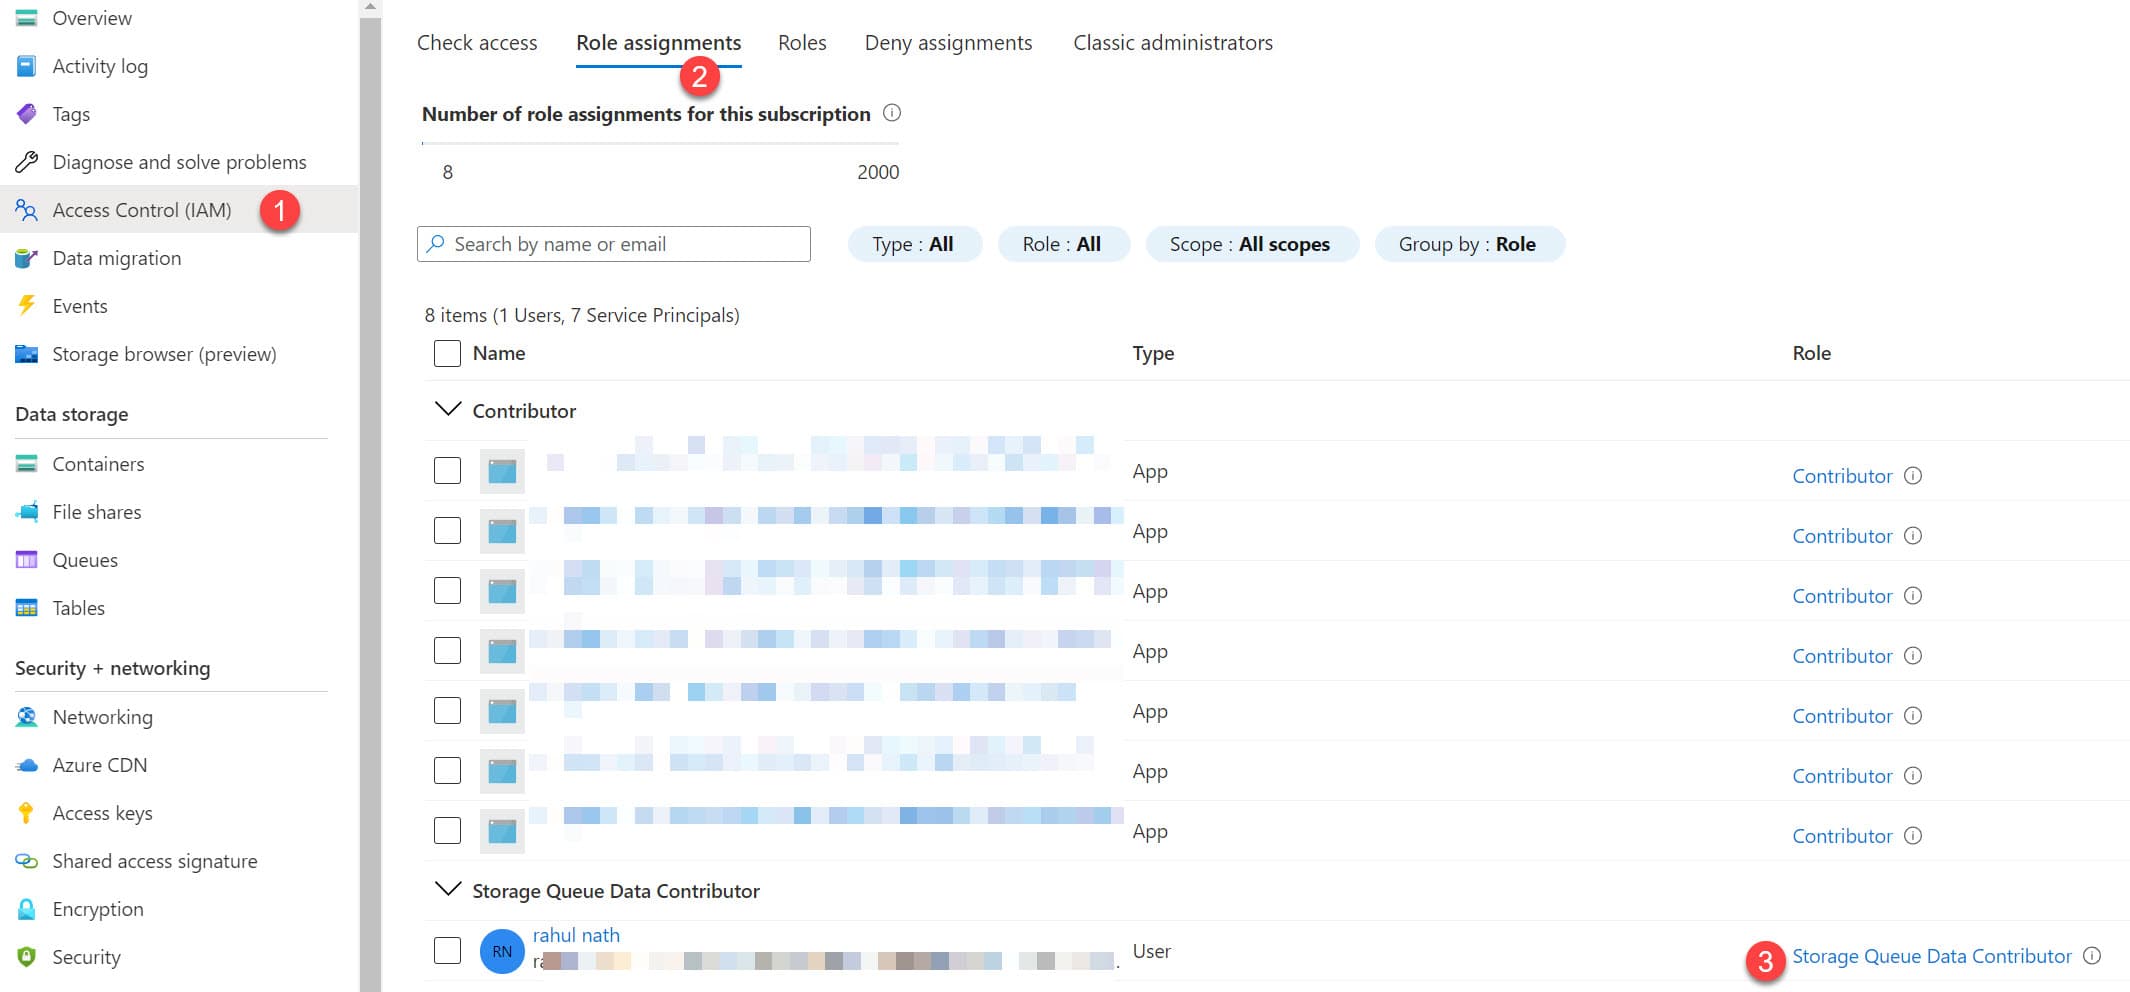
To enable Managed Identity connection on Azure Queue, head over to the Azure portal and add a new role assignment under the 'Access Control (IAM)' section. You can grant access to individuals, groups, or application identities to connect to the Queue Storage.
Below I have added my email address to the Storage Queue Data Contributor role. It allows to read, edit, delete messages from the Queue. When working on your local development, you can configure the IDE to connect and retrieve the token to use with DefaultAzureCredential.
azure_queue_iam_role_assignment.jpg
The below code no longer uses a Connection String to connect to the Azure Queue. When running on the local machine, it can automatically pick up the user logged in to Visual Studio or other supported IDE's. If the application is running in Azure infrastructure, enable Identity on the resource and grant it permissions using the Access Control (IAM).
var credential = new DefaultAzureCredential();
var queueUri = new Uri("https://youtubestoragetest.queue.core.windows.net/myqueue");
return new QueueClient(queueUri, credential);
I hope this helps you to get started with Azure Queue Storage and build disconnected applications.

Rahul Nath Newsletter
Join the newsletter to receive the latest updates in your inbox.
