
Learn To Deploy AWS Lambda Functions with Ease in JetBrains Rider
The AWS Toolkit plugin for JetBrains Rider makes it easier to develop, debug, and deploy serverless applications with AWS right from your IDE. Let's learn how to quickly create and update standalone AWS Lambda Functions to the AWS infrastructure.
Table of Contents
The AWS Toolkit plugin for JetBrains Rider makes it easier to develop, debug, and deploy serverless applications with AWS right from your IDE.
In this blog post, let's learn how to quickly create and update standalone AWS Lambda Functions to the AWS infrastructure.
This article is sponsored by AWS and is part of my AWS Series.
Deploy New Lambda Function From Rider
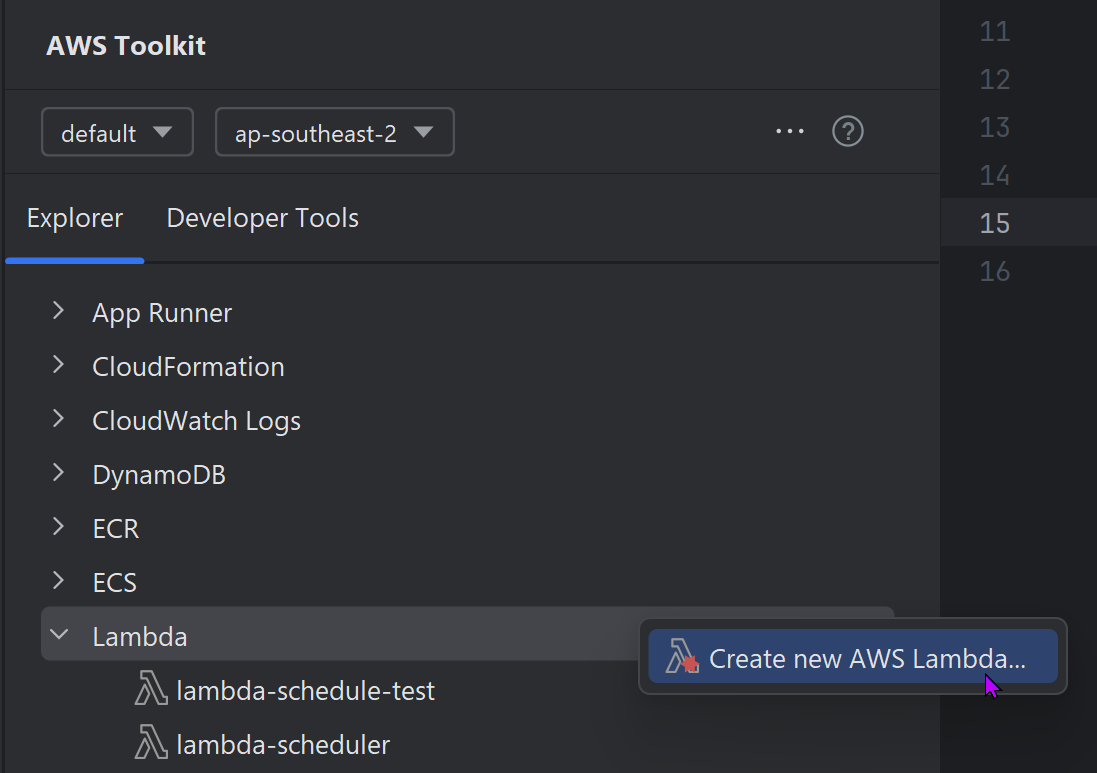
To create a new Lambda Function in AWS Infrastructure from JetBrains Rider IDE, navigate to the AWS Toolkit → Lambda.
Right-click on the Lambda section for the option to 'Create new AWS Lambda' function, as shown in the screenshot below.
Selecting the 'Create new AWS Lambda' option, prompts up a new 'Create Function' dialog in JetBrains Rider IDE.
This requires the information to create the new Lambda Function. Specify the Name and Description for the new Lambda function.
For the Handler, specify the Lambda Function Entry point.
The Handler string is of the format ASSEMBLY::TYPE::METHOD where Assembly is the name of the handler function assembly; Type is the full name of the handler type including the Namespace, and Method is the name of the function handler.
This needs to be a valid string, if not it will show an error.
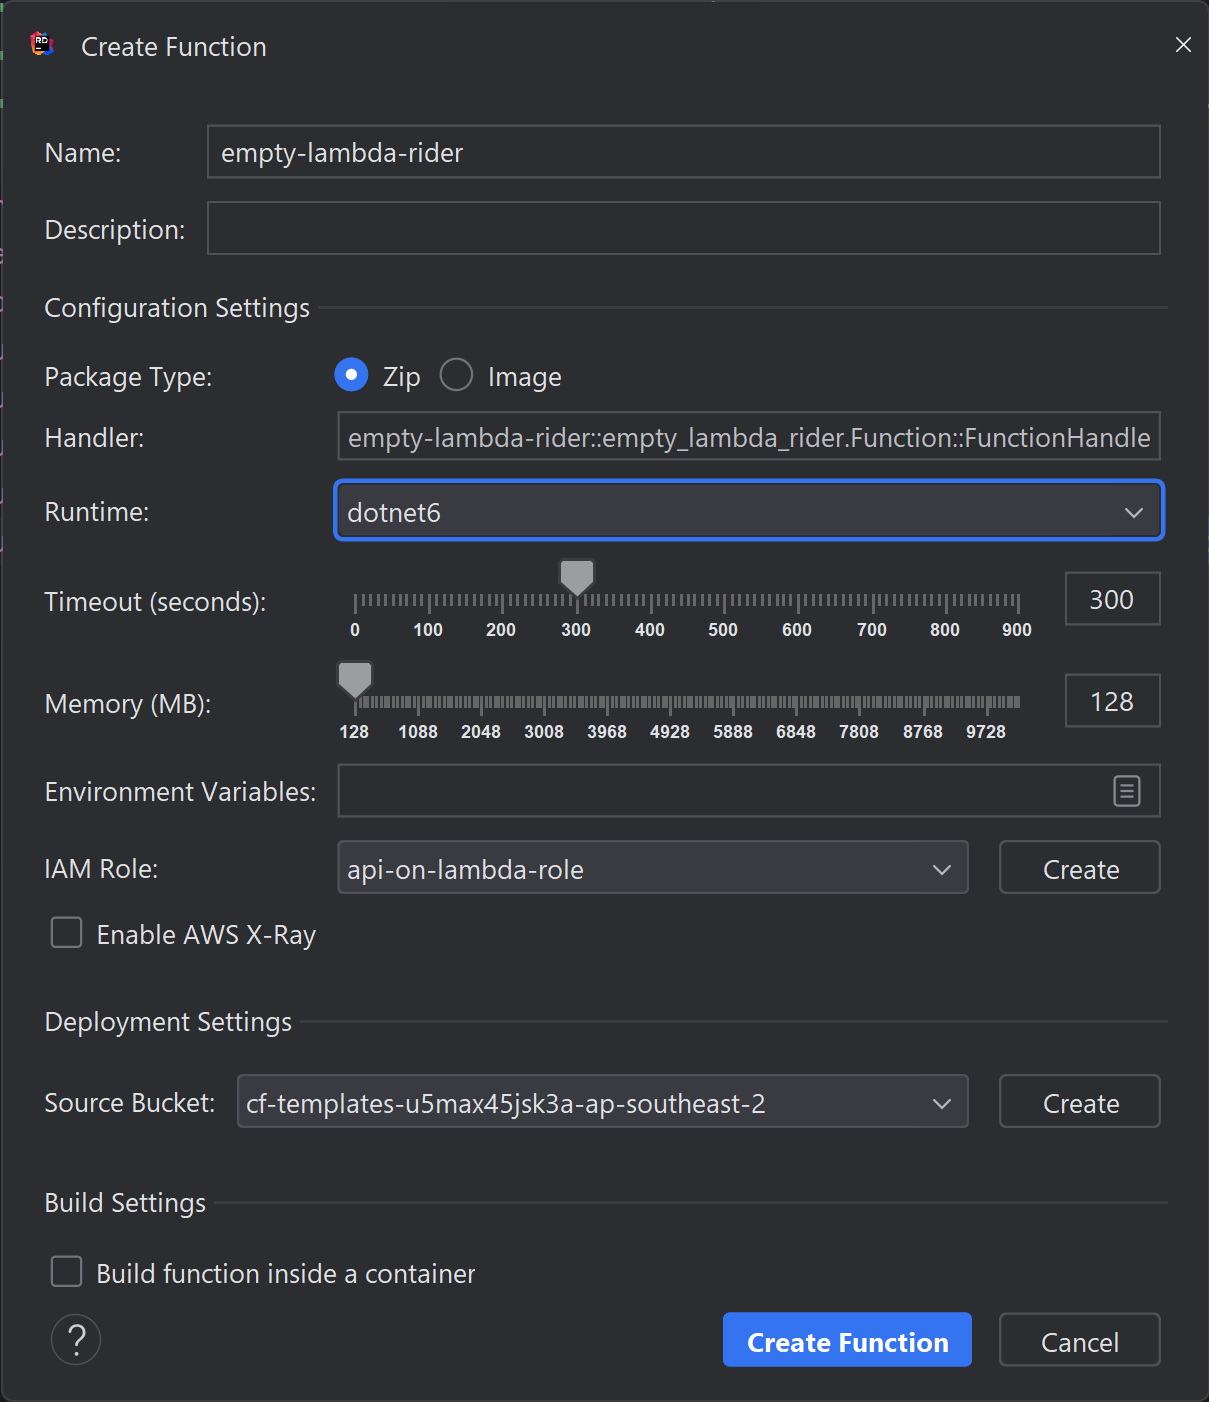
Configure the remaining settings as required for your Lambda Function.
For the IAM Role, you can select an existing Role, or create a new Role using the Create button.
We need to specify an S3 bucket to upload the Lambda function code for the SAM CLI to upload the Lambda package to deploy to AWS.
Select 'Create Function' to create and deploy a new Lambda Function.
Lambda Function Gutter Icons in Rider
JetBrains Rider also provides an option to deploy a Lambda Function right from the Function definition in the class file.
To enable this, go to Settings → Tools → AWS → Lambda option and enable the 'Show gutter icons for all potential AWS Lambda handlers' option as shown below.

This enables a special icon next to all potential Lambda Function handler methods.
As shown below, there is a special Lambda icon that shows up next to our Lambda Function Handler entry point.

Selecting that gives you the option to Run, Debug, and also Create/Deploy a new AWS Lambda Function. You can use this as well to open the Create Lambda Function dialog which we used earlier.
Update Lambda Function From Rider
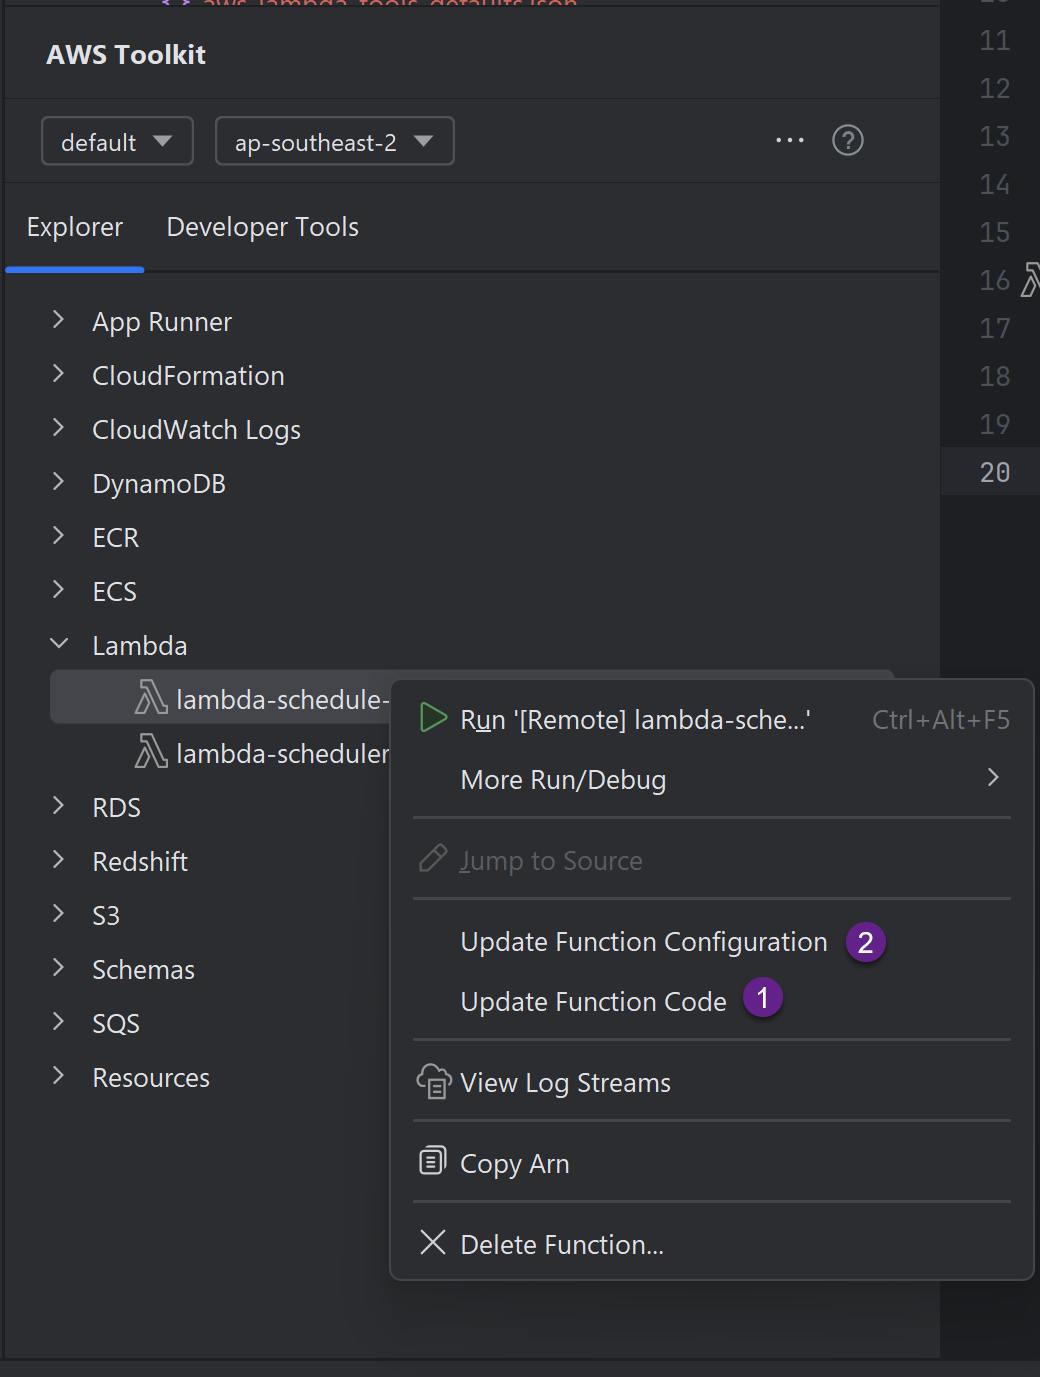
You can see the list of Lambda Functions existing under your AWS Account, under the AWS Toolkit → Lambda section.
To update the code or configuration for an existing Lambda function, right-click on the appropriate function and choose the 'Update Function configuration' or 'Update Function Code' option.
This prompts for the Handler name and also the S3 bucket to use to upload the code changes.
The Lambda package is built again, uploaded and deployed to AWS.

This makes it easy to create and update Lambda Functions from within the JetBrains IDE.

Rahul Nath Newsletter
Join the newsletter to receive the latest updates in your inbox.