
How To Create An ARM Template For Cosmos DB
Learn how to create an ARM template to deploy Azure Cosmos DB with dynamic containers. With this template you can keep adding containers as you build the application.
Table of Contents
ARM Templates always overwhelmed me for its size and various attributes and values. After having discovered the ways to author them, these are less intimidating than before.
I now use either the Visual Studio Resource Group Project or the ARM Tools extensions for VS Code for authoring ARM templates. It has significantly reduced the time and energy required to create an ARM template.
In this blog post, I will use the VS Code Extension to create an ARM template to create a Cosmos DB account, database, and containers.
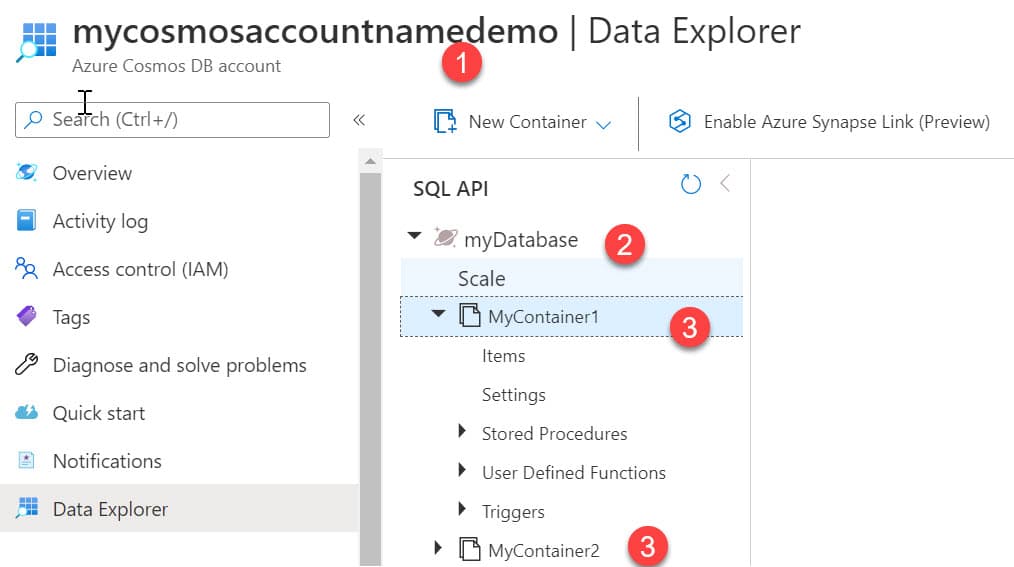
If you are new or getting started with Azure Cosmos DB, it's good to get an idea of the Azure Cosmos DB resource model. To start using Azure Cosmos DB, we need to create an Azure Cosmos account (1), a database (2) in it, and containers (3) inside them. Below is a snapshot from the Azure Portal Data Explorer showing this hierarchy.
ARM Template
In an empty working folder, let's create a new file for our ARM template and name it azuredeploy.json (you can choose any name for the file, but will see later why I chose this specific name.). Once you have the VS Code extension for ARM Template installed, open your working folder/file in VS Code editor.
NOTE: The template snippets generated by the plugin are a few versions behind and also generates some defaults which can be safely removed. You can manually update the versions and remove the un-necessary attributes. Check the comment by Mark Brown below for more details.
In an empty JSON file, typing arm or using the 'Trigger Suggest' (shortcut in VS Code; for me, it is Ctrl + Space) will show a list of scaffolding snippets to create an ARM template.
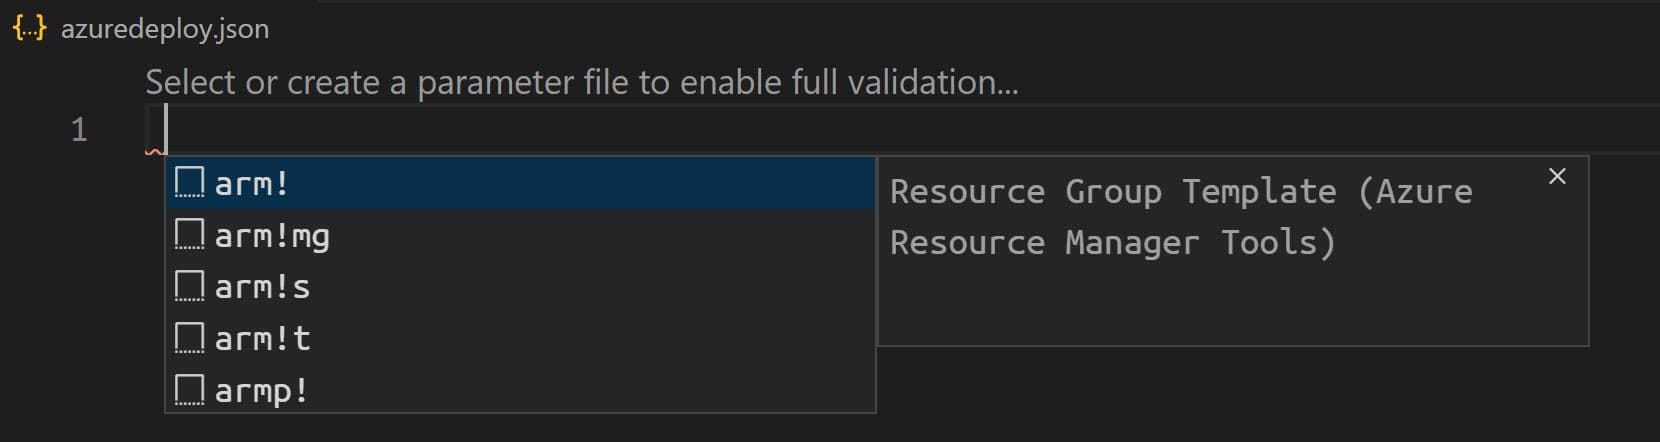
By selecting the arm! Snippet from the list scaffolds the ARM template structure.
We will now add the resources to deploy to the Resources section.
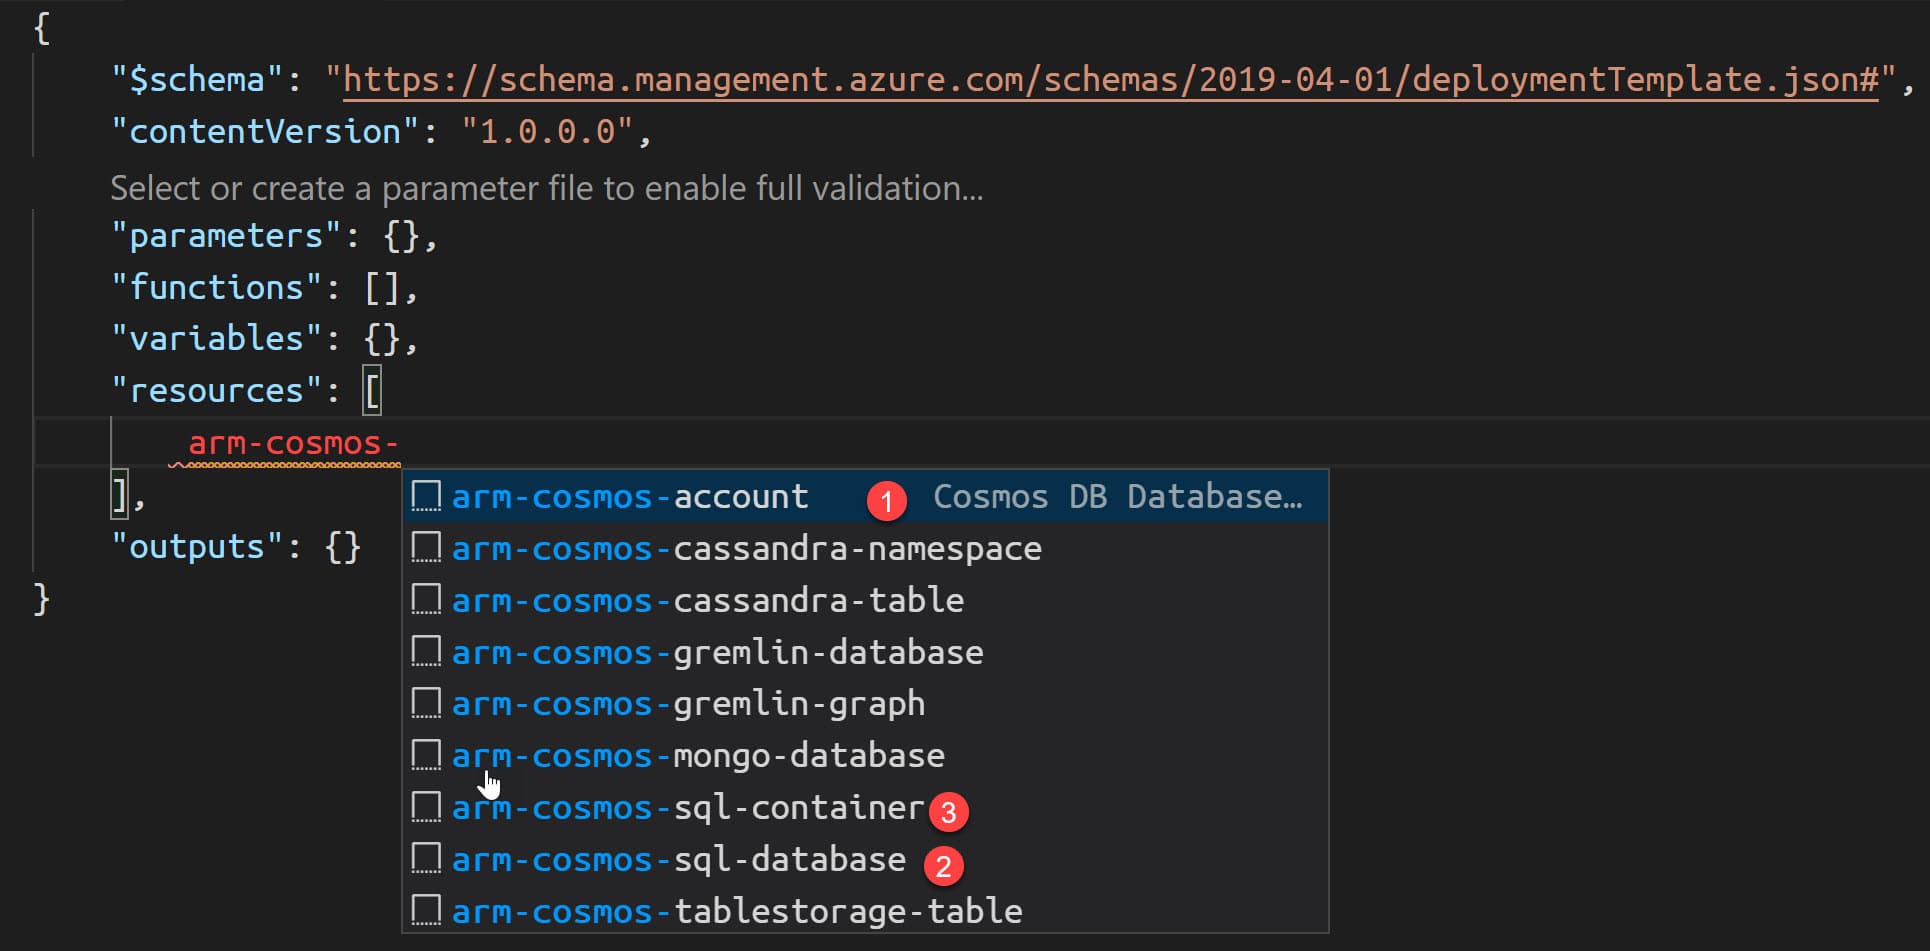
We need to create the Cosmos account, the database, and containers within our template, as we saw earlier. The following scaffolding templates helps us to add them.
- arm-cosmos-account
- arm-cosmos-sql-database
- arm-cosmos-sql-container
Adding Resources
Let's see one of them in detail and how to create the resource with the snippet. Selecting the arm-cosmos-account will scaffold the template to create the Cosmos account.
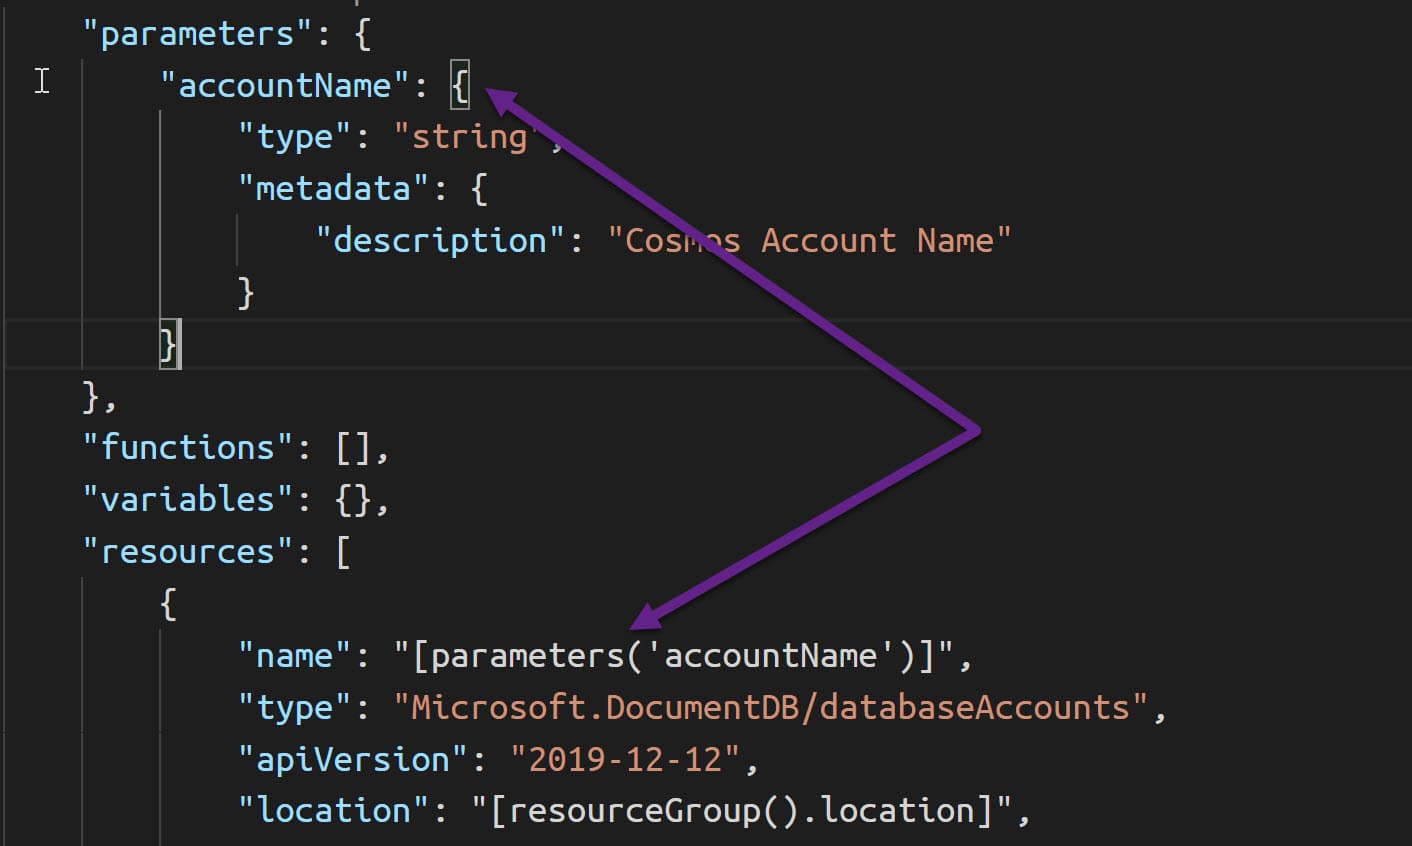
Within the scaffolded section, it prompts you to specify the Cosmos DB account name. Since the account name will be different for different environments or apps, let's not hardcode the name in the template. We will use ARM template parameters to make this configurable.
Using Parameters
ARM Parameters helps us make the template configurable. Parameters are added to the Parameters section of the ARM template. Use the new-parameter snippet to add a new parameter to the template.
I have added a parameter accountName of type string. It specifies the Cosmos account name when we use the ARM template to deploy (more on that later).
Even though ARM templates are JSON files, it supports using expressions to extend the JSON values available within the template.
Expressions start and end with brackets - [ and ], and the value gets evaluated when we deploy the template.
ARM template supports a list of standard template functions that are automatically available for use within the template.
The parameters function is one of them and is used to retrieve the parameter value defined in the parameters section of the template. Using this function, we can specify the Azure Cosmos account name from the variable accountName that we just created.
"resources": [
  {
    "name": "[parameters('accountName')]",
  }
]
Now that we have the account created let's create the database. using the arm-cosmos-sql-database template snippets. I have the database name (databaseName) as a parameter.
Here is how the template looks so far
{
  "$schema": "https://schema.management.azure.com/schemas/2019-04-01/deploymentTemplate.json#",
  "contentVersion": "1.0.0.0",
  "parameters": {
    "location": {
      "type": "string",
      "defaultValue": "[resourceGroup().location]",
      "metadata": {
        "description": "Location for the Cosmos DB account."
      }
    },
    "accountName": {
      "type": "string",
      "defaultValue": "[concat('sql-', uniqueString(resourceGroup().id))]",
      "metadata": {
        "description": "Cosmos Account Name"
      }
    },
    "databaseName": {
      "type": "string",
      "defaultValue": "myDatabase",
      "metadata": {
        "description": "Database name"
      }
    }
  },
  "resources": [
    {
      "name": "[parameters('accountName')]",
      "type": "Microsoft.DocumentDB/databaseAccounts",
      "apiVersion": "2019-12-12",
      "location": "[parameters('location')]",
      "kind": "GlobalDocumentDB",
      "properties": {
        "consistencyPolicy": {
          "defaultConsistencyLevel": "Eventual",
          "maxStalenessPrefix": 1,
          "maxIntervalInSeconds": 5
        },
        "locations": [
          {
            "locationName": "[parameters('location')]",
            "failoverPriority": 0
          }
        ],
        "databaseAccountOfferType": "Standard",
        "enableAutomaticFailover": false
      }
    },
    {
      "type": "Microsoft.DocumentDB/databaseAccounts/apis/databases",
      "name": "[concat( parameters('accountName'), '/sql/', parameters('databaseName'))]",
      "apiVersion": "2016-03-31",
      "dependsOn": [
        "[resourceId('Microsoft.DocumentDB/databaseAccounts/', parameters('accountName'))]"
      ],
      "properties": {
        "resource": {
          "id": "[parameters('databaseName')]"
        },
        "options": {
          "throughput": 400
        }
      }
    }
  ]
}
Adding Dynamic Containers
A container is the unit of scalability in an Azure Cosmos container, and it is a schema-agnostic container of items. Items added to the containers and automatically grouped into partitions based on the partition key.
The bare minimum to create a container is the name and a partition key. When adding an item to the container, it must have an id property or will be auto-generated.
To add one container to the template, we can use the arm-cosmos-sql-container snippet. To create a container specify the appropriate accountName, databaseName and the containerName.
But we rarely want only one container inside our Cosmos database. Often we want multiple of them.
Let's define a parameter to hold the containers and the related properties. For multiple containers, we will define an object array as below.
"containers": {
  "value": [
    {
      "name": "MyContainer1",
      "partitionKey": "/partitionKey1"
    },
    {
      "name": "MyContainer2",
      "partitionKey": "/partitionKey2"
    }
  ]
}
It specifies an array object, which has a name and parititionKey property. You can extend this if you want to set more properties on the container.
When we create the template, we need to iterate through the array and create a new container for each object, using the appropriate key and partitionKey.
The copy element lets us do Resource iterations in ARM templates.
In the containers section of the resources, the copy section can be used as below to repeat it based on the containers parameter. Using the copyIndex function, values can be referenced from the array property.
In the example below, the container name and the partition key is set using that. This section is repeated based on the number of objects in the containers parameter - "count": "[length(parameters('containers'))]"
{
  "type": "Microsoft.DocumentDb/databaseAccounts/apis/databases/containers",
  "name": "[concat(parameters('accountName'), '/sql/', parameters('databaseName'), '/', parameters('containers')[copyIndex()].name)]",
  "copy": {
    "name": "ContainerCopy",
    "count": "[length(parameters('containers'))]"
  },
  "apiVersion": "2016-03-31",
  "dependsOn": [
    "[resourceId('Microsoft.DocumentDB/databaseAccounts/apis/databases', parameters('accountName'), 'sql', parameters('databaseName'))]"
  ],
  "properties": {
    "resource": {
      "id": "[parameters('containers')[copyIndex()].name]",
      "partitionKey": {
        "paths": ["[parameters('containers')[copyIndex()].partitionKey]"],
        "kind": "hash"
      },
      "indexingPolicy": {
        "indexingMode": "consistent"
      }
    }
  }
}
ARM Template Parameters File
Rather than passing parameters inline when running the ARM template, it's easier to use a JSON parameter file. You can find more details of the parameter file and the format here.
With the VS Code extension, it is easier to create this file. It prompts an option above the ARM template file's parameters section, as shown below, to 'Select or create a parameter file'.
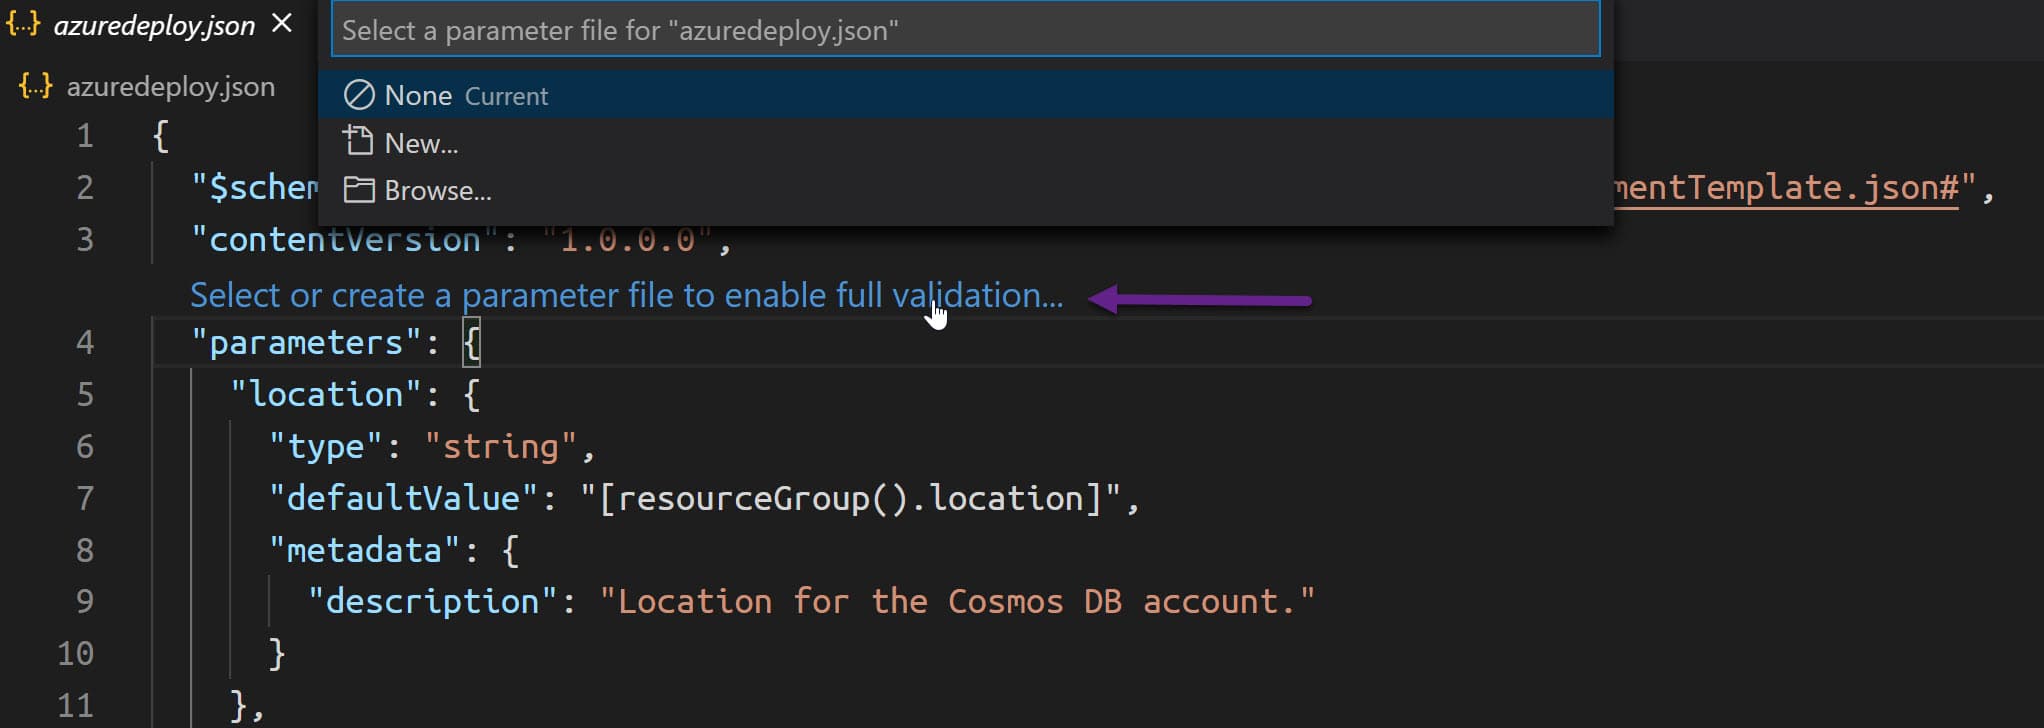
It supports creating a new parameter file or choosing an existing one from disk. Selecting 'New' prompts to select specific parameters or parameters defined in the template and then allows you to save the file to disk.
Below is the parameter file for the Cosmos ARM template we created. You can name this however you like; I have it as azuredeploy.parameters.json
{
  "$schema": "https://schema.management.azure.com/schemas/2019-04-01/deploymentParameters.json#",
  "contentVersion": "1.0.0.0",
  "parameters": {
    "accountName": {
      "value": "uniquecosmosaccountname"
    },
    "databaseName": {
      "value": "MyDatabase"
    },
    "containers": {
      "value": [
        {
          "name": "MyContainer1",
          "partitionKey": "/partitionKey1"
        },
        {
          "name": "MyContainer2",
          "partitionKey": "/partitionKey2"
        }
      ]
    }
  }
}
Deploying ARM Template
There are multiple ways you can deploy the ARM template.
If you prefer to use the UI, the Azure Portal allows this under the 'Deploy a custom template` option. It allows us to deploy an ARM template and specify parameters.
Alternatively, you can use PowerShell scripts or Azure CLI to deploy too. Below is an example of using the CLI to deploy.
az login
az group create --name "Delete" --location "Australia East"
az deployment group create --resource-group Delete --template-file .\azuredeploy.json --parameters azuredeploy.parameters.json
When executing deployment scripts, you can choose mode between 'Incremental' or 'Complete'. By default, it is Incremental, which only adds resources to resource groups. So if a resource already exists, it skips and goes to the next resource in the template.
You can run the same script above by adding more containers to the array object each time, and it will incrementally create the new container to the same cosmos account and database. It is helpful when you are adding new containers throughout your application development lifetime.
ARM templates can be used in Build/Deploy pipelines, and you can automate creating resources for different environments (DEV, TEST, UAT, PROD, etc.).
Azure Quickstart Templates
Azure Resource Manager Quickstart Templates is a collection of community-contributed templates to deploy Azure resources quickly. The template code for these templates are available in this GitHub repository.
The Cosmos ARM template we created in this post is available in the repository for you to use. The template has a few files naming conventions and specific other requirements, which is why I named the files as azuredeploy.json and azuredeploy.parameters.json.
I hope you now have a good understanding of creating an ARM template in general and using that to deploy resources for your application. Sound off in the comments!

Rahul Nath Newsletter
Join the newsletter to receive the latest updates in your inbox.
