Azure Web Sites: Moving Wordpress to Cloud
Table of Contents
It’s been almost an year since I have moved to this custom hosted blog and is nearing its renewal with my current host, Godaddy. Now that Azure has full support for Web Sites which enables you to deploy web applications on a scalable and reliable cloud infrastructure and being a FTE(Full Time Employee), I have the privilege of a free msdn account that offers 150$ free credit on azure, I have decided on to move to Azure for my blog. You could also try this with a free Azure trial that offers you 200$ credit for all the services
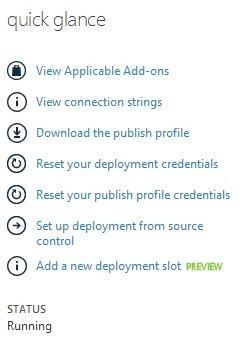
Setting up Wordpress on Azure is very easy and is just a matter of few clicks from the Management Portal. You can find the detailed steps to get this done here. By default Azure Web Sites are installed in the root directory of IIS. To move this into a sub-folder of your choice, you can use any FTP client(FileZilla). The connection details can be obtained from the Management Portal as shown in the below screen shot.


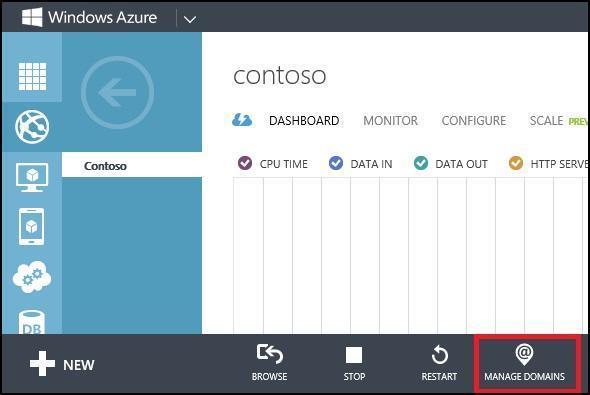
**Mapping your custom domain **to the new wordpress site is about adding a CName record for awverify or www in your Domain dashboard provided by the domain registrar. Once you have the required CName entries you can map the custom domain in the portal using the ‘Manage Domains’ option.
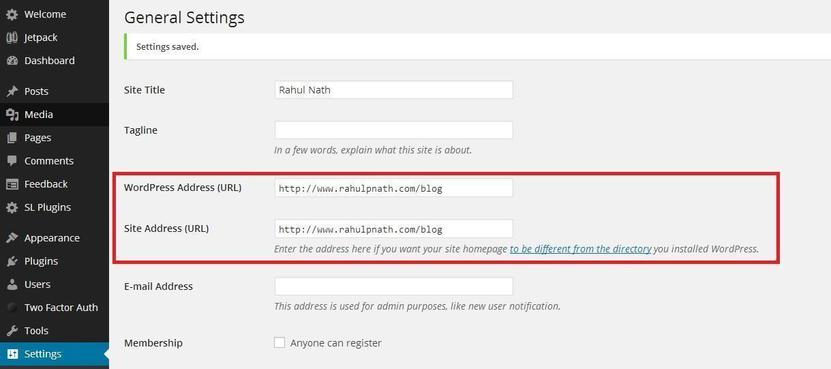
**Restoring your content **from my current host was easy as I am using Vaultpress for my site backup and it provides an option to backup to a different web site too. If not you could also use FTP to move your current site content which is detailed out here. Once the content is restored you would need to update the Wordpress Url and Site address url in the General Settings of your blog dashboard. You could also update this directly on the MySQL database in the wp_options table(home and siteurl property). To connect to the database you would get the connection string details from the portal and you can use MySQL Workbench to connect to it. You might have to recheck your permalink setting on the Wordpress dashboard to ensure that it is the same as you were using earlier.
Now you are up an running your blog on Azure!!
Things to look out for:
1. Make sure that all your blog links use your custom domain and not yourdomain.azurewebsite.net.
2. I had my Jetpack commenting system broken as I had moved the blog to a subdirectory. To correct this you would need to disconnect jetpack from the wordpress account and reconnect it. You can do this from the Wordpress dashboard. If reconnecting throws some error, then connect to your SQL database and delete of the entries that starts with jetpack in the wp_options table.(Make sure you have a db backup before you do this). Reconnecting after that should work fine
**3. **If you see any error indicating there is a Redirect loop error, this is mostly because you would be redirecting a no-www request to the www sub domain. In this case make sure that the siteurl and home property in wp_options table also has www in the urls. Otherwise it will keep redirecting itself between no-www and www creating a redirect loop.
**Edit:
- **If you face any error while trying to connect to the azure hosted web site from Windows Live Writer(WLW), this most likely is because it uses xmlrpc.php for publishing posts to the site and this is accessed over the https enpoint. Since https is not setup for the custom domain, accessing xmlrpc.php over https would present you with the below certificate error.
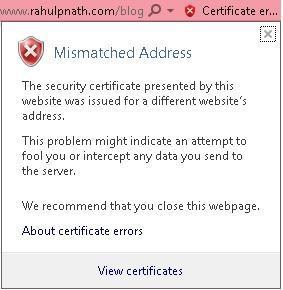
You could either configure your ssl bindings in azure portal, under the Configure tab under your website. SSL bindings to custom domains can only be used in Basic or Standard mode. If yours is not in basic or standard mode as mine, you can workaround this by either configuring the blog in WLW using your *.azurewebsites.net url.
Azure Plans & Pricing
If you do not have a free account, you might be thinking of the costs that would be really incurred for you to move on to Azure. In short Azure Web Sites is offered in four tiers: Free, Shared (Preview), Basic and Standard. The pricing details for each of these is available in detail here. To have a custom domain name mapping you would at least need to choose Shared mode. For more information on how to choose the right plan for you, Scott Hanselman has a very good article on Penny Pinching in the cloud.
Do you plan to move to Azure Web Sites some time soon?

Rahul Nath Newsletter
Join the newsletter to receive the latest updates in your inbox.
