
Azure AD Custom Attributes and Optional Claims from an ASP.Net Application
Adding and retrieving custom attributes from an Azure AD
Table of Contents
When using Azure Active Directory for managing your users, it is a common requirement to add additional attributes to your Users like SkypeId, employee code, EmployeeId and similar. Even though this happens to be a common need, getting this done is not that straightforward. This post describes how you can get additional properties on User objects in Azure AD.
Recently when I had to do this at a client, we had users in Azure AD, the additional property, employeeCode for the user was available in an internal application which had the users Azure email-address mapped to it. We needed these to be synced across to the user Azure AD and make it available as part of claims for a Web site that uses Azure AD authentication
Adding Custom Attribute using Directory Schema Extensions
Azure AD user has a set of default properties, manageable through the Azure Portal. Any additional property to User gets added as an extension to the current user Schema. To add a new property we first need to register an extension. Adding a new extension can be done using the GraphExplorer website. You need to specify the appropriate directory name (e.g., contoso.onmicrosoft.com) and the applicationObjectId. The application object id is the Object Id of the AD application that the Web Application uses to authenticate with Azure AD.
Azure AD supports a similar type of extension, known as directory schema extensions, on a few directory object resources. Although you have to use the Azure AD Graph API to create and manage the definitions of directory schema extensions, you can use the Microsoft Graph API to add, get, update and delete data in the properties of these extensions.
POST https://graph.windows.net/contoso.onmicrosoft.com/applications/
    <applicationObjectId>/extensionProperties?api-version=1.5 HTTP/1.1
{
    "name": "employeeCode<optionalEnvironmentName>",
    "dataType": "String",
    "targetObjects": [
        "User"
    ]
}
The response gives back the fully-qualified extension property name, which is used to write values to the property. Usually the name is of the format extension_<adApplicationIdWithoutDashes>_extensionPropertyName
If you have multiple environments (like Dev, Test, UAT, Prod) all pointing to the same Active Directory, it is a good idea to append the environment name to the extension property. It avoids any bad data issues between environments as all these properties get written to the same User object. You can automate the above step using any scripting language of your choice if required.
Setting Values for Custom Attributes
Now that we have the extension property created on the AD application, we can set the property on the User object. If you want to set this manually, you can use the GraphExplorer website again to do this.
PATCH https://graph.windows.net/contoso.onmicrosoft.com/users
        /jim@contoso.onmicrosoft.com?api-version=1.5
{
    "extension_ab603c56068041afb2f6832e2a17e237_employeeCode<optionalEnvironmentName>": "EMP124"
}
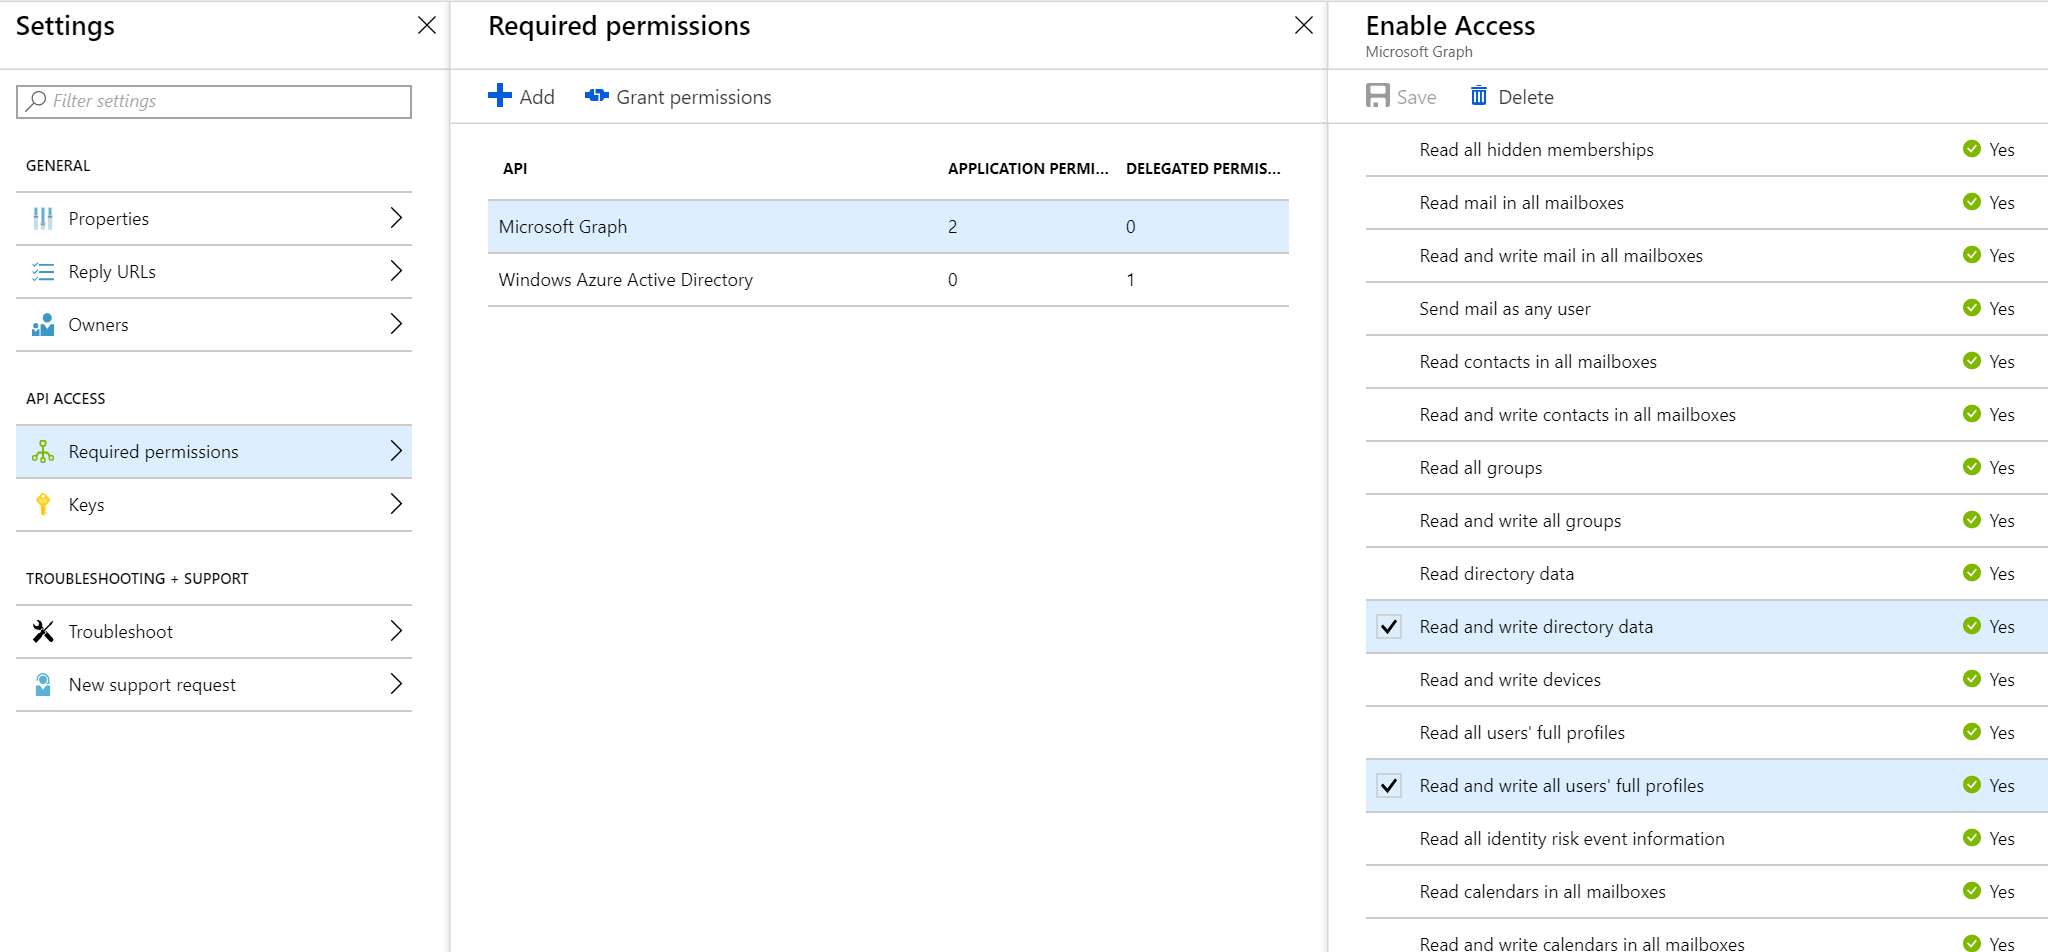
In our case it was not a one-off case of updating the User object, so better wanted this to be automated. Employee codes were available from a database with the associated Azure AD email address. So we created a windows service job that would sync these codes to Azure AD. You can write to Azure AD schema extension properties using Microsoft Graph API. Add a reference to the Microsoft Graph NuGet package, and you are all set to go. For the Graph API to authenticate, use a different Azure AD app (separate to the one that you registered the extension property on, which the web app uses to authenticate), just because it needs additional permissions as well and it is a good idea to isolate that. Under Settings -> Required Permissions, Add Microsoft Graph and provide the relevant permissions for it to write the user's profile/directory data.
private static async Task<GraphServiceClient> GetGraphApiClient()
{
    var clientId = ConfigurationManager.AppSettings["AppId"];
    var secret = ConfigurationManager.AppSettings["Secret"];
    var domain = ConfigurationManager.AppSettings["Domain"];

    var credentials = new ClientCredential(clientId, secret);
    var authContext =
        new AuthenticationContext($"https://login.microsoftonline.com/{domain}/");
    var token = await authContext
        .AcquireTokenAsync("https://graph.microsoft.com/", credentials);

    var graphServiceClient = new GraphServiceClient(new DelegateAuthenticationProvider((requestMessage) =>
    {
        requestMessage
            .Headers
            .Authorization = new AuthenticationHeaderValue("bearer", token.AccessToken);

        return Task.CompletedTask;
    }));

    return graphServiceClient;
}
private async Task UpdateEmployeeCode(
    string employeeCodePropertyName, GraphServiceClient graphApiClient, Employee employee)
{
    var dictionary = new Dictionary<string, object>();
    dictionary.Add(employeeCodePropertyName, employee.Code);

    await graphApiClient.Users[employee.EmailAddress]
        .Request()
        .UpdateAsync(new User()
        {
            AdditionalData = dictionary
        });
}
Looping through all the employee codes, you can update all of them into Azure AD at regular intervals. To verify that the attributes are updated correctly, you can either use the Graph API client to read the extension property or use the Graph Explorer Website.
Accessing Custom Attributes through Claims
With the Azure AD updated with the employee code for each user, we can now set up the AD application to return the additional property as part of the claims, when the web application authenticates with it. The application manifest of the Azure AD application needs to be modified to return the extension property as part of the claims. By default optionalClaims property is set to null and you can update it with the below values.
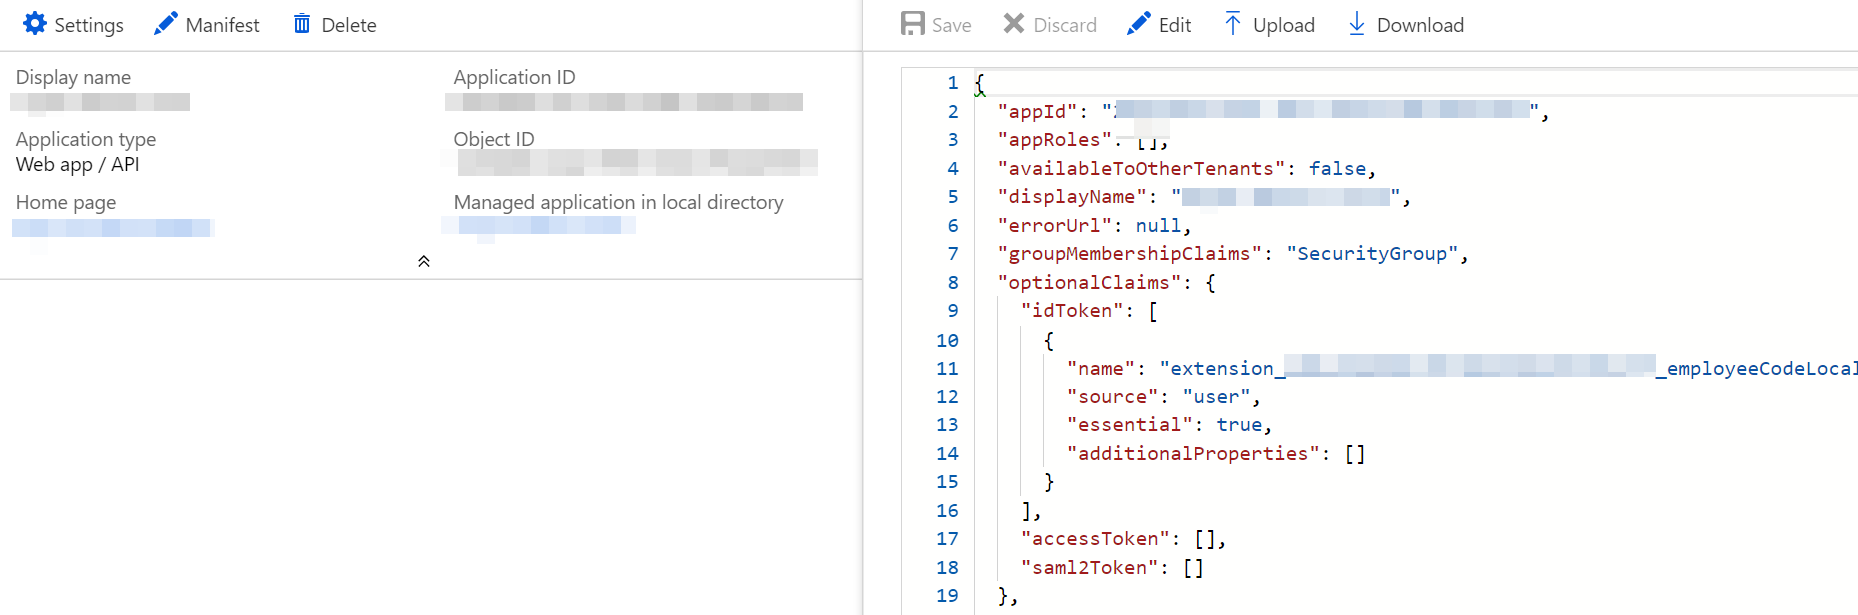
"optionalClaims": {
    "idToken": [
      {
        "name": "extension_<id>_employeeCodeLocal",
        "source": "user",
        "essential": true,
        "additionalProperties": []
      }
    ],
    "accessToken": [],
    "saml2Token": []
  },
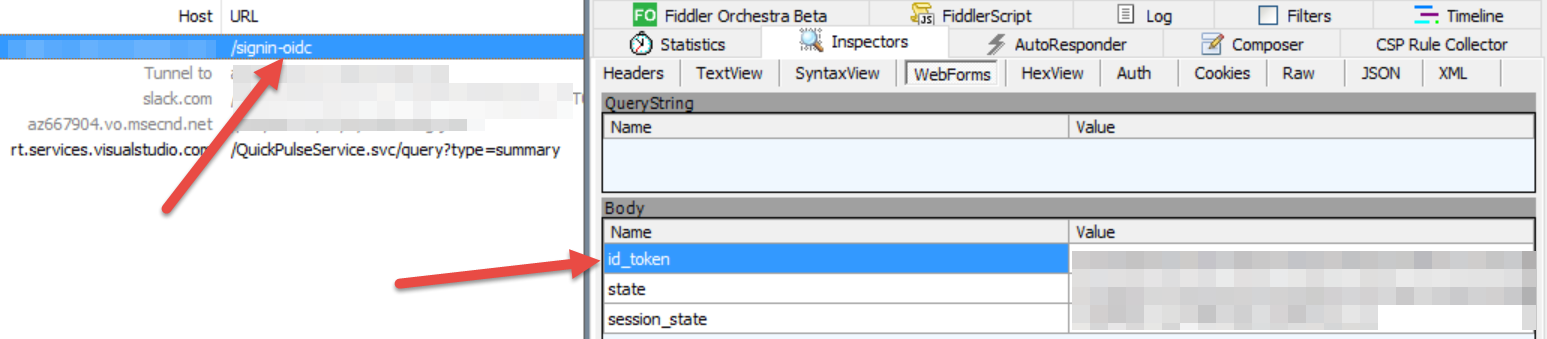
I updated the idToken property as the .Net Core Web Application was using JWT ID token. If you are unsure of what token you can use Fiddler to find what kind of token is used (as shown below).
With the optonalClaims set, the web application is all set to go. For an authenticated user (with the extension property set), the extension property is available as part of claims. The claim type will be _extn.employeeCode<optionalEnvironmentNam>_. The below code can be used to extract the employee code from the claim.
public static string GetEmployeeCode(this ClaimsPrincipal claimsPrincipal)
{
    if (claimsPrincipal == null || claimsPrincipal.Claims == null)
        return null;

    var empCodeClaim = claimsPrincipal.Claims
        .FirstOrDefault(claim => claim.Type.StartsWith("extn.employeeCode"));

    return empCodeClaim?.Value;
}
Usually, the claims start flowing through immediately. However, once it did happen to me that the claims did not come for over a long period. Not sure what I did wrong, but once I deleted and recreated the AD application, it started working fine.
Although setting additional properties on Azure AD Users is a common requirement, setting it up is not that straight-forward. Hope the portal improves someday, and it would be as easy as setting a list of key-value properties as extension properties, and it would all seamlessly flow through as part of the claims. However, till that day, hope this helps you to set up extra information on your Azure AD users.

Rahul Nath Newsletter
Join the newsletter to receive the latest updates in your inbox.

