Authenticating a Client Application with Azure Key Vault
This post describes the different methods by which a client application can access Azure Key Vault and use the keys for performing cryptographic activities.
Table of Contents
Please check here for scripts using the latest PowerShell cmdlets and check out the new Visual Studio Connected Service feature.
Azure Key Vault provides an easy way for managing cryptographic keys and secrets (like connection strings or passwords) in a secure and distributed manner as opposed to having them in the configuration file or a database. If you are new to Azure Key Vault check out the Getting Started with Azure Key Vault on how to setup the vault and add keys and use that from a console application.
In this post we will explore into the ways of authenticating a client application with a key vault. For an application to use the key vault it must authenticate using a token from the Azure Active Directory (AD). For this an application needs to be registered in the Azure AD and this application needs to be authorized to access key or secret in the vault using the Set-AzureKeyVaultAccessPolicy that comes as part of the key vault powershell scripts.
As of today, the keyvault will be created in the Default AD associated to the azure subscription and there is no way that it can be created in a different directory. But maybe this will be supported in future.
So for a client to access the key vault, it needs to obtain the token from the Azure AD application, which can be done using 2 ways:
- Using ClientId and secret
- Using ClientId and certificate
Using ClientId and Secret
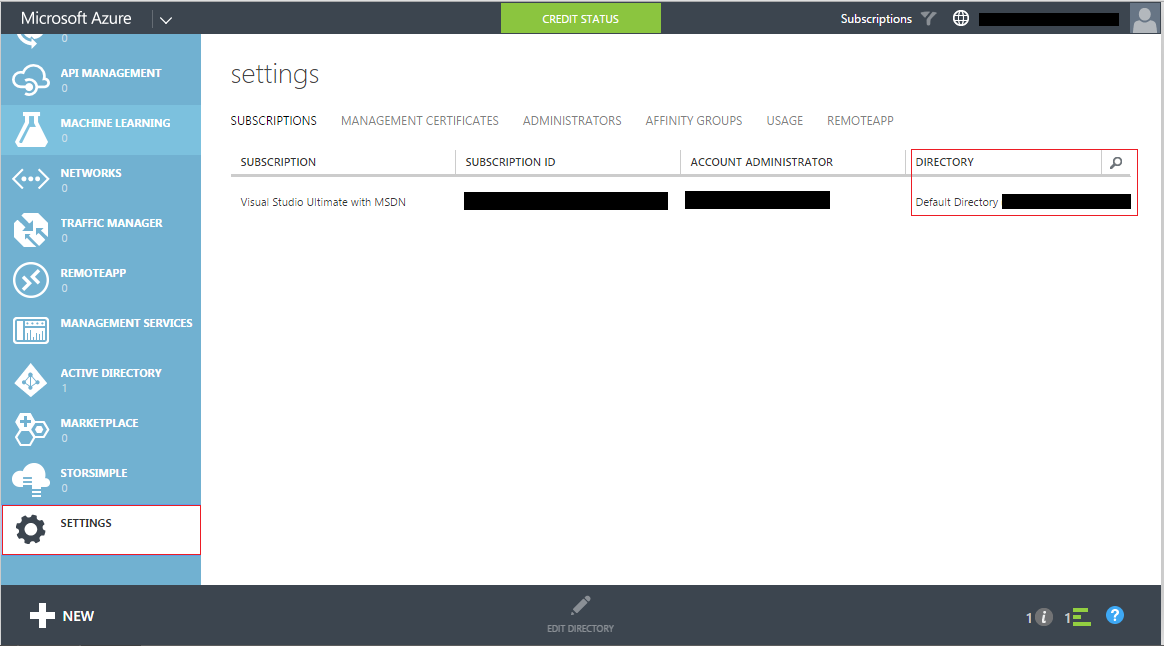
Creating an application that can be authenticated using clientid and secret can be done using the management portal. In the azure management portal, we need to create to the application under the default AD. To find the default AD you can check under the settings in the portal

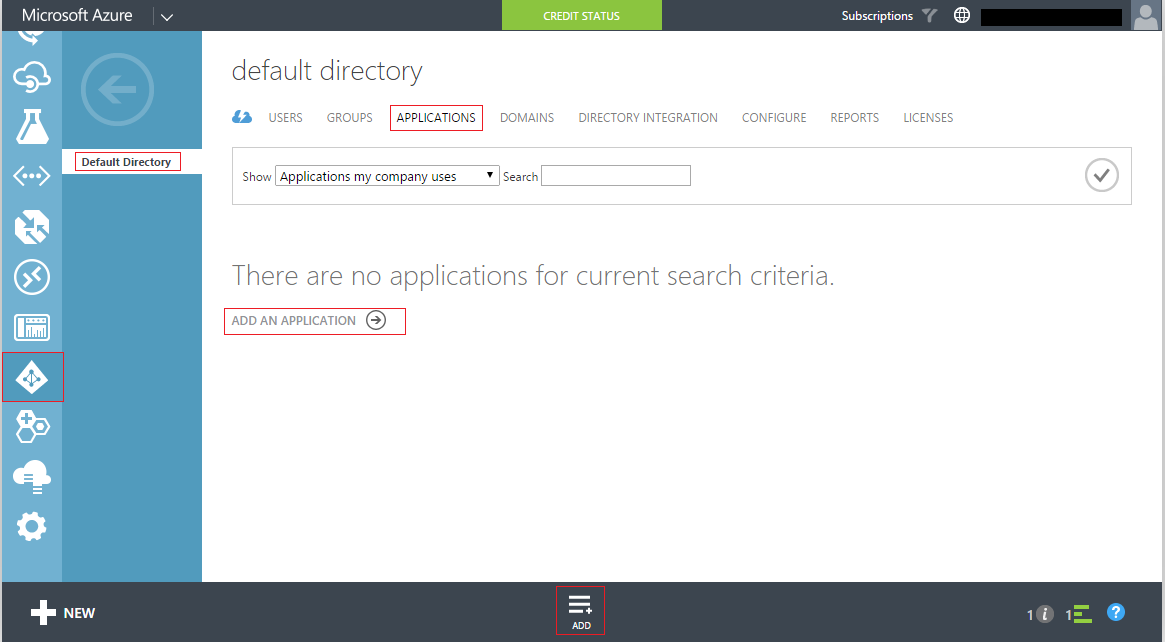
To add an application in the default, under Active Directory select the default AD and the applications tab and select 'Add an application'.

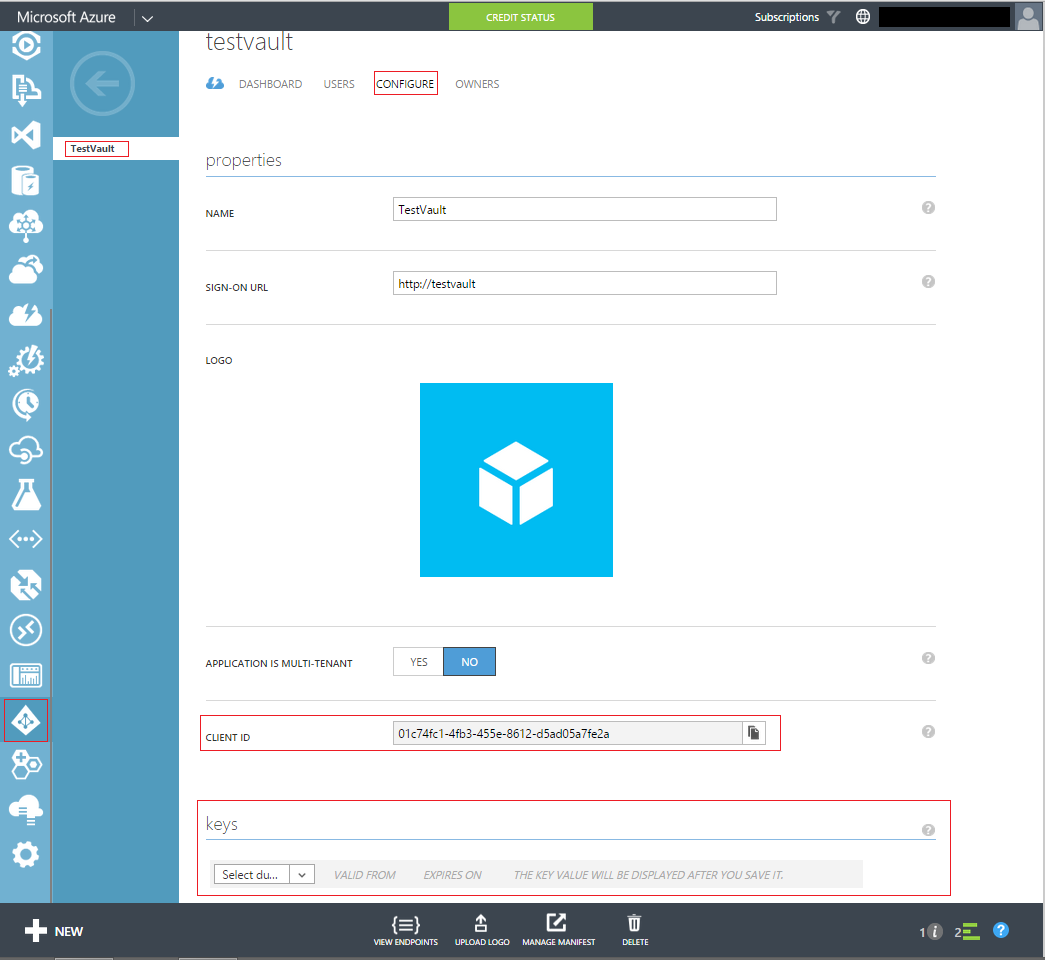
From the pop-up select 'Add an application my organization is developing' and give a name of your choice and of type 'Web Application AND/OR WEB API'. In the App properties window it asks for the 'Sign-On Url' and 'App ID Uri', for which you can give two unique values and is not mandatory that it should exists. On confirming these values the AD application would be created and you would be presented with the application properties. Under the 'Configure' tab, you can see the Client ID and below that there is an option to create the 'keys' which will be the secret.

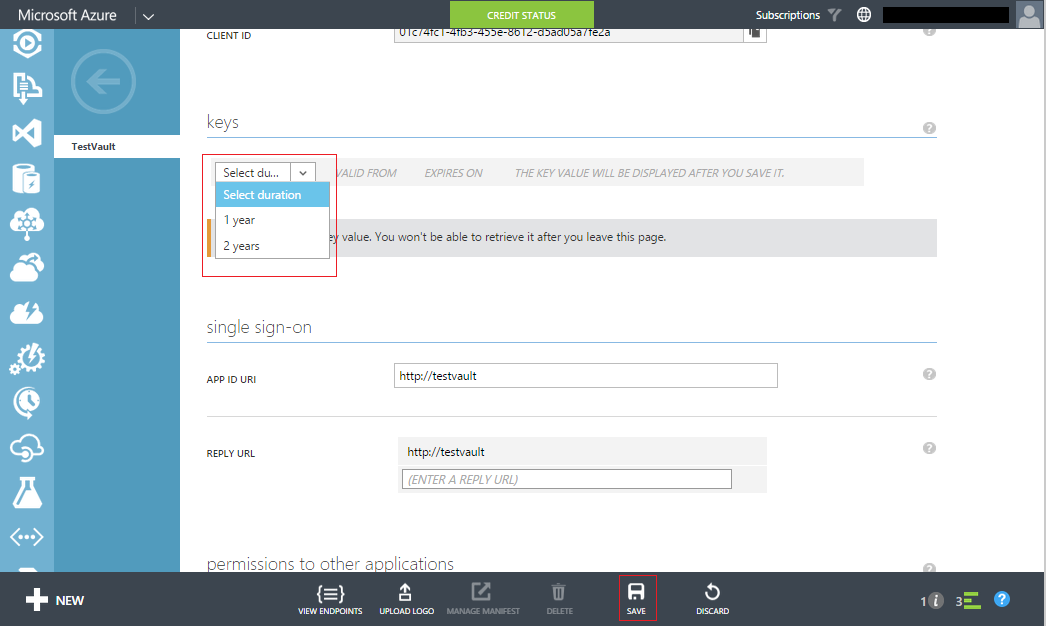
In the drop-down under the keys select the duration and choose a duration of your choice and save. On saving the secret will be generated. Copy this secret and keep for reference to use in the client application.

Now that we have created the application and have the clientid and the secret we need to authorize the application to access the key vault. For this we use the Set-AzureKeyVaultAccessPolicy from the powershell and provide the client id of the application that we have just created. The PermissionToKeys parameter determines the permission that the application would have on the keys in the vault which can take multiple comma separated values (all, backup, create, decrypt, delete, encrypt, import, get, list, restore, sign, wrapkey, unwrapkey, update and verify). Similarly for access to secrets in the keyvault you need to set PermissionToSecrets which can all take multiple values (all, delete, get, list and set).
PS C:\> Set-AzureKeyVaultAccessPolicy -VaultName 'TestVaultRahul' -ServicePrincipalName '01c74fc1-4fb3-455e-8612-d5ad05a7fe2a' -PermissionsToKeys all
Now using the clientid and the secret we can authenticate from the client application using it as below
var keyClient = new KeyVaultClient((authority, resource, scope) =>
{
    var adCredential = new ClientCredential(clientid, applicationSecret);
    var authenticationContext = new AuthenticationContext(authority, null);
    return authenticationContext.AcquireToken(resource, adCredential).AccessToken;
});
Using ClientId and Certificate
Creating an application that can be authenticated using the clientid and the certificate is only possible using powershell scripts, and these are again available with the key vault powershell scripts. For this we first need to create a certificate or if your organization already has provided one use that. Since this is for demo I would be creating a test certificate as explained here.
makecert -sv mykey.pvk -n "cn=AD Test Vault Application" ADTestVaultApplication.cer -b 03/03/2014 -e 06/05/2016 -r
pvk2pfx -pvk mykey.pvk -spc ADTestVaultApplication.cer -pfx ADTestVaultApplication.pfx -po test
Once we have the certificate, we can create a new AD application and specify certificate authentication for the application as shown below. Make sure that you give the full path to the certificate as below (mine was located under C:\cert)
Connect-AzureAD -DomainName '<domainname>'
$newADApplication = New-AzureADApplication -DisplayName 'TestVaultApplication'
Add-AzureADApplicationCredential -ObjectId $newADApplication.objectId -FilePath C:\cert\ADTestVaultApplication.cer
$newADApplication.appId
Once the application is created, we need to perform the same authorization steps as above to give the application access to the key vault, after which we can use the clientid (that would be output to the powershell console) and the certificate to authenticate the application. Make sure that the certificate is installed into the store so that it can be used by the application.
var keyClient = new KeyVaultClient((authority, resource, scope) =>
{
    var authenticationContext = new AuthenticationContext(authority, null);
    X509Certificate2 certificate;
    X509Store store = new X509Store(StoreName.My, StoreLocation.CurrentUser);
    try
    {
        store.Open(OpenFlags.ReadOnly);
        X509Certificate2Collection certificateCollection = store.Certificates.Find(X509FindType.FindByThumbprint, "E2F3EAE0A131EE0CF1FF1995A6ABA9F9462A0C03", false);
        if (certificateCollection == null || certificateCollection.Count == 0)
        {
            throw new Exception("Certificate not installed in the store");
        }

        certificate = certificateCollection[0];
    }
    finally
    {
        store.Close();
    }

    var clientAssertionCertificate = new ClientAssertionCertificate(applicationId, certificate);
    var result = authenticationContext.AcquireToken(resource, clientAssertionCertificate);
    return result.AccessToken;
});
You could use either ways to authenticate an application to Azure Key Vault. Using the certificate way would be more secure as you can also password protect your certificate so that it cannot be installed without having that. If using the client secret anybody having access to the configuration would be able to access the vault. Also make sure that you give the application's only necessary permissions for accessing keys and secrets while registering the application. You could use the sample used in the Getting Started with Azure Key Vault sample. The code in there uses clientId and secret, you could change it with the above code to use certificate authentication.
Key Vault supports Managed Service Identity which makes authenticating with it even more easier if your application is deployed in Azure. You no longer have to add any configuration related to key vault to the applications config file.
Rahul Nath Newsletter
Join the newsletter to receive the latest updates in your inbox.
