Windows 8 Series - Exploring OAuth: c# and 500px
Table of Contents
The days when we ourselves developed sites and application for our own services are long gone. Now it’s about building api’s, sharing data and going social that's the buzz. No more is it a feasible solution to build applications for the numerous devices, that varies in size,shape and by the software that runs in them. The best thing then would be to expose API’s so that anybody interested can build applications for you. In any case the last thing that you would want to share is your users credentials. This is where OAuth comes into picture. Put it simply OAuth is an open protocol that allows secure access to the data that you want to expose, usually the API.
Most of us would have seen OAuth in action. Whenever you logon to a site using any of the social network sites identity,be it Facebook or Twitter it’s OAuth that is behind the scenes that helps the site to get the required information from the social entity and you don’t have to disclose your social credentials to the site that you actually intended to visit. If you have never seen this now is a good time to. Try it here
Now that you have seen how it works lets dig deeper to see how to get this feature into the apps that you are building. There are a lot of c# libraries,so are for other languages, that will handle the OAuth part for you like some listed here, keeping the mystery unsolved.
I chose the web-api provided by 500px, which does secure its data using OAuth. You can see the complete documentation of the api here. It is the Authentication part in that, that we would be concentrating here on, using OAuth 1.0

On a high level as seen above,OAuth has 3 steps.
- Getting a request token
- Authorizing the user
- Getting the access token.
The access token is then used to access any protected resource.
The following definitions, as from the OAuth specification is worth knowing before we delve in
Service Provider: A web application that allows access via OAuth.
User: An individual who has an account with the Service Provider.
Consumer: A website or application that uses OAuth to access the Service Provider on behalf of the User.
Protected Resource(s): Data controlled by the Service Provider, which the Consumer can access through authentication.
Consumer Developer: An individual or organization that implements a Consumer.
Consumer Key: A value used by the Consumer to identify itself to the Service Provider.
Consumer Secret: A secret used by the Consumer to establish ownership of the Consumer Key.
Request Token: A value used by the Consumer to obtain authorization from the User, and exchanged for an Access Token.
Access Token: A value used by the Consumer to gain access to the Protected Resources on behalf of the User, instead of using the User’s Service Provider credentials.
Token Secret: A secret used by the Consumer to establish ownership of a given Token.
OAuth Protocol Parameters: Parameters with names beginning with oauth_.
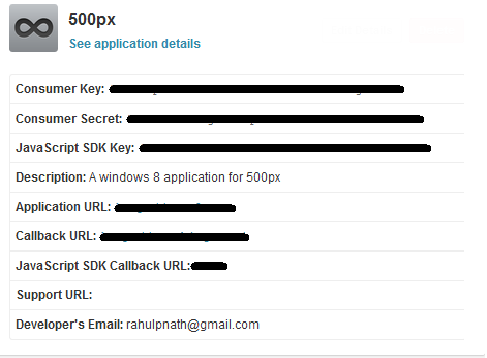
Before getting on to the steps we would need to register the application that is going to consume the web api, to get the Consumer Key and Consumer Secret required in OAuth.You can do that here for 500px. All web-api’s supporting OAuth would have such a page, as registering provides us with the keys. If the application does not have a callback url, like in case you are developing for a phone or desktop application you can specify any url you want.

The base URL for 500px web-api is ‘https://api.500px.com/v1/’. All further references to url’s would be relative to this
Getting the Request Token
To get the request token we need to make a POST request to oauth/request_token, which expects the parameters CallbackUrl,ConsumerKey,Nonce,SignatureMethod,Timestamp and OAuthVersion. _All these should be in the same order,i.e alphabetical. All these parameters needs to be signed using the consumer secret and the signature too needs to be attached in the request data. This data goes as part of the ‘_Authorization’ header of the request.
public async Task<OauthToken> RequestToken()
{
    AuthorizationParameters = new Dictionary<string, string>(){
                      {OauthParameter.OauthCallback, OAuthCallbackUrl},
                      {OauthParameter.OauthConsumerKey, consumerKey},
                      {OauthParameter.OauthNonce, Nonce()},
                      {OauthParameter.OauthSignatureMethod,OAuthSignatureMethod},
                      {OauthParameter.OauthTimestamp, TimeStamp()},
                      {OauthParameter.OauthVersion, OAuthVersion}
                        };
    string response = await this.MakeRequest(RequestType.POST)
        .Sign(OAuthRequestUrl, String.Empty)
        .ExecuteRequest(OAuthRequestUrl);
}
The above function handles adding the parameters required and executing the request.
The MakeRequest call specifies the kind of HTTP call that you want to make, here it being a POST. The call to the function Sign, _signs the parameters and adds the signature details to the parameter list. It uses the same signature method as specified in the parameter list, _HMAC-SHA1
private Oauth500px Sign(string Url, string tokenSecret)
{
    String SigBaseStringParams = String.Join("&", AuthorizationParameters.Select(key => key.Key + "=" + Uri.EscapeDataString(key.Value)));
    String SigBaseString = requestType.ToString() + "&";
    SigBaseString += Uri.EscapeDataString(Url) + "&" + Uri.EscapeDataString(SigBaseStringParams);

    IBuffer KeyMaterial = CryptographicBuffer.ConvertStringToBinary(consumerSecret + "&" + tokenSecret, BinaryStringEncoding.Utf8);
    MacAlgorithmProvider HmacSha1Provider = MacAlgorithmProvider.OpenAlgorithm(OAuthSignatureMethodName);
    CryptographicKey MacKey = HmacSha1Provider.CreateKey(KeyMaterial);
    IBuffer DataToBeSigned = CryptographicBuffer.ConvertStringToBinary(SigBaseString, BinaryStringEncoding.Utf8);
    IBuffer SignatureBuffer = CryptographicEngine.Sign(MacKey, DataToBeSigned);
    String Signature = CryptographicBuffer.EncodeToBase64String(SignatureBuffer);
    AuthorizationParameters.Add(OauthParameter.OauthSignature, Signature);
    return this;
}
The ExecueRequest handles adding the details to the authorization header and making the request and returning the response.
A successful call to request token will return Request Token and a _token secret _which is to be used in the subsequent call to Authorize
Authorize
The call to authorize brings up the login page of the Service Provider(500px),if the user is not already logged in and is used to authorize the request token that has been just obtained. The request to authorize is to be made at oauth/authorize, with the request token received in the previous call.
public async Task<OauthToken> AuthorizeToken()
{
    var tempAuthorizeUrl = OAuthAuthorizeUrl + "?oauth_token=" + Token.Token;
    System.Uri StartUri = new Uri(tempAuthorizeUrl);
    System.Uri EndUri = new Uri(OAuthCallbackUrl);
    var auth =
        await
        WebAuthenticationBroker.AuthenticateAsync(WebAuthenticationOptions.None, StartUri, EndUri);
    var responseData = auth.ResponseData;
}
Since this is for Windows8 I use the WebAuthenticationBroker to issue the request to authorize the user, which will open up a nice UI asking the user credentials. On entering the login details and getting successfully authorized, we would get the request token and the oauth_verifier code.
Access Token
This final step gives you the access token, that is used for any request to a protected resource. A POST request it to made to the url oauth/access_token, with the parameters _ConsumerKey, Nonce, SignatureMethod, Timestamp, RequestToken, VerifierCode and OAuthVersion, _again all alphabetical sorted and signed using the consumer key and token secret that we got in the call to request token.
public async Task<OauthToken> AccessToken()
{
    AuthorizationParameters = new Dictionary<string, string>()
            {
                {OauthParameter.OauthConsumerKey, consumerKey},
                {OauthParameter.OauthNonce, Nonce()},
                {OauthParameter.OauthSignatureMethod,OAuthSignatureMethod},
                {OauthParameter.OauthTimestamp, TimeStamp()},
                {OauthParameter.OauthToken,Token.Token},
                {OauthParameter.OauthVerifier,Token.Verifier},
                {OauthParameter.OauthVersion, OAuthVersion}
            };
    var response = await this.MakeRequest(RequestType.POST)
        .Sign(OAuthAccessUrl, Token.SecretCode)
        .ExecuteRequest(OAuthAccessUrl);
}
The SecretCode, that was obtained from the call to Requesttoken is also passed to the function Sign.
A successful call would return you the AccessToken and the Access token’s secret code for that. All subsequent request to any protected resource needs the AccessToken and should be signed using ConsumerKey and the access token’s secret code.
From now on any request to a protected resource should be made with the following parameters: ConsumerKey,Nonce,SignatureMethod,Timestamp,OAuthToken and OAuthVersion along with any additional parameters_. _This should be signed using the consumer secret and the access token secret code.
The ExecuteRequest handles for this and is a genenric function that would allow you to specify the return type that you are expecting and the Url of the protected resource
public async Task<T> ExecuteRequest<T>(string Url, Dictionary<string, string> Parameters) where T : class
{
    AuthorizationParameters = new Dictionary<string, string>()
                                  {
                                      {OauthParameter.OauthConsumerKey, consumerKey},
                                      {OauthParameter.OauthNonce, Nonce()},
                                      {OauthParameter.OauthSignatureMethod, OAuthSignatureMethod},
                                      {OauthParameter.OauthTimestamp, TimeStamp()},
                                      {OauthParameter.OauthToken, Token.Token},
                                      {OauthParameter.OauthVersion, OAuthVersion}
                                  };

    string RequestUrl;
    if (Parameters != null && Parameters.Count > 0)
    {
        RequestUrl = Url + "?" +
                     String.Join("&",
                     Parameters.Select(a => a.Key + (string.IsNullOrEmpty(a.Value) ? string.Empty : "=" + Uri.EscapeDataString(a.Value))).ToArray());
        foreach (var parameter in Parameters)
        {
            AuthorizationParameters.Add(parameter.Key, parameter.Value);
        }
    }
    else
        RequestUrl = Url;
    var response = await this.MakeRequest(requestType).Sign(Url, Token.SecretCode).ExecuteRequest(RequestUrl);
    if (string.IsNullOrEmpty(response))
        return null;
    DataContractJsonSerializer json = new DataContractJsonSerializer(typeof(T));
    T dat = json.ReadObject(new MemoryStream(Encoding.UTF8.GetBytes(response))) as T;
    return dat;
}
A sample way to use this would be as below
Oauth500Px.MakeRequest(Oauth500px.RequestType.GET).ExecuteRequest<PhotoDetails>(
                    photoDetails, null);
The code for the OAuth wrapper for 500px specific toWindows8 is available here for download. Feel free to modify it and use it. I will be refactoring the code out a bit more and also add a few functionalities. So in case you wanted this specific version do keep a copy for yourself.
PS: Incorporating an offline comment that I had got, on putting a space after each full stop and hope I have not missed any.
Rahul Nath Newsletter
Join the newsletter to receive the latest updates in your inbox.

