Getting Started with Amazon Cognito: Setting Up User Pools and App Clients
Discover how to configure Amazon Cognito User Pools and App Clients, then implement the Authorization Code OAuth Flow using the hosted UI and Postman. Learn to securely handle user sign-in, authorization, and token retrieval for your web, mobile, or API applications.
Amazon Cognito is a user identity platform that helps you manage sign-up, sign-in, and access control for your applications
Whether you're working on a web app, mobile app, or API, Cognito gives you a secure and scalable way to handle users, support multi-factor authentication, social logins, and more
In this article, let's learn about Cognito User Pools and App Clients and how to set them up.
Thanks to AWS for sponsoring this blog post.
Core Concepts
Amazon Cognito User Pools are managed user directories that handle sign‑up, sign‑in, and user management for your application. They store user profiles securely and support authentication via username/password, social identity providers, or SAML/OIDC providers.
App Clients represent applications that connect to the user pool. They define how the app interacts with Cognito, including allowed authentication flows, callback URLs, and token lifetimes. Each app client has its own ID (and optional secret for secure server‑side apps).
Setting Up User Pools and App Client
To get started with setting up User Pools and App Client head over to Amazon Cognito in AWS Console and click the 'Create User Pool' button.
This prompts you with a dialog that allows to setup both the User Pool and the App Client in one go.
Choose the application type that you are looking to protect using Cognito. For this example, I will choose a 'Traditional web application'.
Choosing "Traditional Web Application" means Cognito will use the Authorization Code Grant flow (with PKCE) suited for server‑side web apps that can securely store a client secret, rather than SPAs or native/mobile apps.
This choice will affect the kind of authorization flows that will be set up by default on your app client.
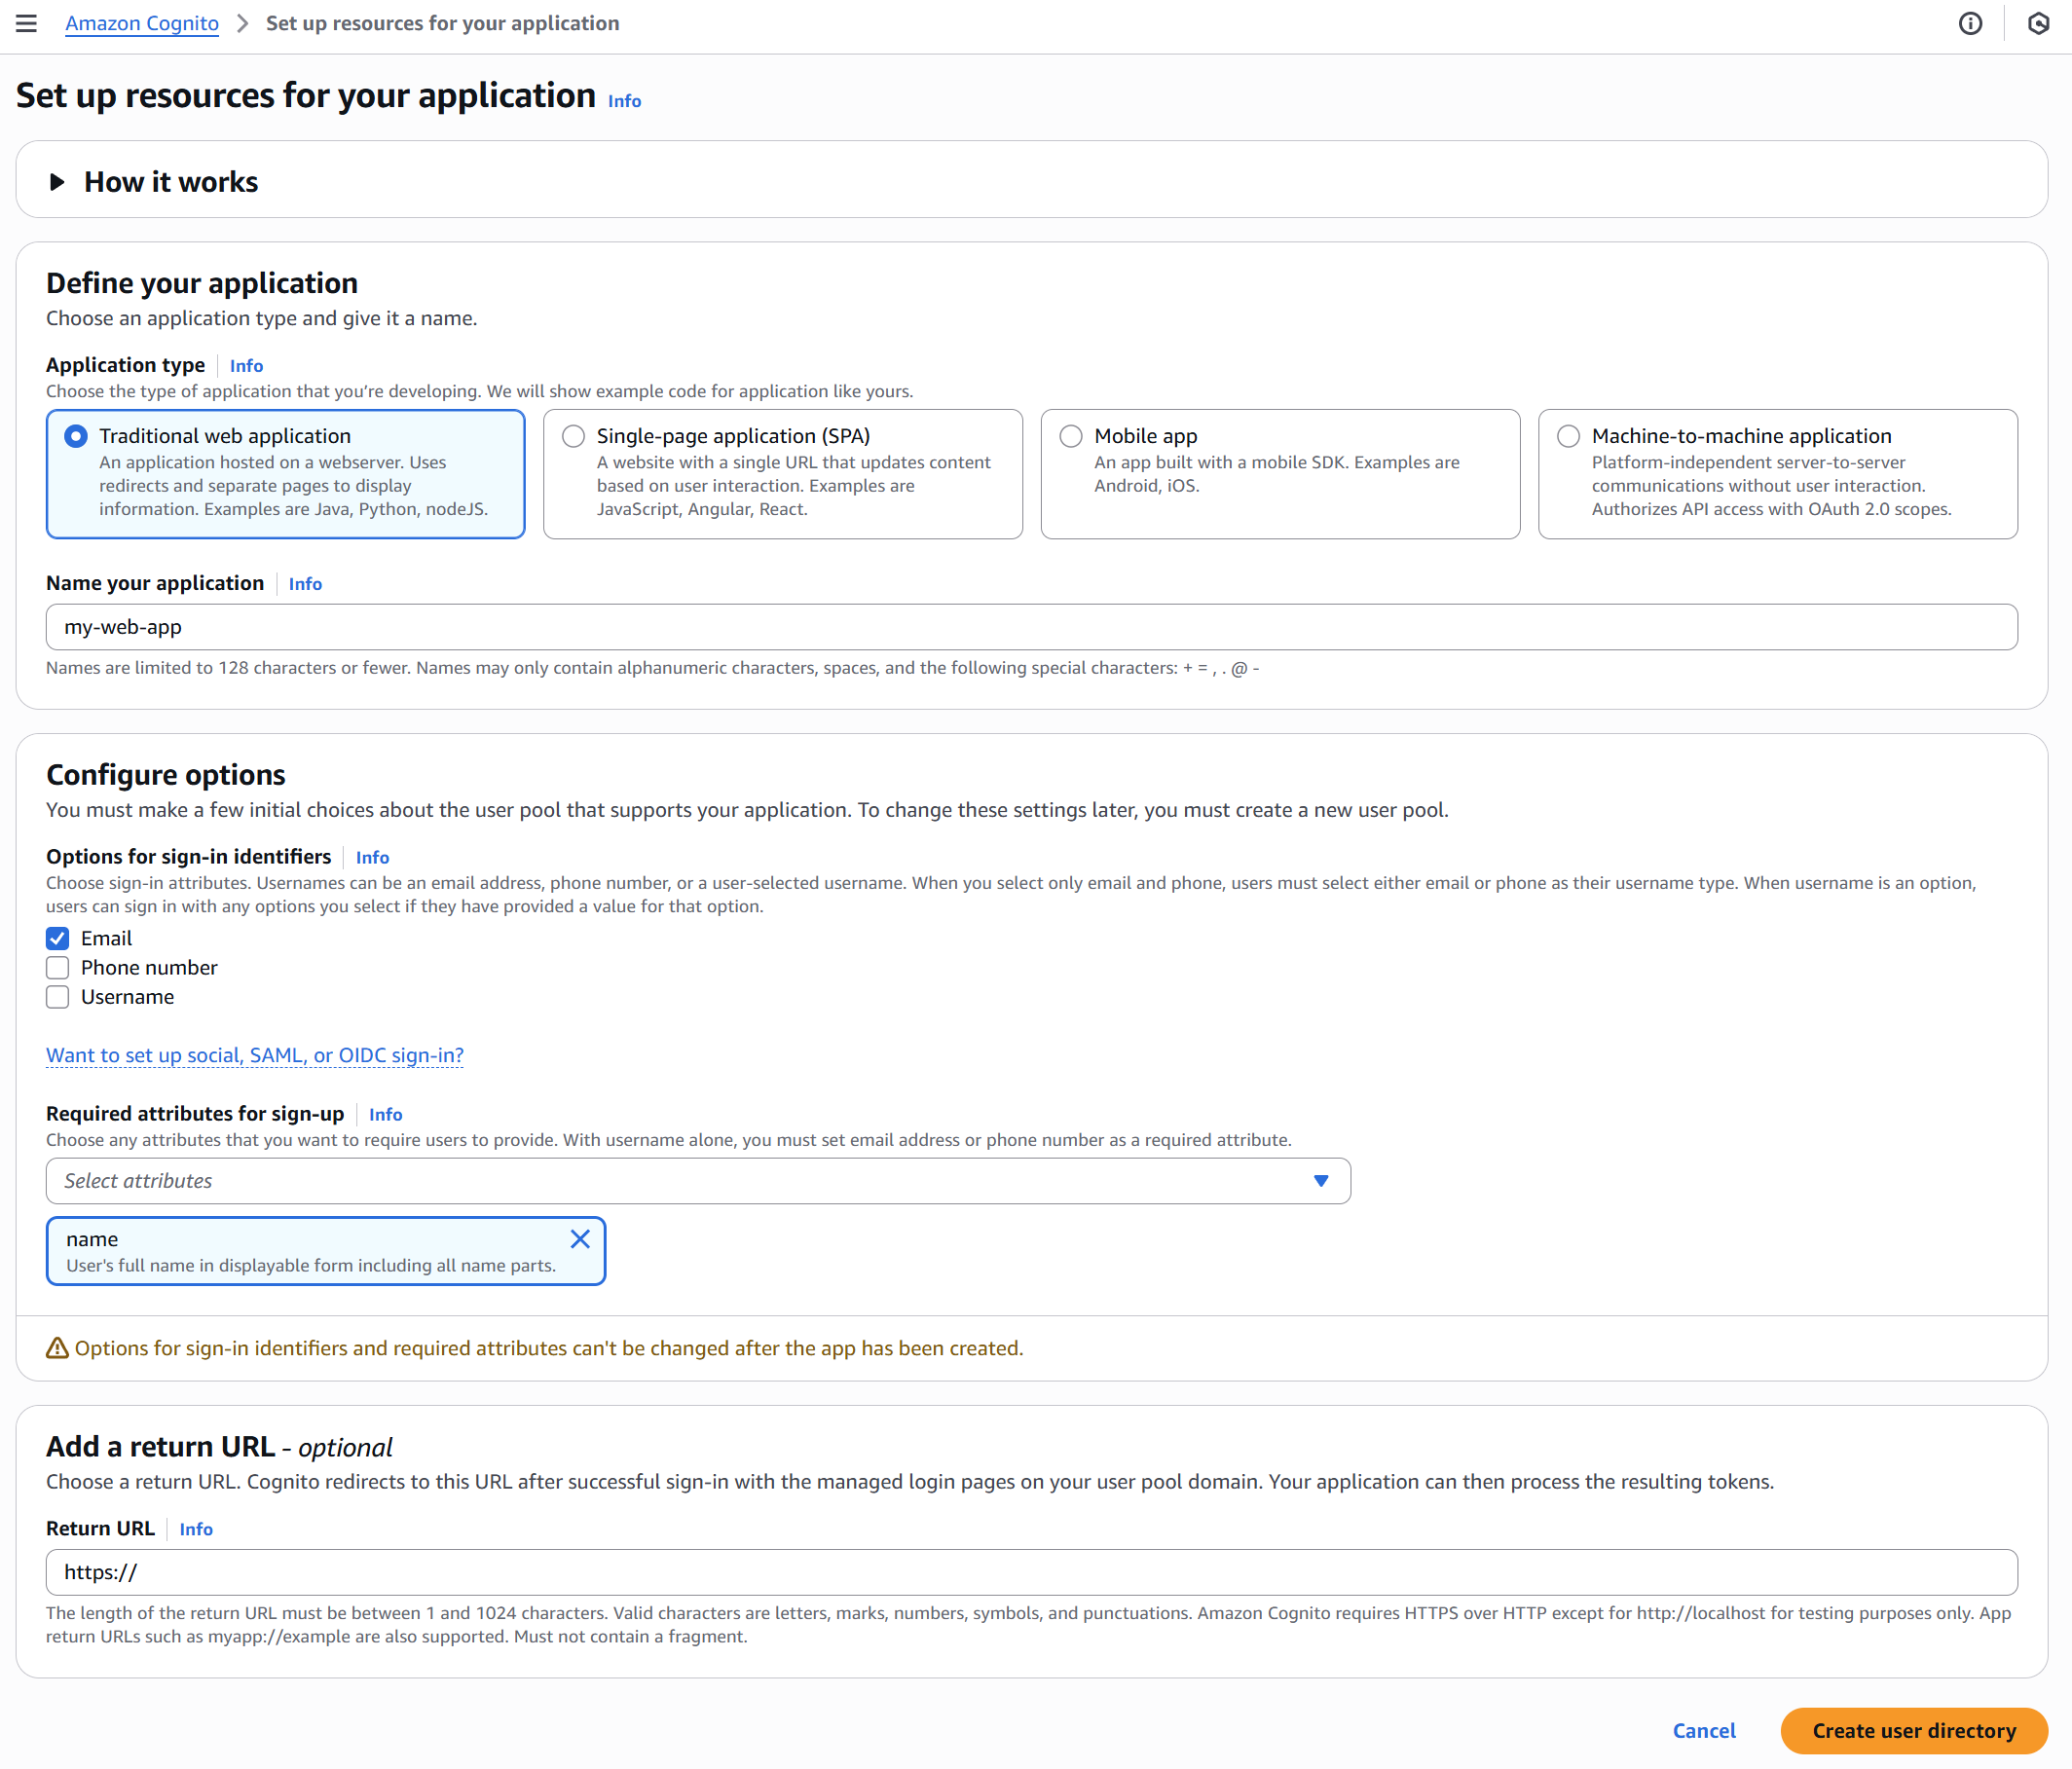
You can also configure the sign-in identifiers you want to support for users of your application and also any additional attributes you would like to capture on signup.
In the above example I have specified 'Email' as the sign-in identifier and have also specified to capture name as an additional attribute on sign up.
You also need to specify a return URL (which will be your app URL endpoint), that will be used by Cognito to redirect to after a successful sign in. We will see more on this shortly.
Once you have all the details entered, click 'Create user directory'

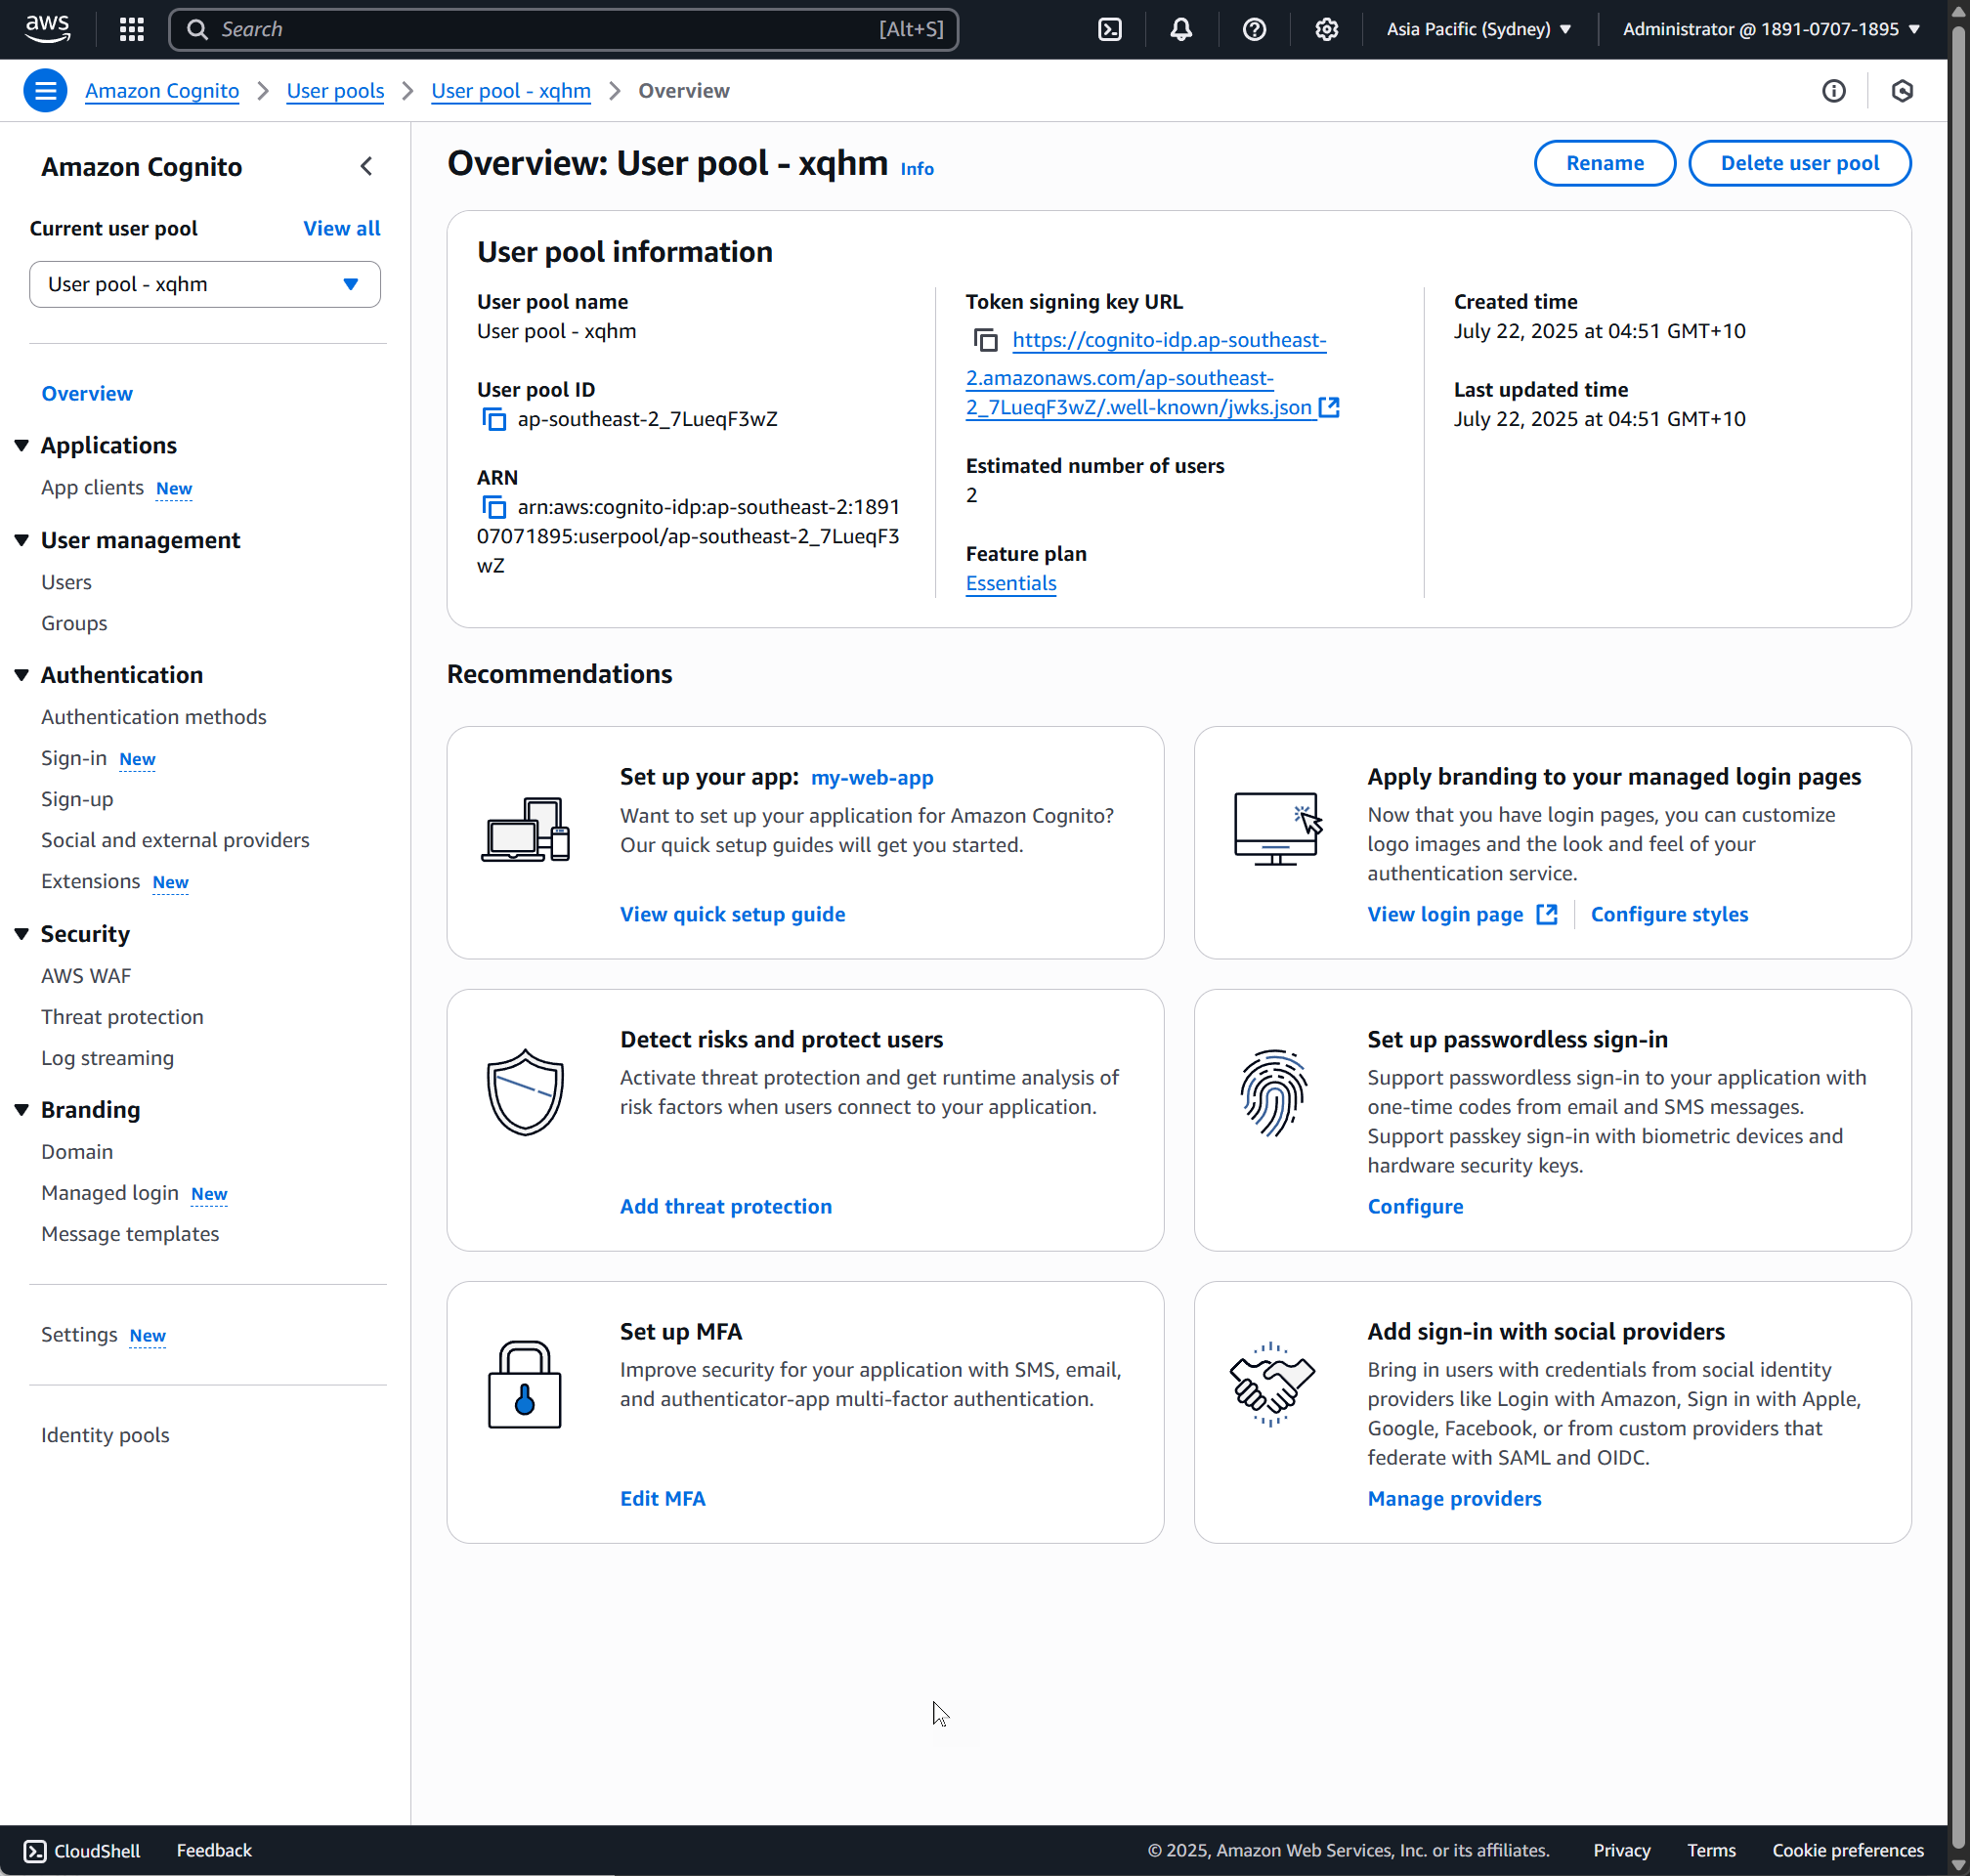
You have successfully created both a User Pool and an App Client. Navigate into the user pool to see the full details.
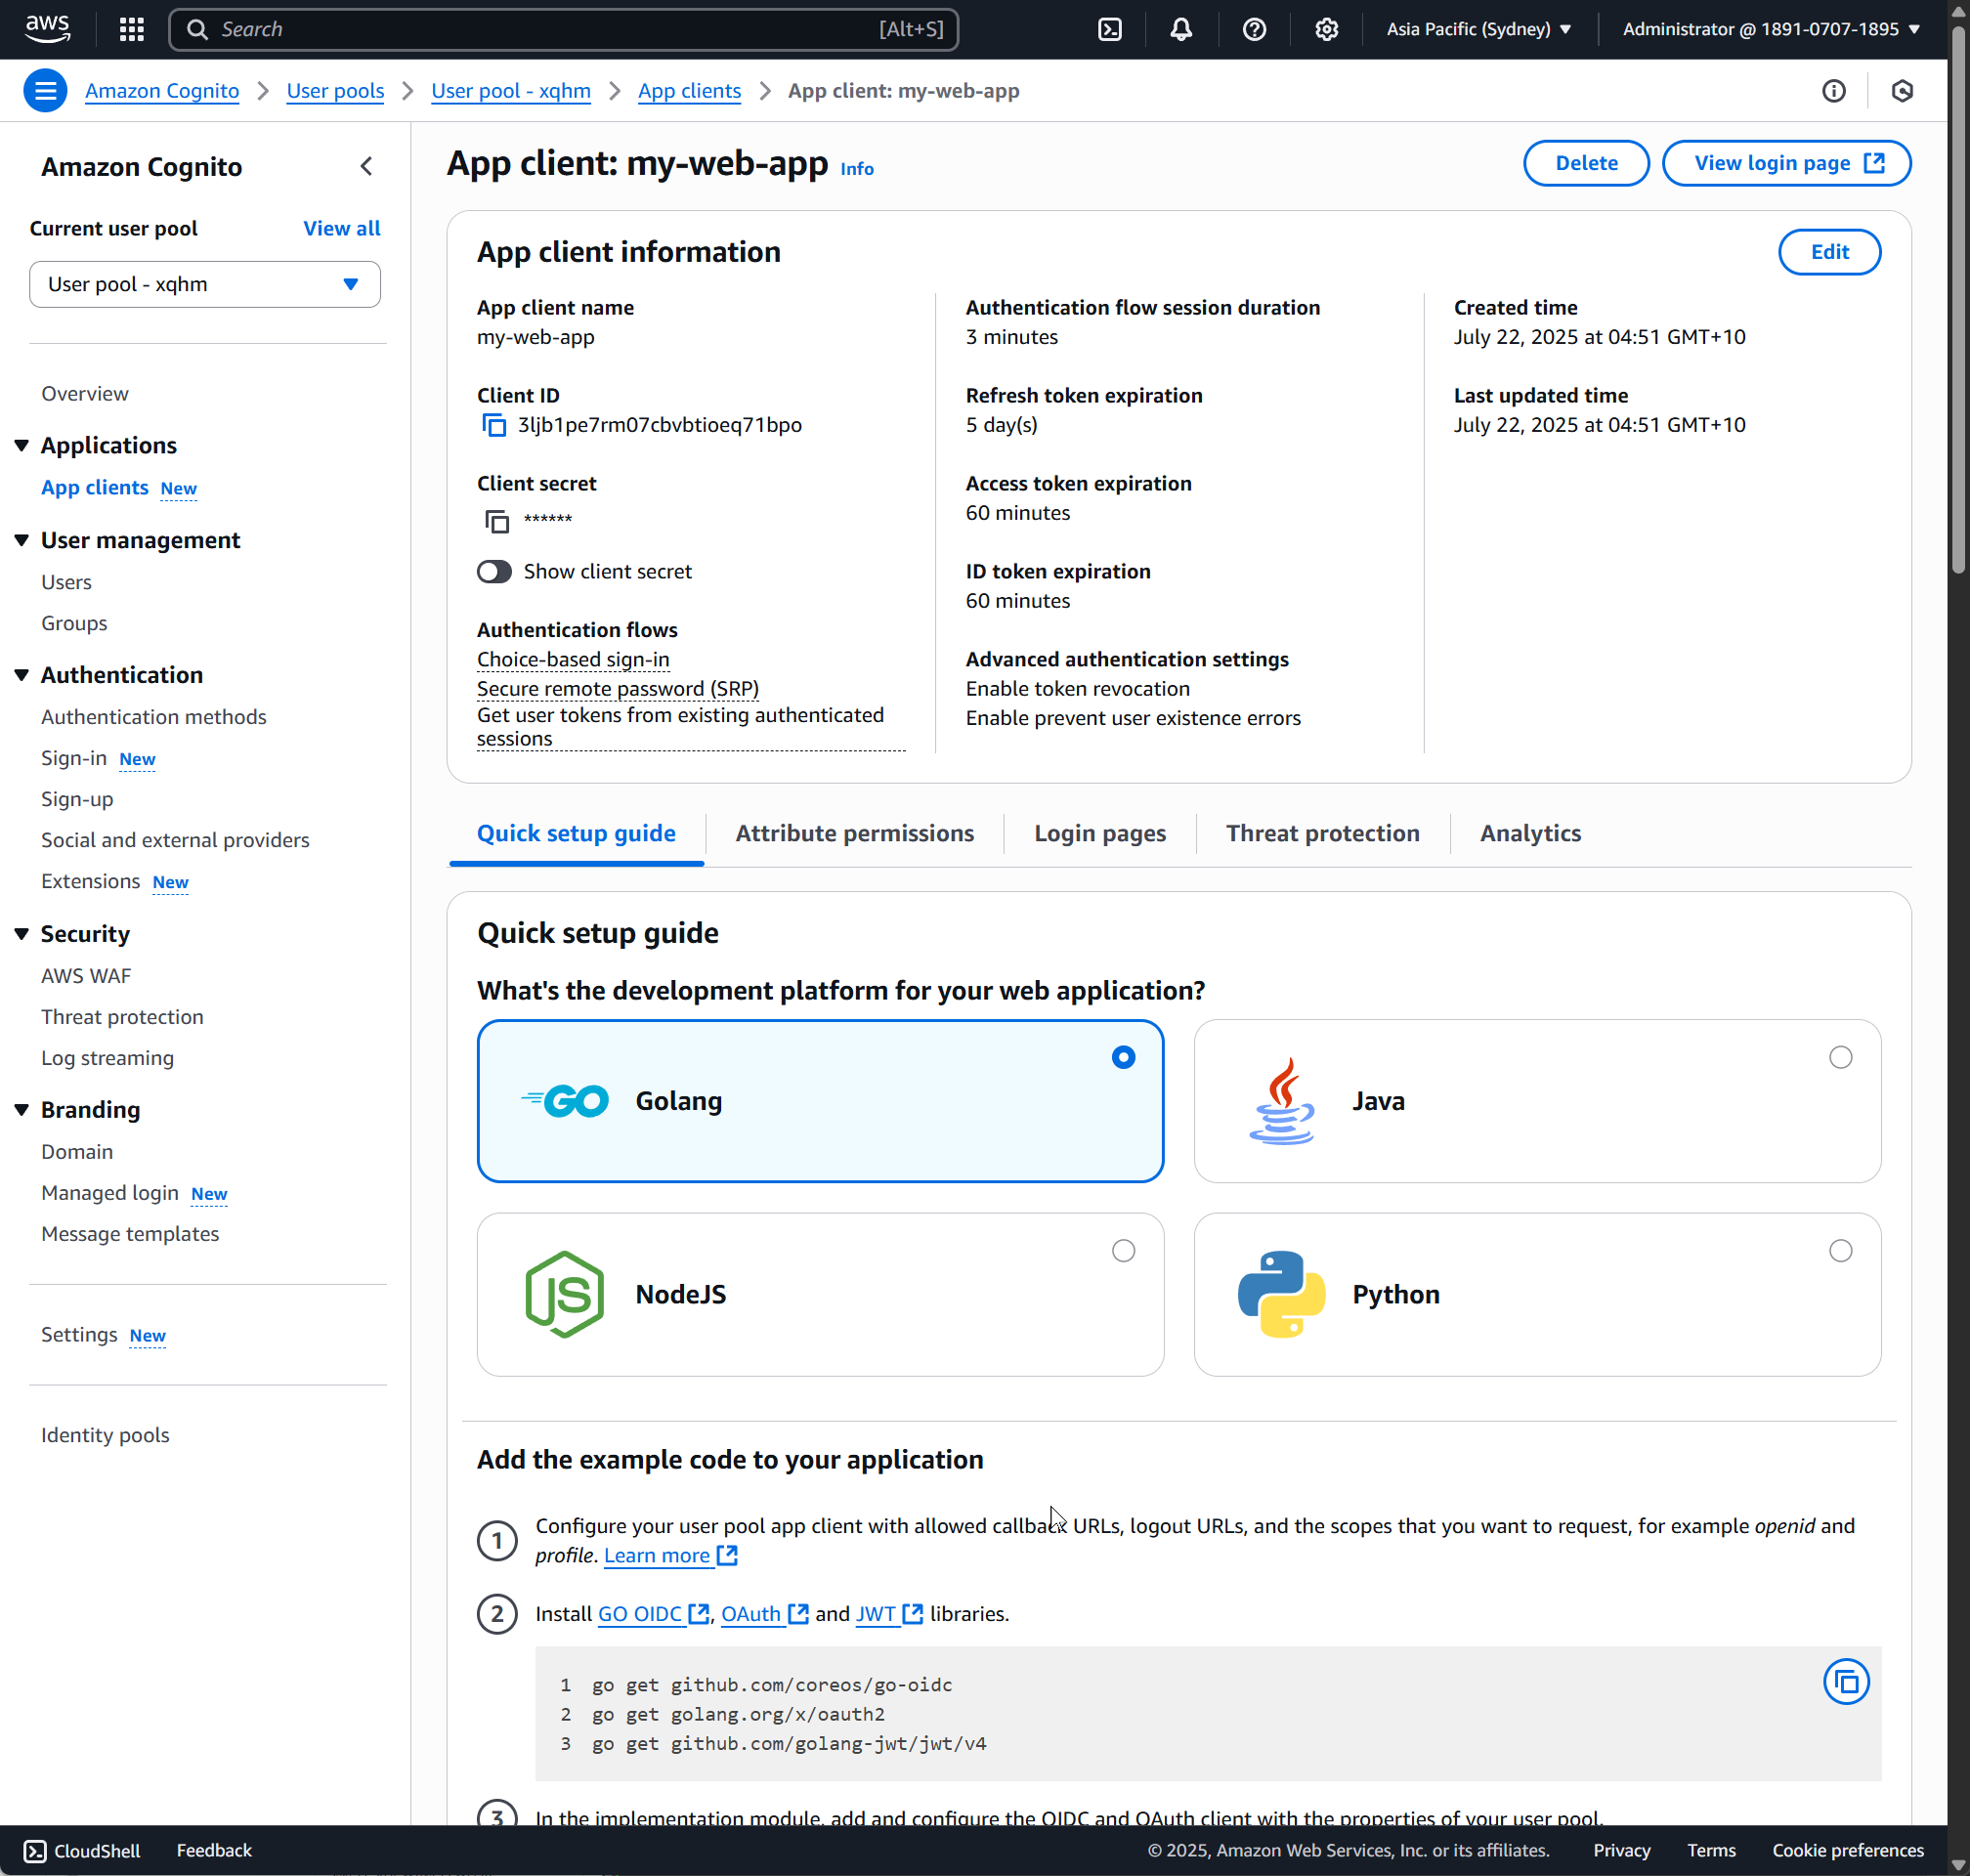
Navigate to the App clients section to see the detail of the application - mainly the Client ID and Client Secret.
We will use this to connect to the Cognito client to get a token.
Cognito Authorization Code Token Flow
Since we chose 'Traditional Web Application" as our application type in Cognito when setting up the App Client, we have opted into the Authorization Code OAuth flow.
The Authorization Code Flow is an OAuth 2.0 process where the app first redirects the user to the identity provider’s login page.
After successful login, the provider sends back a short‑lived authorization code to the app’s backend. The backend then securely exchanges this code for tokens (ID token, access token, refresh token) directly from the provider.
This flow keeps tokens off the browser and is ideal for server‑side web apps that can safely store secrets.
Under the App Client, you have the Login Page URL. You can set up a custom domain for this URL based on your application.
Navigate to the Login URL.
You will be presented with a Cognito Hosted UI. You have options to customise this page.

Since this is the first time here, you can click 'Create an account', which will show you the account creation form.

Once you successfully create an account login, it will redirect you to the URL with a code parameter in the URL like below.
https://www.rahulpnath.com/?code=8a066085-9092-4d0a-a837-ada9532e9305
For this example since I haven't setup an application to listen to this URL to exchange this for a code, we will use Postman.
Pass in the clientId, clientSecret, grantType, redirectUrl and the code that you received in the call back to the oauth2/token endpoint as shown below.
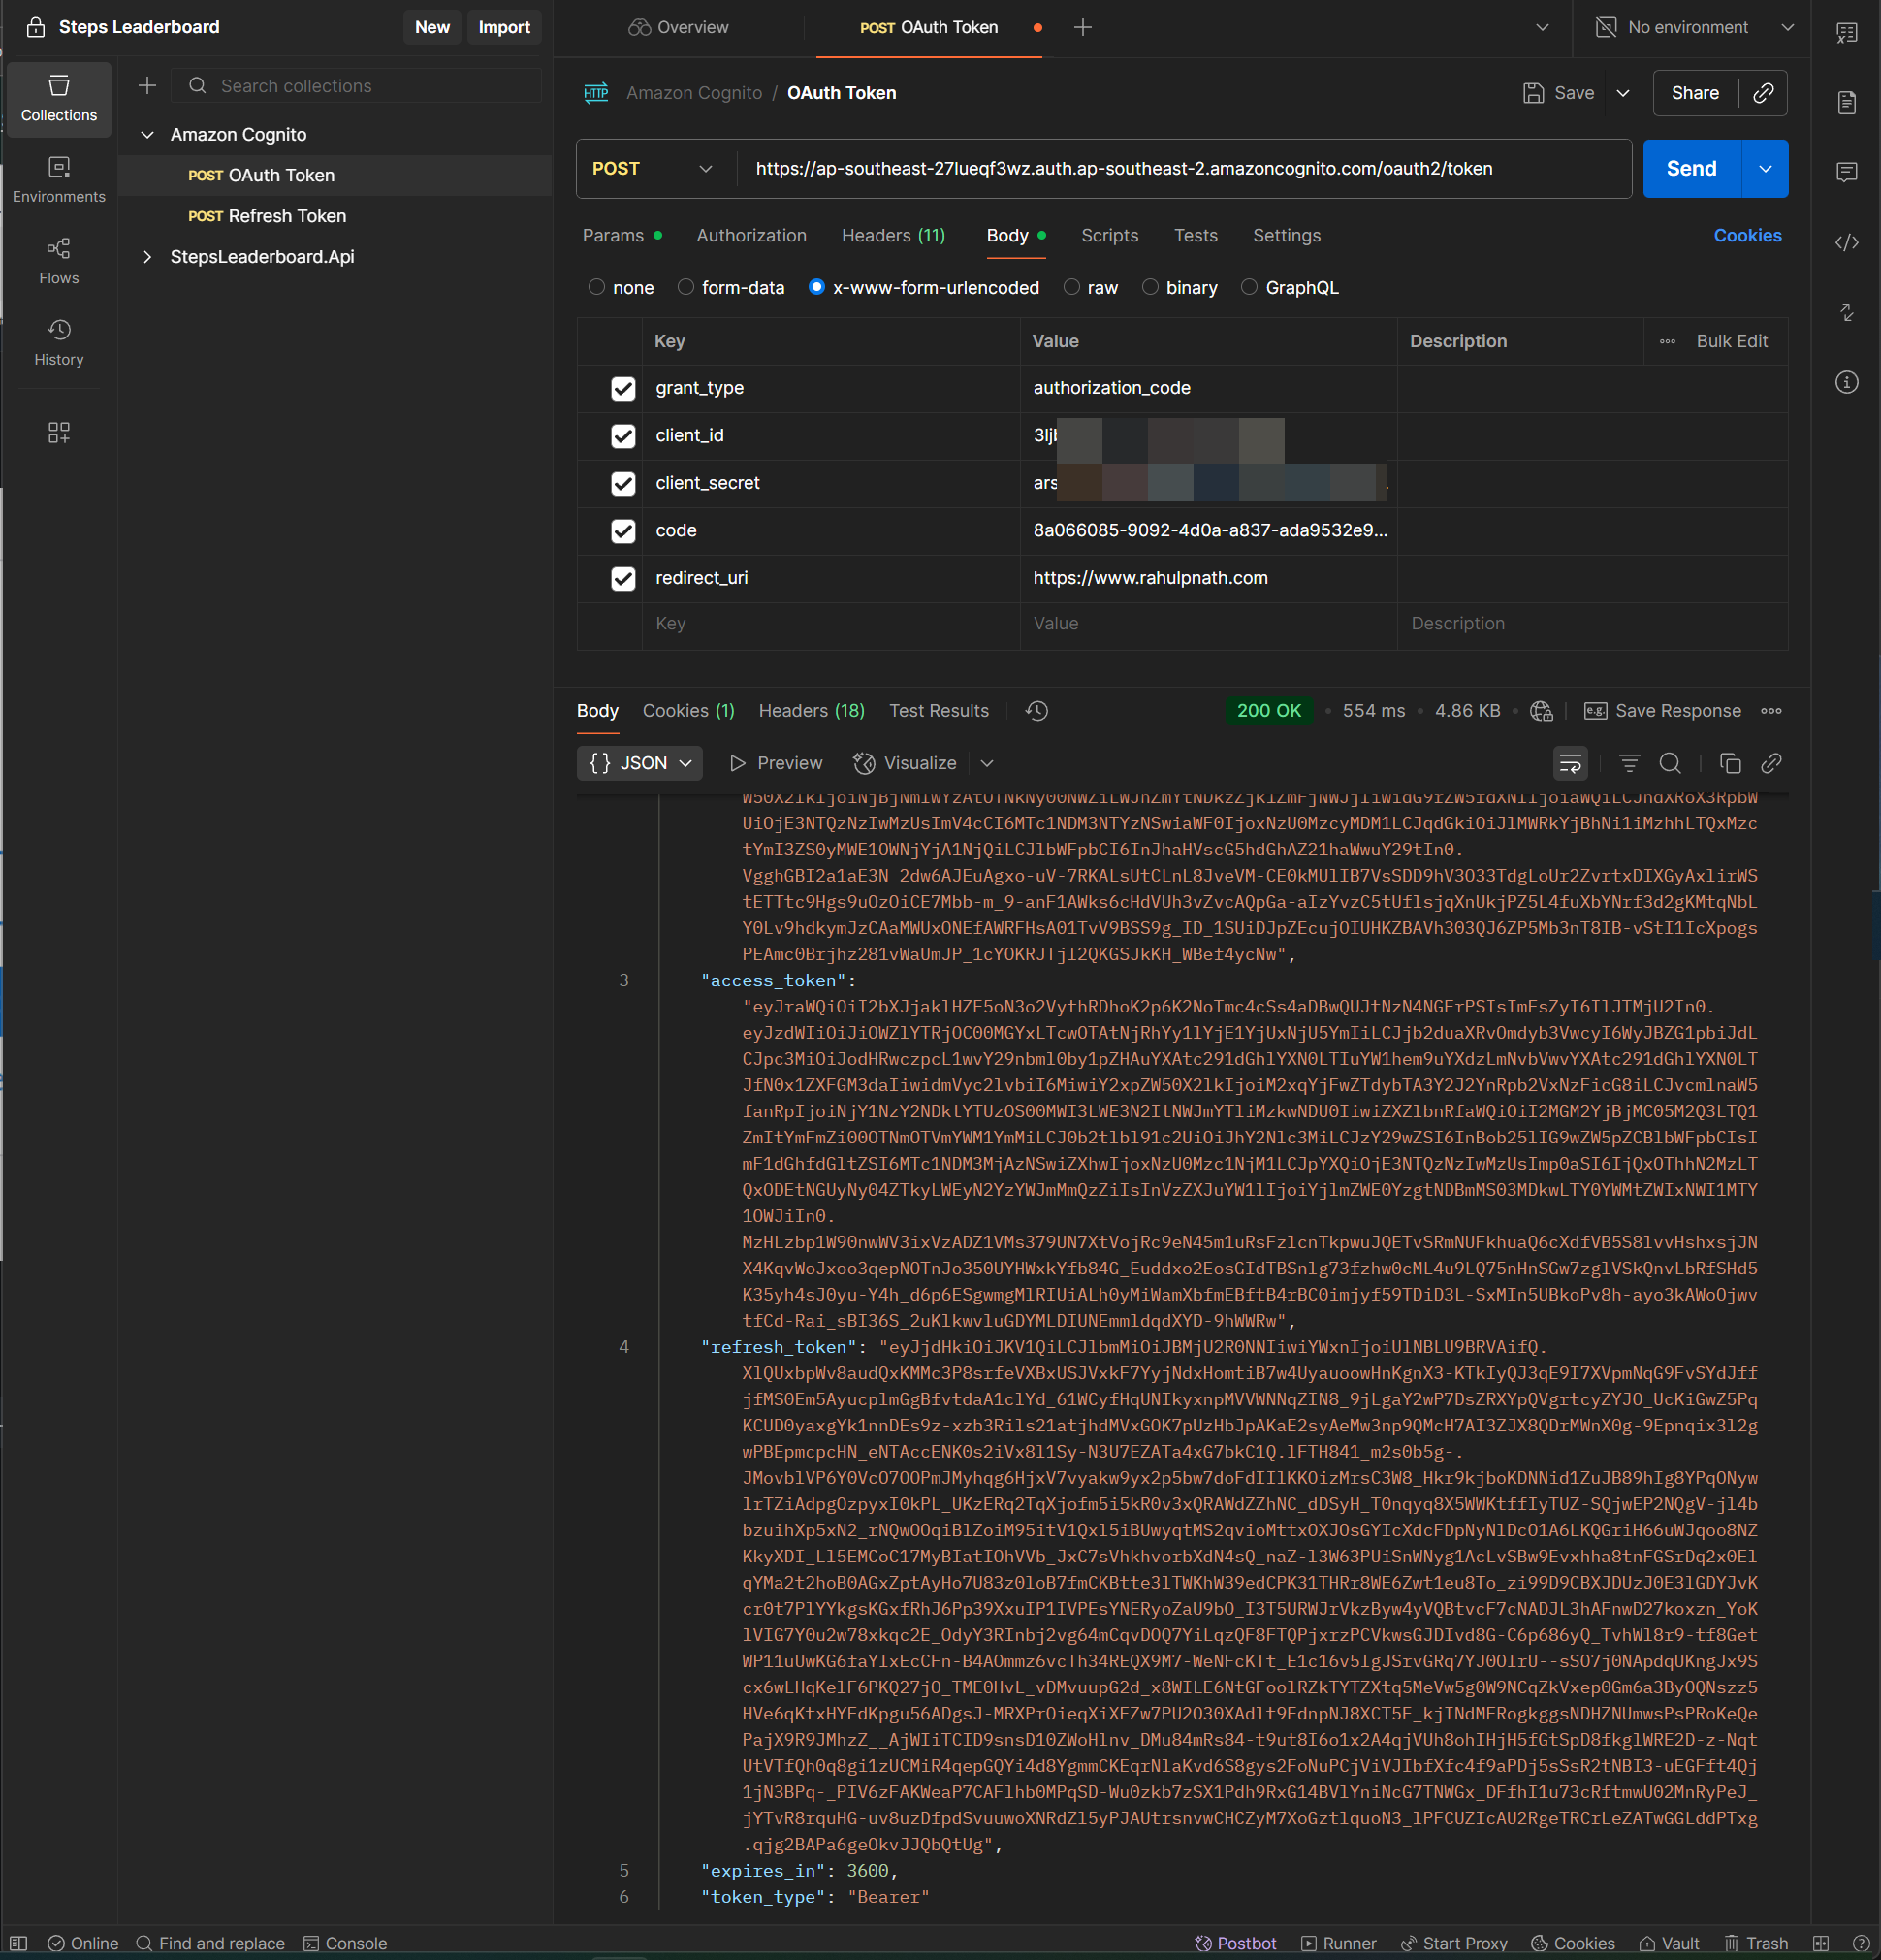
You will get back the idToken, accessToken and also a refreshToken.
- idToken – Contains user profile information (name, email, etc.) in JWT form; used by the app to identify the user.
- accessToken – Grants access to protected APIs/resources; contains scopes and permissions.
- refreshToken – Used to get new ID and access tokens without requiring the user to log in again.
You can exchange the refreshToken for a fresh idToken and accessToken once the original token expires, by making a call as shown below.
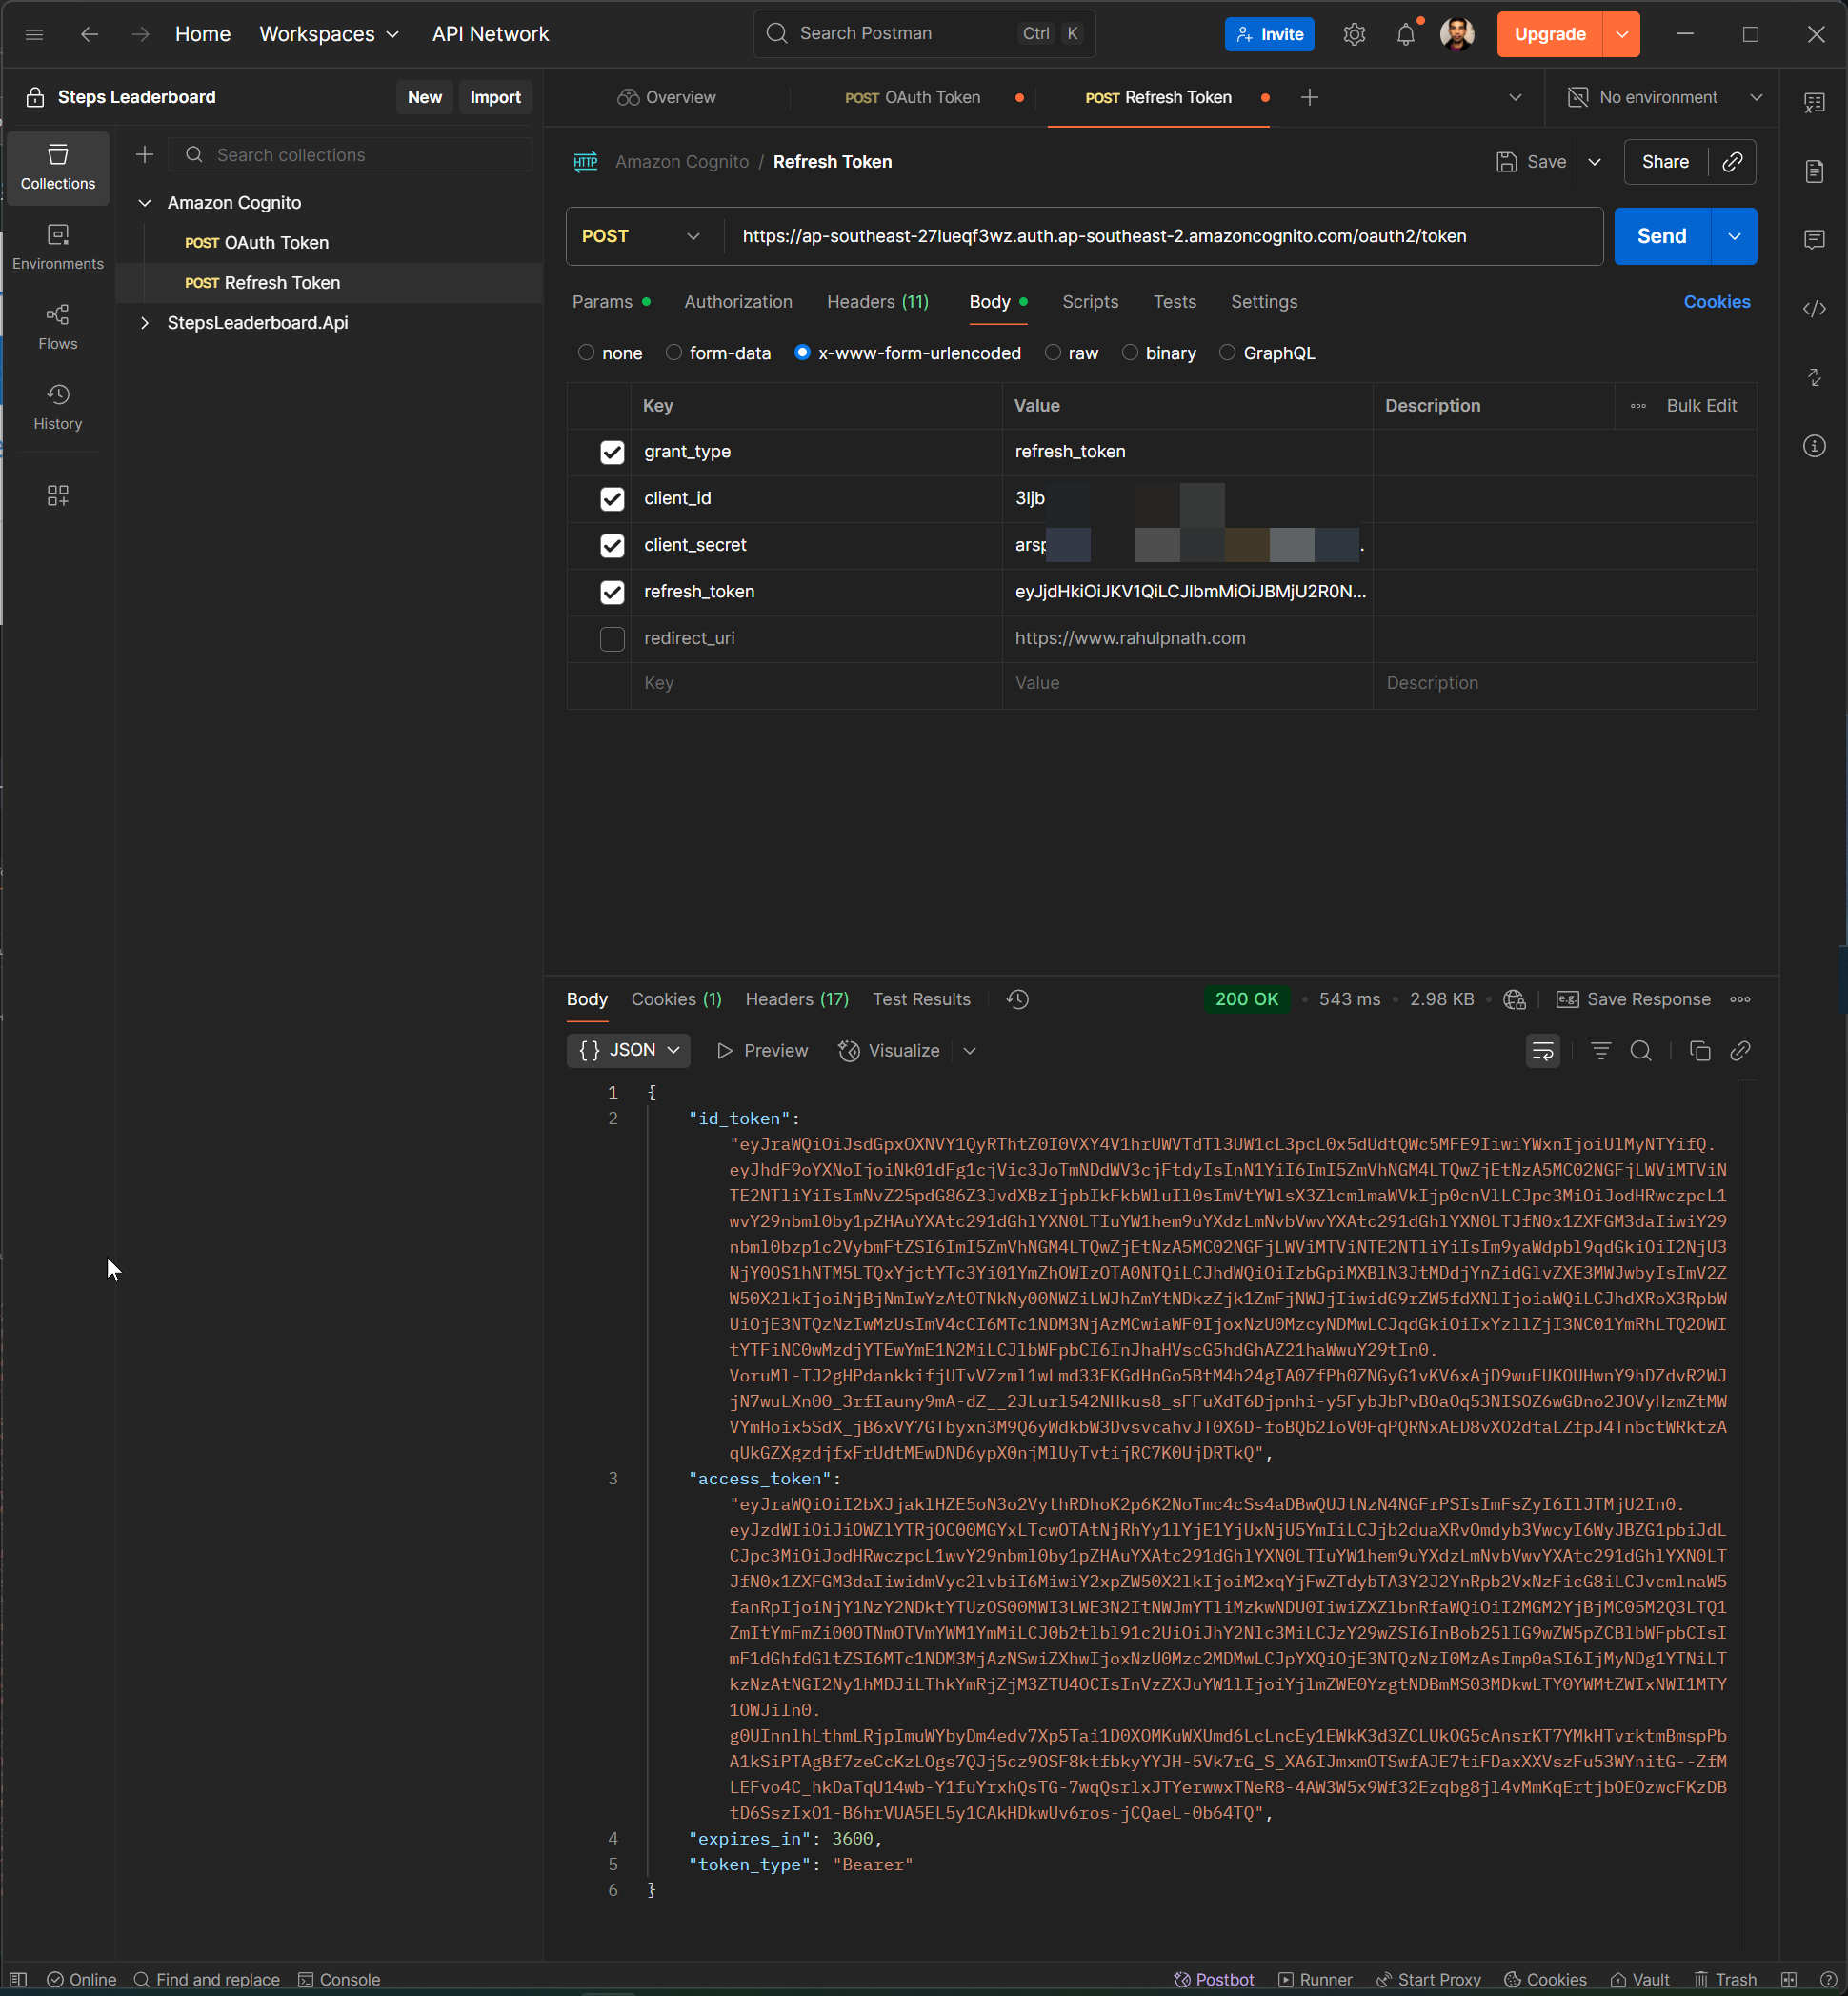
The accessToken is what is used to authenticate all further requests against your application.
We will explore how to setup an ASP NET Web API application to use this and verify requests made against it in a future post.