AWS Step Functions: Getting Started with Workflows and States
Learn how to get started with AWS Step Functions to build serverless workflows. We'll explore the basic concepts, flow states, and how to pass data between steps using variables and JSONata expressions.
AWS Step Functions is a serverless orchestration service that lets you build and visualize workflows using states.
Whether you're orchestrating microservices, automating processes, or building data pipelines, Step Functions provides a visual way to coordinate distributed applications.
In this post, let's explore the basic concepts — what workflows and states are, how flow states control execution, and how to pass data between steps.
Thanks to AWS for sponsoring this article in my Step Functions Series.
What Are Step Functions?
With AWS Step Functions, you can create workflows called state machines. You can use these to Build applications, Automate processes, Orchestrate microservices, Create data and machine learning pipelines etc
Let's understand some key terminology:
- State Machine: The workflow itself
- State: Each step in the workflow
- Execution: An instance of a running workflow that performs tasks
When you run a specific workflow, it's referred to as an execution.
Standard vs Express Workflows
Step Functions offers two workflow types with different execution guarantees and duration limits:
Standard Workflows:
- Each step is executed exactly once
- Can run for up to one year
- Best for long-running, auditable workflows
Express Workflows:
- Each step has at-least once execution guarantee (can run more than once)
- Limited to 5 minutes maximum duration
- Better suited for high-volume, short-duration workloads
You can find the detailed differences between these two in the AWS documentation.
Understanding AWS Step Function Workflow States
Each step in a workflow is called a state. There are two main types of states:
- Flow States: Control the flow of execution between steps (Pass, Choice, Parallel, etc.)
- Task States: Represent units of work performed by other AWS services (Lambda, DynamoDB, API Gateway, etc.)
In this post, we'll focus on flow states to understand the basic concepts.
Building Your First Workflow
Let's head over to the AWS Console and create our first Step Function.
Navigate to Step Functions and click Get Started. You'll see three options to create a state machine. For this tutorial, choose Create your own and start from a blank template.
Give your state machine a name like my-hello-world-state-machine, choose Standard, and click Continue.
This opens the visual AWS Step Function builder where you can drag and drop different states or code using the Amazon States Language template.
Building Your First AWS Step Functions Workflow
Let's build a workflow that demonstrates key Step Functions concepts: Pass states, JSONata expressions, variables, and conditional logic.
Start by dragging a Pass state onto the canvas. Pass states don't perform work but can transform data, making them perfect for learning data flow concepts.
JSONata Expressions
To work with dynamic data, Step Functions uses JSONata — a query and transformation language for JSON.
- Use
{% ... %}syntax to evaluate expressions - Access input data with
$states.input.propertyName - Use
&operator to concatenate strings - Example:
{% 'Hello ' & $states.input.name %}outputs "Hello Rahul" when input is{"name": "Rahul"}
Understanding Variables vs States Input
Variables persist data across multiple workflow steps. Unlike $states.input (only available to the first step), variables remain accessible throughout execution.
In your Pass state, define variables:
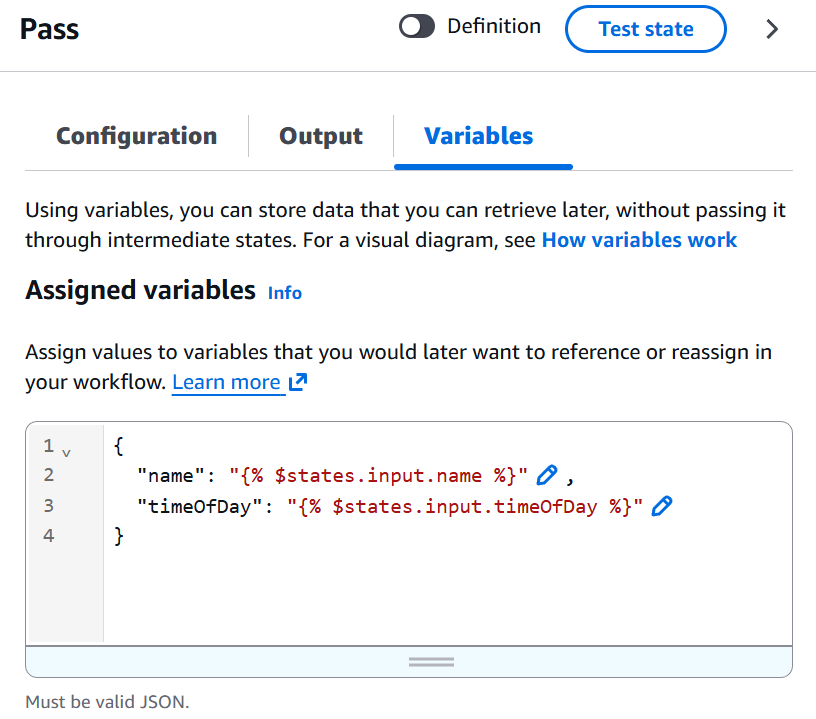
These create $name and $timeOfDay variables usable in all subsequent steps.
An important concept to understand is the difference between $states.input and variables:
$states.input: Only available to the first step that receives the workflow input- Variables: Available across all subsequent steps once defined
This is why we set variables in the first Pass state — it allows us to access those values throughout the entire workflow.
If you click on each step during execution, you can see:
- The input and output for that step
- The variables tab showing all available variables (used and unused)
Choice States
Add a Choice state to create conditional branches (like if-else logic):
- Rule:
{% $timeOfDay = "morning" %}routes to morning greeting - Default: Fallback for all other values
For each branch, add a Pass state setting a different greeting variable:
- Morning path:
greeting: "Good Morning" - Default path:
greeting: "Have a Good Day"
Merge both paths into a final Pass state that outputs:
{% 'Hello ' & $name & ' ' & $greeting %}

To test the workflow, click Execute and pass a JSON input. For example:
{"name": "Rahul","timeOfDay": "morning"}
Based on different input values for timeOfDay, you'll see the workflow take different paths — the morning path when timeOfDay is "morning", or the default path for any other value.
Viewing the State Machine Definition
Step Functions uses Amazon States Language (ASL) to define workflows. You can view the JSON definition by switching to the Code view.
Each state you drag and drop in the visual builder generates the corresponding JSON definition. You can also define state machines purely in code if you prefer.
Here's an example of what the definition looks like:
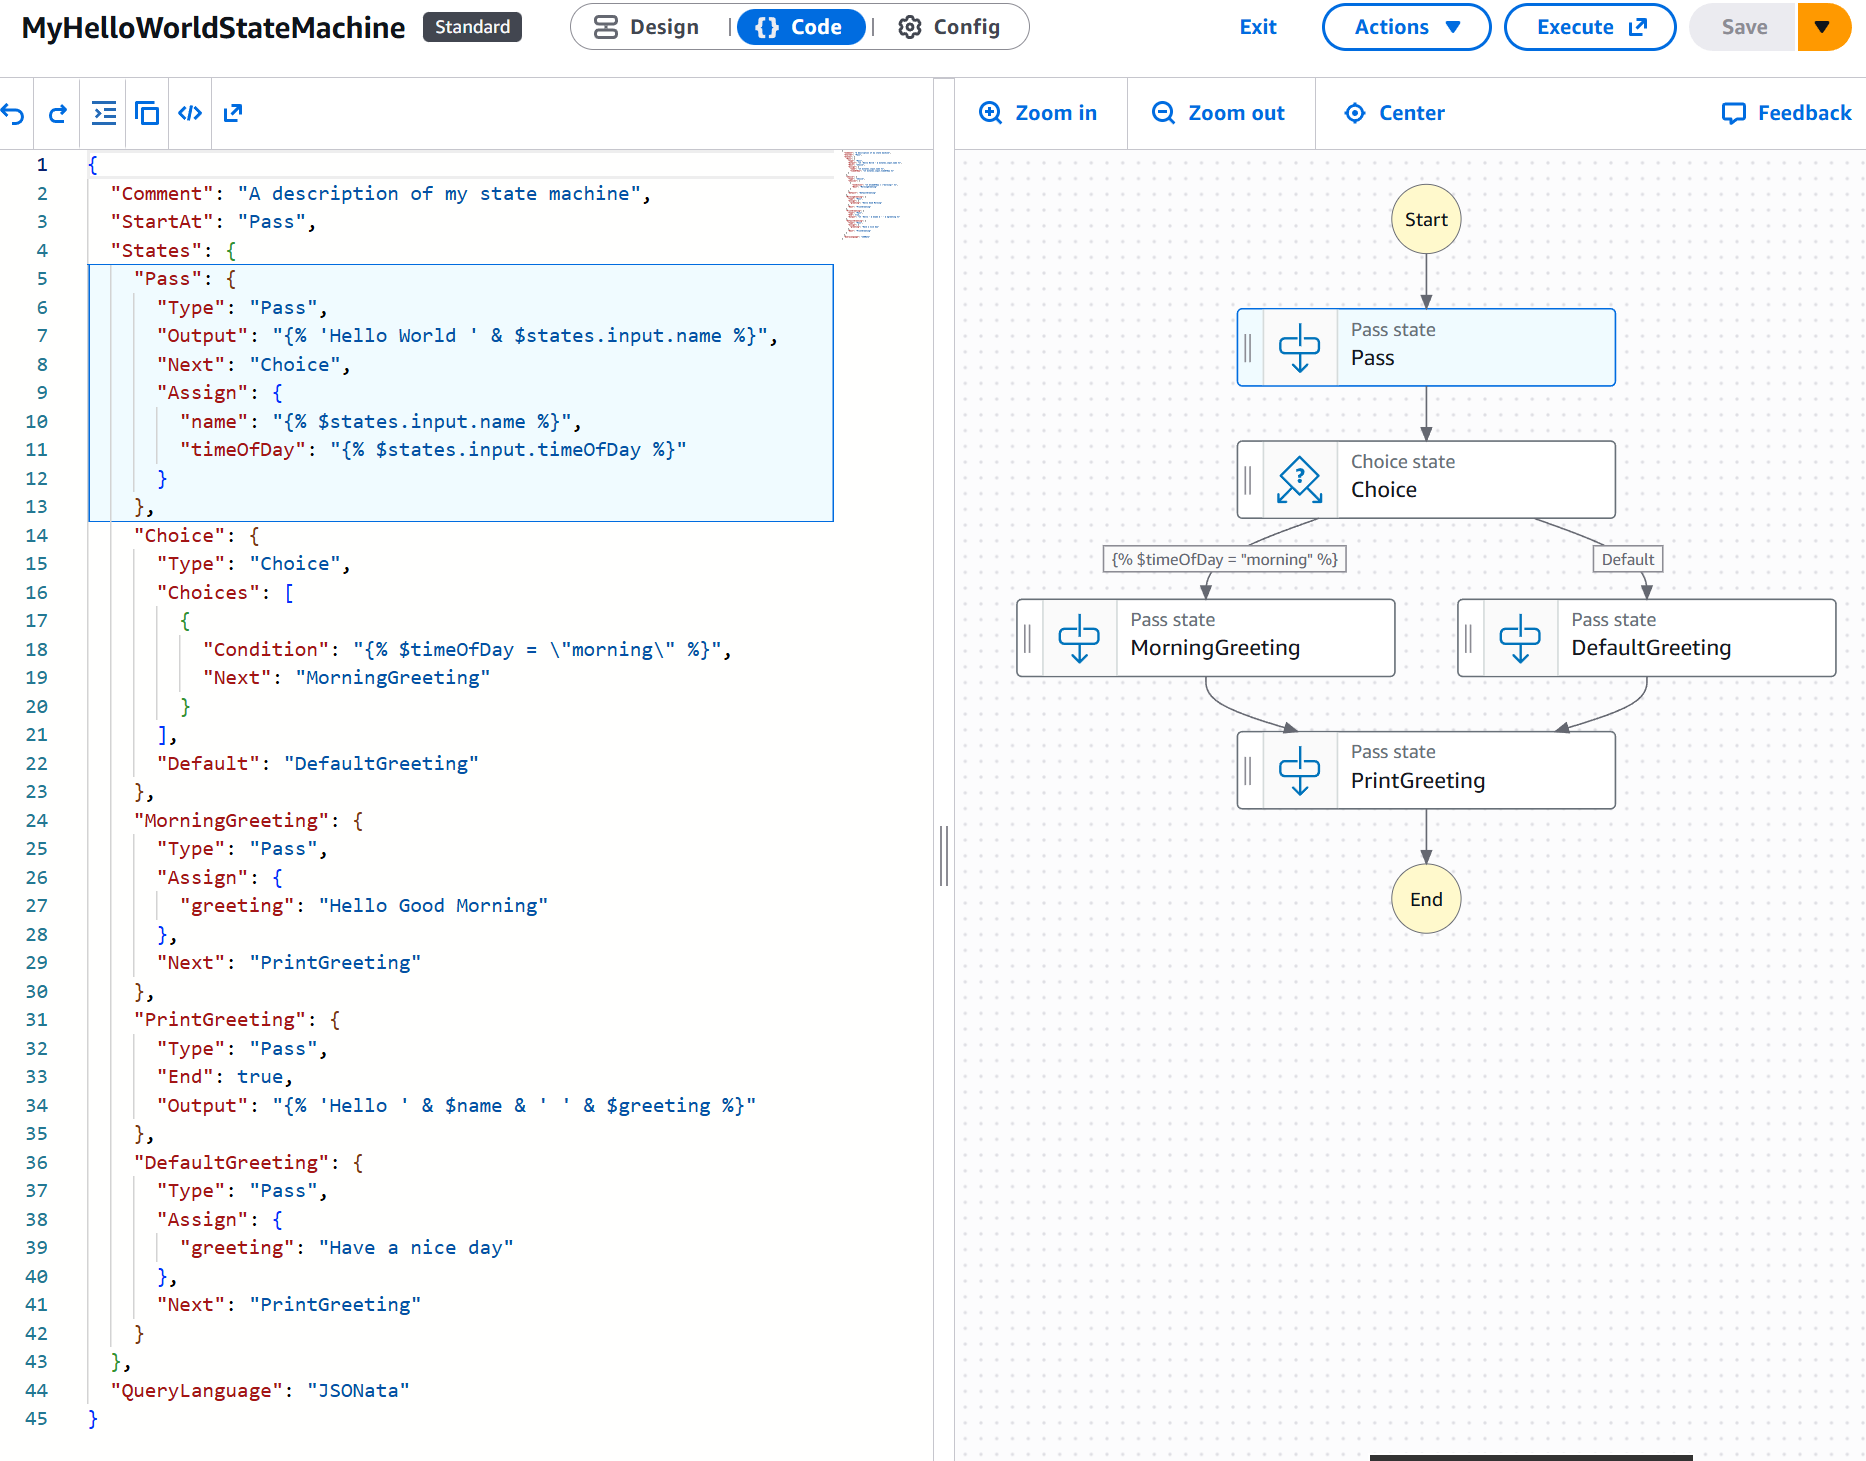
This definition can be stored in source control and used to deploy state machines using Infrastructure as Code tools or GitHub Actions.