Role-Based and Policy-Based Authorization in ASP NET | Amazon Cognito
Learn how to enforce access control using Amazon Cognito User Groups with ASP.NET API applications. We'll explore both role-based and policy-based authorization to protect your endpoints.
When building APIs, controlling who can access specific endpoints is crucial.
Amazon Cognito User Groups provide a clean way to manage permissions for your application users.
In this post, let's explore how to use Cognito User Groups to implement role-based and policy-based authorization in ASP.NET API applications.
Thanks to AWS for sponsoring this article in my Amazon Cognito Series.
Amazon Cognito User Groups
You can assign users in your Amazon Cognito user pool to groups.
Groups are logical collections of users that enable you to more easily manage the user pool and control access to your application resources.
Groups are useful for creating collections of users based on their role or permissions, such as: Readers, Contributors, Editors, Admins etc
A key feature is that individual users can belong to multiple groups, giving you flexibility in how you structure permissions.
Let's see how this works in practice.
Setting Up User Groups
Navigate to your Amazon Cognito user pool in the AWS Console. If you're new to Amazon Cognito, I recommend checking out the previous videos in this series where we covered the initial setup.
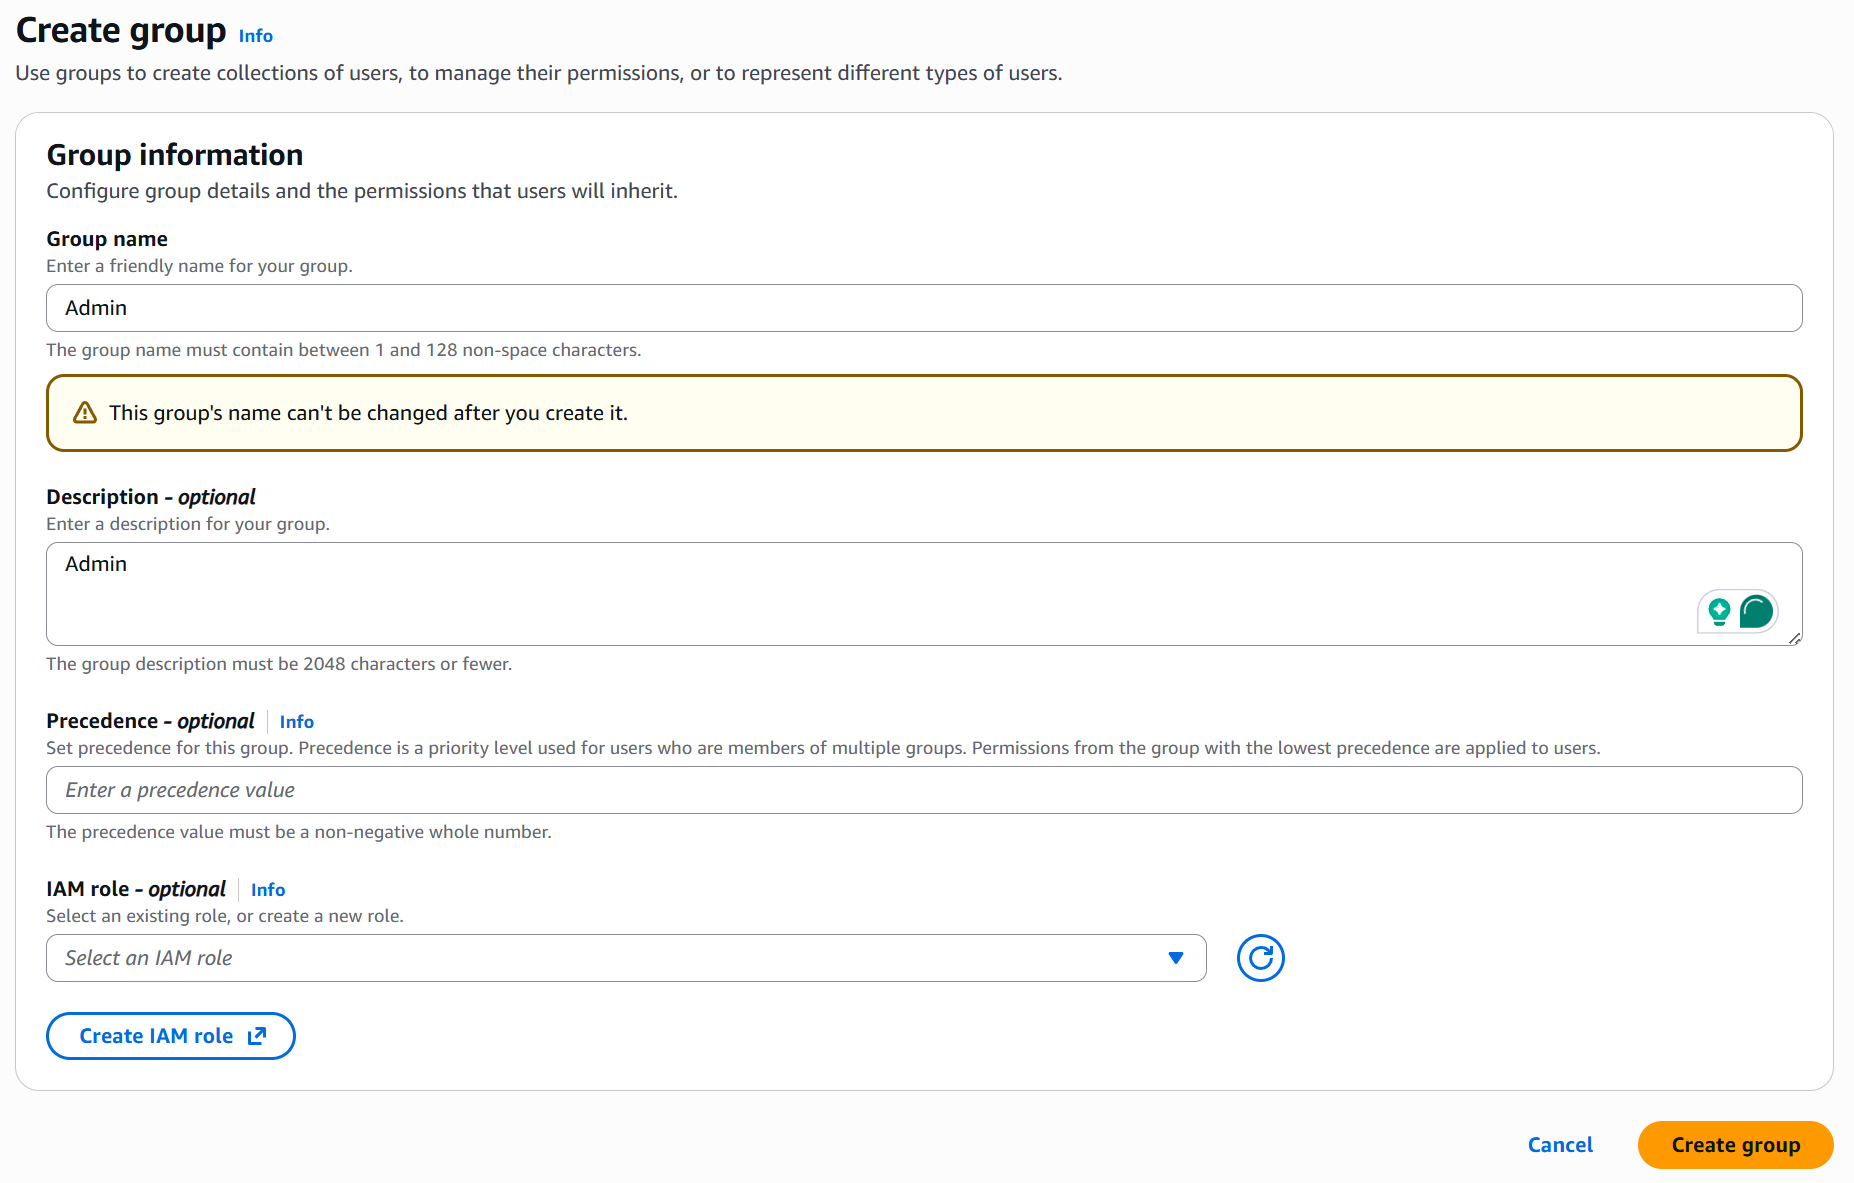
In the user pool, navigate to the Groups section and create a new group:
Click Create group, Enter a group name (e.g., "Admin"). Add a description and Click Create

Once created, you can add users to this group. Select the group and Click Add user. Select the user to add and confirm.

Now you have users organized into groups.
Let's see how this information appears in the authentication tokens.
Understanding Group Claims in JWT Tokens
When a user who belongs to a group authenticates, Cognito includes group membership information in the access token.
Let's log in with a user who is part of the Admin group and inspect the token.
After logging in and exchanging the authorization code for tokens, copy the access token and paste it into jwt.io to inspect the payload.
You'll notice a new property: cognito:groups with a value of ["Admin"].
We can use this information to restrict access to API endpoints.
Setting Up Authorization the ASP NET API
Let's start with a basic ASP.NET API that already has authentication configured with Cognito (covered in the previous blog post in this series).
The existing setup includes:
- Authentication and authorization middleware configured
- JWT Bearer authentication pointing to Cognito
- Basic endpoint with
RequireAuthorization
Implementing Role-Based Auth to ASP NET Endpoint
Let's add a new POST endpoint to our Weather Forecast API.
app.MapPost("/weatherforecast", (WeatherForecast forecast) =>{Console.WriteLine($"Received weather forecast: {forecast.Summary}");return Results.Ok();}).WithName("PostWeatherForecast").RequireAuthorization();
This endpoint currently requires authentication but doesn't enforce any specific role or group membership.
ASP.NET Core provides built-in support for role-based authorization. You can restrict access to users in specific roles using the Authorize attribute with the Roles parameter.
In Minimal APIs, you apply this using the Authorize attribute on the endpoint handler as shown below.
app.MapPost("/weatherforecast", [Authorize(Roles = "Admin")] (WeatherForecast forecast) =>{Console.WriteLine($"Received weather forecast: {forecast.Summary}");return Results.Ok();}).WithName("PostWeatherForecast").RequireAuthorization();
However, there's one more step. We need to tell ASP.NET where to find the role information in the JWT token.
By default, ASP.NET looks for a claim named role, but Cognito uses cognito:groups. We configure this mapping in appsettings.json:
{"JwtBearer": {"Authority": "https://cognito-idp.ap-southeast-2.amazonaws.com/ap-southeast-2_YOUR_POOL_ID","TokenValidationParameters": {"ValidateAudience": false,"RoleClaimType": "cognito:groups"}}}
The RoleClaimType property tells the authentication middleware to use the cognito:groups claim when checking for roles.
When testing this endpoint, only users who are members of the Admin group will be able to successfully make POST requests to /weatherforecast. Users not in the Admin group will receive a 403 Forbidden response.
Implementing Policy-Based Auth to ASP NET Endpoint
ASP.NET Core also provides a more flexible approach called policy-based authorization.
While role-based authorization works well for simple scenarios, policies give you more control and can include complex logic.
Under the hood, role-based authorization actually uses policies - it's just abstracted away for convenience.
Let's implement policy-based authorization for our endpoint.
Defining an Authorization Policy
First, update the endpoint to use a policy instead of a role:
app.MapPost("/weatherforecast", [Authorize(Policy = "AdminOnly")] (WeatherForecast forecast) =>{Console.WriteLine($"Received weather forecast: {forecast.Summary}");return Results.Ok();}).WithName("PostWeatherForecast").RequireAuthorization();
Next, configure the policy in Program.cs when setting up authorization:
builder.Services.AddAuthorization(options =>{options.AddPolicy("AdminOnly", policy =>{policy.RequireAuthenticatedUser();policy.RequireClaim("cognito:groups", "Admin");});});
This policy requires:
- The user must be authenticated
- The user must have a claim named
cognito:groupswith a value ofAdmin
Both approaches achieve the same result for this simple scenario, but policies become more valuable when you need complex authorization rules.